This article was co-authored by wikiHow staff writer, Aly Rusciano. Aly Rusciano is a Creative Writer based outside of Nashville, Tennessee. She has over ten years of experience in creative, academic, and professional writing. Aly’s writing has been nationally recognized in the Sigma Tau Delta Rectangle and featured in Blue Marble Review, The Sunshine Review, PopMatters, and Cathartic Literary Magazine. She graduated from The University of Tennessee at Martin with a BA in English, focusing in Creative Writing and minoring in Theatre.
There are 12 references cited in this article, which can be found at the bottom of the page.
This article has been viewed 566,715 times.
Learn more...
Do you have boogie fever? We’ve heard it’s going around, and the only cure is a DIY disco ball! Thankfully, this cure is relatively easy to make and only requires a Styrofoam ball, paint, old CDs, and hot glue. So, what are you waiting for? It’s time to create a funky, groovy, and totally radical disco ball.
Things You Should Know
- Poke a hole through the middle of a Styrofoam ball and paint it silver to use as the base of your disco ball.
- Cut recycled CDs into strips and tiny 1⁄2 in (1.3 cm) pieces to act as the disco ball’s mirrors.
- Glue your CD pieces around the Styrofoam ball in even rows with hot glue.
- Use a piece of fishing line or clear string to hang your DIY disco ball to the ceiling so you can dance the night away.
Steps
The Base
-
1Poke a hole through the center of a Styrofoam ball. Use a skewer, knitting needle, or screwdriver to pierce a hole through the ball's middle. Pull your long tool out of the ball gently, so you’re left with a long hole through the center of the Styrofoam.[1]
- The size of the Styrofoam ball doesn’t matter—pick whatever size you’d like! Just keep in mind that the smaller the ball, the smaller your CD tile pieces will have to be.
-
2Slide a folded piece of wire through the hole you created.[2] Cut a piece of craft wire that’s twice as long as your Styrofoam ball using wire cutters or scissors. Fold the wire in half and thread it through the ball’s hole. Leave about 1 inch (2.5 cm) of looped wire outside the ball.
- The looped wire sticking out will help you hang your DIY disco ball later.
- The thinner gauge wire you use, the easier it’ll be to slide through.
Advertisement -
3Twist the looped wire into place with a pencil to make a hook. Widen the looped wire with your fingers, and slide a pencil through it. Spin the pencil around to wrap and secure the loop and wire in place. Remove the pencil after twisting it at least 3 times.
- If you don’t have a pencil on hand, try using a pen or the long tool you used to poke a hole in the Styrofoam ball (skewer, long knitting needle, or screwdriver).
-
4Fold over the excess wire on the end without the hook. Gently tug on the opposite end of the wire (the one without a loop) until the loop is flush against the top of the Styrofoam ball. Push one end of the wire to the left and the other to the right. This will keep your disco ball from sliding off its loop.
- Add a dab of hot glue or super glue to the wire ends for a stronger hold.
-
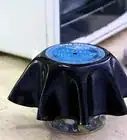
5Paint the Styrofoam ball silver to make it look more realistic. Use Styrofoam-friendly spray paint or acrylic paint. This step isn’t necessary, but can help conceal the Styrofoam if there are any gaps between your tiles.[3]
- For an extra layer of sparkle, use a glitter silver or metallic paint.
- The acetone in spraypaint can melt Styrofoam, so look for paints that are mostly water- or alcohol-based, like Liquitex Spray Paint and MTA Water Based.[4]


CD Tiles
-
1Boil a pot of water to dip your CDs in. CDs can be hard to break and cut on their own, but a little heat can make them more malleable. Fill a pot with water and set it on the stove at high heat. Wait for the water to start bubbling.[5]
-
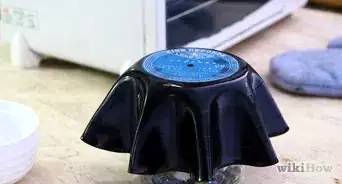
2Use a pair of tongs to dip the CDs into the boiling water. Remove the pot from the heat. Press the CD between the tongs and submerge it in the water for a few seconds. Don’t let it touch the bottom of the pot. Pull the CD out when you notice the edges curling in.[6]
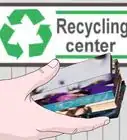
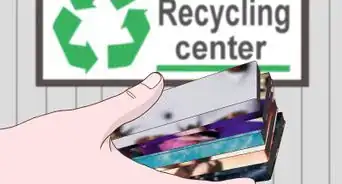
- Recycle old, scratched, or broken CDs for this DIY project.[7]
- Use all silver CDs for a realistic disco ball or opt for an array of colors for a groovier vibe.
- Work with one CD at a time.
- The CD will become hard again once it cools, so boil each CD one at a time, so you have time to cut them while they’re warm.
-
3Cut the warm CDs into 1⁄2 in (1.3 cm) wide strips. Use heavy duty craft scissors, kitchen shears, or metal cutters for the best results. Start at one edge of the CD and cut vertically towards the center.[8]
- Use your hands to wiggle stubborn pieces away from the disc.
- Avoid using CDs that peel when you cut them, as they won’t give the same mosaic, disco ball effect.
- Put on a pair of gloves if the CDs are too warm in your hands.
-
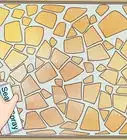
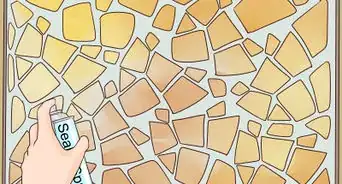
4Trim the CD strips into 1⁄2 in (1.3 cm) squares. Use scissors, shears, or metal cutters to chop the strips into smaller squares. Work on each piece one at a time. These will be the “mirrors” of your disco ball.[9]
- Consider omitting the curved edges of the CD strips if you want each mirror piece to be uniform.
- For a more decorative mosaic look, cut the disc into different-sized squares or triangles.


Assembly
-
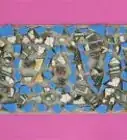
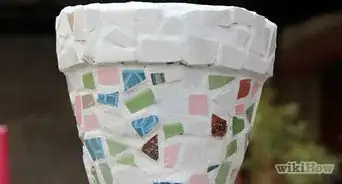
1Hot glue the first few tiles around the center of the Styrofoam ball. Place the ball in a cup or bowl to keep it from rolling around while you work. Dab a dot of hot glue onto the back of a CD tile piece, and quickly press it against the Styrofoam. Start in the center and work your way around the ball.[10]
- Line the tiles up so that their edges touch and they’re flush with each other for a classic, uniform look.
- Keep a small space between each tile for a mosaic-style disco ball.[11]
- Cover the folded wire with tiles the best you can.
-
2Continue gluing the CD tiles to the ball in even rows. Work your way around the Styrofoam ball, placing each tile one at a time. Flip your ball around in the bowl as you go. If your 1⁄2 in (1.3 cm) tiles don’t fit towards the top or bottom, trim them down to size.[12]
-
3Dry and clean up your disco ball. Hot glue tends to leave little strings of hot glue behind. To remove these, take a blow dryer and dry the disco ball with low heat to make sure all the glue is set. Then, use your fingers and/or scissors to remove any stubborn threads.[13]
-
4Hang your disco ball up with fishing line. Thread a piece of clear string or fishing line through your disco ball’s loop. Secure it with an overhand knot (think of it like tying a shoe). Then, tie the other ends to a ceiling hook.[14]
- Play around with the height of your disco ball by using more line to make it lower and less line to make it higher.
-
5Shine a light on your disco ball and dance. Now all that’s left to do is boogie! Aim a flashlight or spotlight on your DIY disco ball and watch as the room sparkles. Turn on some funky beats and show the world how groovy you are!


Community Q&A
-
QuestionWould super glue work?
 wikiHow Staff EditorThis answer was written by one of our trained team of researchers who validated it for accuracy and comprehensiveness.
Staff AnswerwikiHow Staff EditorStaff AnswerSuper glue would totally work! Simply apply a small amount to the back of a CD tile and stick it to the Styrofoam ball. -
QuestionHow do I make it look real?
 Community AnswerCut as evenly as you can, but do not cut yourself! It doesn't have to look like a hunky, expensive one from the '70s -- it's just for fun. No one will judge you.
 -
QuestionCan I use a glue stick for this project?
 Community AnswerA glue stick would not have enough stickiness to hold the CD pieces on the ball, so it is better to use a liquid glue or permanent glue.
Warnings
- CD shards and pieces can be sharp, so use caution when cutting or ask a grown-up for help.⧼thumbs_response⧽
- Be careful when handling hot glue, as the glue can burn and blister skin when it’s hot.⧼thumbs_response⧽
Things You'll Need
- Styrofoam ball
- Skewer, long knitting needle, or screwdriver
- Craft wire
- Silver acrylic paint or spray paint (optional)
- CDs
- Kitchen pot
- Tongs
- Kitchen shears, craft scissors, or metal cutters
- Hot glue gun and sticks
- Fishing line or clear string


References
- ↑ https://youtu.be/f7Hkl4uks74?t=158
- ↑ https://youtu.be/f7Hkl4uks74?t=163
- ↑ http://www.skiptomylou.org/diy-disco-ball-by-girl-with-a-glue-gun/
- ↑ https://youtu.be/zdqCDGOKnJo?t=72
- ↑ https://youtu.be/f7Hkl4uks74?t=112
- ↑ https://youtu.be/f7Hkl4uks74?t=121
- ↑ http://www.skiptomylou.org/diy-disco-ball-by-girl-with-a-glue-gun/
- ↑ https://youtu.be/m7ryaniq7Dg?t=5
- ↑ https://youtu.be/m7ryaniq7Dg?t=10
About This Article