X
wikiHow is a “wiki,” similar to Wikipedia, which means that many of our articles are co-written by multiple authors. To create this article, 11 people, some anonymous, worked to edit and improve it over time.
This article has been viewed 32,841 times.
Learn more...
If you have a damsel in distress, a dragon in need of slaying, or a costume party you're planning on attending, why not show up as someone's knight in shining armor? Costume shops can be expensive, and you never know if the costume will be the right fit or if it will make it through the night. Making your own costume is not only economical, it allows you a chance to showcase your creativity.
Steps
Method 1
Method 1 of 2:
Making a Foil Knight Costume
-
1Gather materials. The classic Foil Knight costume utilizes around-the-house supplies for its construction, so even if this is a last minute, thrown together costume, you're likely to have the right supplies on hand. Try to accumulate your supplies completely, thinking about what you might like to add, so that you do not have to waste costume making time hunting down a pair of scissors!
- Aluminum foil
- Black elastic or ribbon
- Cardboard
- Construction paper
- Gray pants and sweatshirt
- Markers
- Paint
- Phillips screwdriver
- Scissors
- Silver card stock
- Tape/stapler[1]
-
2Make your crown or helmet. Some fantastical depictions, like the movie Lord of the Rings, show some noble characters, like elves, going into battle with a circlet in place of the traditional medieval battle helm. To give yourself an air of nobility, a circlet might be the way to go, but if you want to come across as a no-nonsense knight, you might prefer a battle helm.
-
Circlet: take your card stock and draw a crown. You can do this in a traditional style, with the crown coming to elaborate points over the head, but in principle, cut a strip of construction paper wide enough to fit around your head in the shape of a crown. This will form the headband. Wrap the strip of paper around your head to find the appropriate length for your head. Cut and fasten the two ends of your paper together with tape or a stapler.
- If you have no card stock and no time to get any, a shirt box will work in a pinch.
- Battle Helmet: use a plate or circular object to help draw a circle on your silver card stock that is bigger than your head for the top piece of your helmet. Add a point to your circle that comes out to one side, making a teardrop shape. This point will be the front of your helmet. Now outline your teardrop shape so there is about an inch in between the two lines. Cut along your outer line, clipping slits in your inch margin between first and second lines. Fold your inch margin down to form tabs to connect the top and bottom pieces. Make the bottom piece by cutting a 10 to 20 inch piece of silver card stock, folding it in half longways, and then cutting a triangle that has its right angle opposite the crease. This will be where the top of your helmet inserts. Along the fold, cut a slit or slits for eye holes, and then fit your tabs into the opening of your bottom piece, stapling, taping, or gluing the two pieces together.[2]
Advertisement -
Circlet: take your card stock and draw a crown. You can do this in a traditional style, with the crown coming to elaborate points over the head, but in principle, cut a strip of construction paper wide enough to fit around your head in the shape of a crown. This will form the headband. Wrap the strip of paper around your head to find the appropriate length for your head. Cut and fasten the two ends of your paper together with tape or a stapler.
-
3Trace your sword on cardboard. Don't go over the top with elaborate designs or minute detail; your sword will be covered with aluminum foil before too long, to give it a metallic effect. Cut a simple, cross-shaped sword to your desired size.
- Small details might not show up under the tin foil, but curving your sword will give it the look of a scimitar. You can cut almost any simple medieval weapon (ax, trident, spear) from cardboard.
- You can achieve the same metallic effect with some paints. Use metallic paint to give your sword a unique design.
-
4Smith your gleaming crown and sword. Card stock and cardboard might not seem so impressive, but you can easily give each a metallic gleam, as though made by a medieval metal smith, by covering both crown and sword in aluminum foil.
-
5Prepare your shield. Draw the shape of your shield (likely diamond) onto cardboard to cut out. Measure and mark the holes for shield-strap, which occupy the center of the shield.[3] Cut your shield from the excess cardboard, and then use your Phillips screwdriver, punch holes for your shield-strap.
-
6Thread the strap and decorate. Taking your elastic or a piece of hardy ribbon through the two holes in the center of your shield, tie knots to keep your handle in place. From here, you can cover your shield with foil, paint it with designs, or add a coat of arms.
- Popular shield designs you might want to consider: the fleur de lis, a roaring lion, a griffin, a castle turret.
-
7Suit up. Put on your gray clothing and have a friend or your squire help you into your newly made knightly gear. A larger sweatshirt will give you the appearance of a medieval tunic.
- Black undergarments can also be worn for more ominous effect.


Advertisement
Method 2
Method 2 of 2:
Making a Knight of the Colander Costume
-
1Gather supplies. The Colander Knight costume, though still finding most of its components in the home, requires a few craft supplies to give it that finished look. Make sure you have a hot glue gun, glue sticks, measuring tape, and scissors in addition to:
- 1 yard elastic
- 1/2 yard patterned fabric
- 12-inch pieces red and black felt
- 2 yards silver ribbon
- 4 white or metallic scouring pads
- Black boots
- Black gloves
- Black hoodie
- Cardboard wrapping-paper roll
- Disposable pie tin
- Gray long johns
- Gray nonskid drawer liner or rug pad
- Large red and black feathers
- Small metal colander
- Small roll canvas-backed foil insulation (available at hardware stores)[4]
-
2Make the tunic. You'll need to take your measuring tape to find the distance from your shoulders to mid-thigh. You should also take your chest measurement. Cut a neck hole by folding your insulation in half and cutting a slit, then cut your insulation so that it falls to mid-thigh, stopping at the outside of your shoulders.
- Dress up the edges of your tunic with silver ribbon, or take drawer liner to give your tunic the appearance of being chain mail.
-
3Make your shield. What kind of coat of arms will grace the front of your shield? Cut a piece of felt as you desire, and glue these to the front of your pie tin shield. Now you can finish the shield by giving yourself a handle; glue a piece of elastic across the inside of the pie tin to do this.
-
4Assemble knee and elbow guards. Your scouring pads will be perfect imitations of the joint armor knights wore. Simply glue loops of elastic to each scouring pad. Now you can slip these on over your knees and elbows.
-
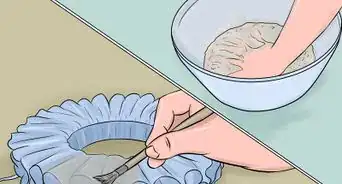
5Plume your helmet. Red and black feathers are striking, but any colors you choose will work for your plume. Glue these to one side of your metal colander, and your helmet is ready for action.
- If you have a sensitive scalp or the colander is uncomfortable, it may help to attach an elastic chinstrap or wearing a hat underneath the colander for padding.
-
6Throw together your gauntlets. The fabric of your black gloves don't exactly look knightly, so glue your drawer liner to each to give your gloves the appearance of gauntlets. The liner doesn't have to completely cover each glove; enough liner for effect is fine.
-
7Assemble your costume. Put on your gray and black boots, gloves, hoodie, and your knightly gear.


Advertisement
Warnings
- Always take off costume pieces before stapling, gluing, or taping. You could inadvertently do harm if you're not careful.⧼thumbs_response⧽
Advertisement
Things You'll Need
- Aluminum foil (Foil Knight)
- Black elastic or ribbon (Foil Knight)
- Cardboard (Foil Knight)
- Construction paper (Foil Knight)
- Markers (Foil Knight)
- Paint (Foil Knight)
- Phillips screwdriver (Foil Knight)
- Silver card stock (Foil Knight)
- Scissors (Foil Knight)
- Tape/stapler (Foil Knight)
- 1 yard elastic (Colander Knight)
- 1/2 yard patterned fabric (Colander Knight)
- 12-inch pieces red and black felt (Colander Knight)
- 2 yards silver ribbon (Colander Knight)
- 4 white or metallic scouring pads (Colander Knight)
- Black boots (Colander Knight)
- Black gloves (Colander Knight)
- Black hoodie (Colander Knight)
- Cardboard wrapping-paper roll (Colander Knight)
- Disposable pie tin (Colander Knight)
- Gray long johns (Colander Knight)
- Gray nonskid drawer liner or rug pad (Colander Knight)
- Large red and black feathers (Colander Knight)
- Small metal colander (Colander Knight)
- Small roll canvas-backed foil insulation (Colander Knight)


References
About This Article
Advertisement