X
wikiHow is a “wiki,” similar to Wikipedia, which means that many of our articles are co-written by multiple authors. To create this article, 71 people, some anonymous, worked to edit and improve it over time.
This article has been viewed 1,002,145 times.
Learn more...
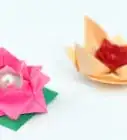
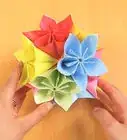
A pretty kusudama flower can be made by folding five or six square pieces of paper. If you make twelve flowers, they can be assembled into a beautiful kusudama ball. Even if you use colorful sticky notes, the result is very impressive and can be used for decorative purposes or even worn as a temporary brooch.
Steps
-
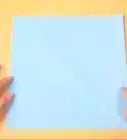
1Fold a square piece of paper in half diagonally. It should now look like a triangle.[1]
-
2Fold the triangle’s bottom two corners of up to its point. You should now have formed a square.[2]Advertisement
-
3Fold each previous fold backwards halfway. The back-folded back edges should line up with the edges of the “square” underneath.[3]
-
4Expand the triangles you folded in the previous step. Lift one side triangle, insert a finger to open the pocket inside, and re-flatten it along the crease so that it is expanded into a diamond. Repeat on the other side. If you're feeling confused, take a look at the image for further guidance.[4]
-
5Turn the paper over.
-
6Tuck in the triangular point sticking out on the left side. If you open the left area of the folded paper slightly, you’ll see that, underneath the top sheet of paper, there’s a fold that half-covers the diamond underneath. Simply fold the point of the diamond into the body of the shape below the piece of paper that is half-covering it.[5]
-
7Repeat with the triangular point on the right side.
-
8Turn the paper over again.
-
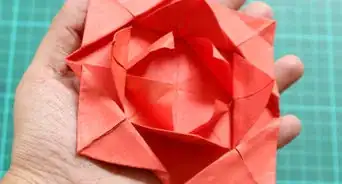
9Fold the left- and rightmost corners inward along the creases that already exist. The resulting outline should once again be a square.[6]
-
10Glue the top of the folded flaps where indicated by the image. Using a glue stick may be a good idea because it dries so quickly, but you can also use white liquid glue as shown here.[7]
-
11Bring the folded flaps together, fastening them in place. Squeeze the flaps together so that the glue takes, then pinch the creases together tightly so that the folds protruding into the cone stay somewhat centered. To hold the glued pieces together, secure them with a paperclip.[8]
-
12Make four more of these.[9]
-
13Apply glue to the central seam of each piece. This seam is where the folded edges meet (where they were glued together previously). Spread out the glue so that the centers of the pieces can stick together securely.
-
14Begin pressing the pieces together. The five cones will make the Kusudama flower’s five petals.
-
15Continue adding pieces until you’ve assembled the entire flower. Glue everything together in a circular formation.[10]
-
16Use paperclips to hold the petals together.
-
17Wait for the glue to dry completely before removing the paperclips. Otherwise, the petals risk slipping apart.
Advertisement
Community Q&A
-
QuestionWhat do I need the paper clips for when I am already using glue?
 Community AnswerIf you don't use the clips, the flower can fall off very easily while the glue is still drying. The paper clips act as supports. Once the glue dries, you can take the clips off.
 -
QuestionCan I use sticky notes to make a flower?
 Community AnswerYes, because to make the petals, you have to start off with squares - and sticky notes are squares.
 -
QuestionCan I use hot glue instead to make a kusudama flower?
 Community AnswerYes, it may even work better.
Advertisement
Warnings
- Sticky notes can be difficult to work with (because the folds will stick together).⧼thumbs_response⧽
- Use a cover over your workspace, as it can get messy.⧼thumbs_response⧽
- Watch out for paper cuts!⧼thumbs_response⧽
- Be careful when using an x-acto knife!⧼thumbs_response⧽
Advertisement
Things You'll Need
- 5 pieces of square paper (for example, Sticky Notes)
- Glue (white liquid or stick)
- Paperclips

References
- ↑ http://www.origami-instructions.com/origami-kusudama-flower.html
- ↑ https://www.youtube.com/watch?v=6elb2EO_ZO0
- ↑ https://www.origamiway.com/origami-kusudama-flower.shtml
- ↑ https://www.youtube.com/watch?v=NcVjCuJG26c
- ↑ https://www.youtube.com/watch?v=NcVjCuJG26c
- ↑ https://www.icreativeideas.com/how-to-make-beautiful-origami-kusudama-flowers/
- ↑ https://www.icreativeideas.com/how-to-make-beautiful-origami-kusudama-flowers/
- ↑ http://www.origami-instructions.com/origami-kusudama-flower.html
- ↑ https://www.icreativeideas.com/how-to-make-beautiful-origami-kusudama-flowers/
About This Article
Advertisement