wikiHow is a “wiki,” similar to Wikipedia, which means that many of our articles are co-written by multiple authors. To create this article, 173 people, some anonymous, worked to edit and improve it over time.
The wikiHow Video Team also followed the article's instructions and verified that they work.
This article has been viewed 1,547,524 times.
Learn more...
You don't have to go to a weapon store to have your very own "ninja star" or a "Shuriken". You can make one or several out of paper as a cheaper and safer alternative. It is also very fun to play with and a good project for you to do with your child. You can also show it off to your friends!
Steps
Making a Square of Paper
-
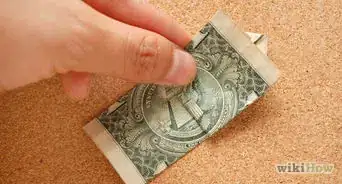
1Begin with a rectangular piece of paper. Ordinary loose paper or construction paper will do. We will make a square piece of paper from this. If you're already starting with a square piece of origami paper, skip the next two steps.
- Alternatively, you can find a range of origami paper on Amazon.
-
2Fold the diagonal of the square. Fold the top right hand corner diagonally down so the top of the paper lines up with the left side, forming a point at the top right corner.Advertisement
-
3Remove the extra piece. Cut or carefully tear along the edge so you are left with a square of paper.
-Step-1-Version-4.jpg)
Forming the Parts
-
1Fold the square in half. The fold should be parallel to the edges.
-
2Cut the square in half. Cut the square in half into 2 equal parts. Scissors may make this easier.
-
3Repeat. Fold each piece in half vertically again, parallel to the long sides.
-
4Fold the ends. Fold the end diagonally, so the edges line up.
-
5Repeat. Repeat this fold, on each end of each strip, making sure the folds are oriented as shown.
-
6Make the triangle fold. Fold the end on the diagonal again. You should end with a big triangle facing you and two smaller triangles facing away from you.
-
7Repeat. Repeat this same fold on each end of each strip. Make sure the orientations go opposite one another, as shown.
Putting Them Together
-
1Turn over only the piece on the left and arrange the two parts, as shown.
-
2Put the right piece on top of the left piece. There should be a square in the center of each piece that lines up, but if you can't find it yet, don't worry. Just line up the middles.
-
3Fold the uppermost point inwards on the diagonal and tuck the point into the pocket.
-
4Fold the bottom point upwards on the diagonal and tuck the point into the pocket.
-
5Flip the whole thing over.
-
6Fold the right point on the diagonal just as before and tuck it into the pocket.
-
7Fold the left and final point on the diagonal and tuck it into the last pocket. You may have to coax a little to get it tucked in.
-
8Put some tape in the middle of the tucked in middles (optional). This will keep the ninja star from becoming undone.
-
9Enjoy your ninja star.
-Step-19-Version-4.jpg)
Community Q&A
-
QuestionDo I really need to put tape on my origami star?
 Community AnswerNot necessarily. If you followed the steps correctly, you may not need tape, but for some people it can be helpful for keeping the origami star in the correct shape.
 -
QuestionCan I use any size of paper?
 Community AnswerYes, but it has to be a rectangle or square. You can turn the rectangle paper into a square and begin.
 -
QuestionCan I use post-it notes?Community AnswerYes, you can but it will be a smaller ninja star so make sure you use big post-it notes.
Warnings
- Be careful when throwing the stars. You could even injure yourself.⧼thumbs_response⧽
- Edges can be sharp, keep away from small children.⧼thumbs_response⧽
- Do not throw this at people or animals.⧼thumbs_response⧽
Things You'll Need
- One sheet of 8.5 x 11" paper (or A4 printing paper) or origami paper (optional but preferred)
- Scissors (optional)
References
About This Article
If you want to fold an origami star, start by folding and cutting in half a square of origami paper or a paper square you make yourself. Use the same steps to fold both halves of paper in half again, and then make triangular folds on both ends of both pieces of paper, which will become the star’s points. Next, put one piece on top of the other, and fold and tuck the pieces into one another to create your star. Finally, tape the center to be sure your star stays together. For more details on how to fold an origami star, including making your own origami squares, scroll down!
-2017.11.09-16.18.58.0.webp)