This article was co-authored by Nicole Bolin. Nicole Bolin is a Crafting Specialist and the CEO of Stencil, a DIY Craft Studio in Phoenix, Arizona. Nicole specializes in interior design and various craft and DIY projects. Nicole holds a Certificate in Interior Design from the New York Institute of Art and Design. She opened Stencil in 2017 to teach others to create DIY projects that fit their home and lifestyle.
wikiHow marks an article as reader-approved once it receives enough positive feedback. In this case, several readers have written to tell us that this article was helpful to them, earning it our reader-approved status.
This article has been viewed 977,130 times.
Exquisite little paper stars can be used for decorations, jewelry, craft projects, and gift-giving. They're very easy to make, and they're a fun way to recycle a bit of junk mail into something colorful and decorative. If you want to make your own lucky paper stars, see Step 1 to get started.
Steps
-
1Cut a long, narrow strip of paper about 1 centimeter (0.4 in) wide and as long as whatever page you are cutting.
- Instead of scissors, you can cut the paper with an Exacto knife.
-
2Tie a simple knot (of the same kind that you would use to tie your shoes) at one end. Then:
- Cross the ends of the strips and pull one end through the loop that forms. If you want the color from a particular end of the strip, tie the knot at the other end. Don't twist the paper, just loop it.
- Gently tighten the knot, then gently pull the knot without creasing or squeezing the strip of paper.
- When all the edges are in contact, press it down and crease. You should have a pentagon with a long end and a short end sticking out.
Advertisement -
3Fold the short end over, following the edges of the pentagon, so that it does not stick out. If there's a little more than a pentagon width, you can tear it off or fold it under and tuck it in.
-
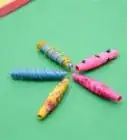
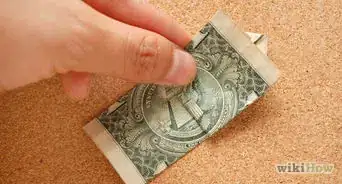
4Wrap the long end around and around the pentagon, following the edges and the folds. The result should be a fatter pentagon. Fold so that the color you want faces out, if the two sides of the strip are different.
-
5Tuck in the loose end. If there is a little too much, fold it over or tear it off before tucking it in.
-
6Pinch each corner or push in the edges to puff the star up.
-
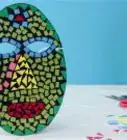
7Use the stars for display.
- Make a whole bunch of these and display them in a jar or clear glass.
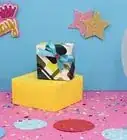
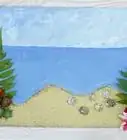
- Display them mixed with confetti or tinsel as part of the party decorations on a table.
- Work a needle and thread or string through opposite corners to string them together as a garland or necklace. You could combine them with paper beads or other elements on the same string.
- You can put them on a bulletin board but consider the thickness of the corkboard.
- See that the thumbtacks do not go into the wall through the board.


Community Q&A
-
QuestionWhat size does the paper need to be?
 Community AnswerNormally 1cm as width, and 28 cm as length. Printer paper would work for this.
 -
QuestionCan I make big lucky stars if I use a bigger paper?
 Amishu JhansalCommunity AnswerYes, just make sure that the ratio stays the same, if you increase width, you must increase length.
 -
QuestionCan I use scrapbook paper?
 HumanBeingTop AnswererYes, scrapbook paper would be good for this project. If it is on the thicker side, don't cut your strip too narrow or your completed star will be too small to puff out.
Warnings
- Take care not to nick yourself with a paper edge.⧼thumbs_response⧽
- Use scissors responsibly. Children should be supervised when cutting paper.⧼thumbs_response⧽
Things You'll Need
- Paper – magazine and catalog pages you were going to throw out are great, since they're fairly soft, thin paper and provide a wealth of bright colors. You're using narrow enough strips so that most designs will just show up as colors when you're done.
- Scissors and a ruler or a paper cutter
- A glass, box, or jar (optional) in which to display a collection
- Needle and thread or string (optional)
About This Article