X
wikiHow is a “wiki,” similar to Wikipedia, which means that many of our articles are co-written by multiple authors. To create this article, volunteer authors worked to edit and improve it over time.
This article has been viewed 55,663 times.
Learn more...
This project will cover how to upcycle your overgrown, long philodendron and pothos plants into a beautiful upright floor plant--and save money in the process by making your own "totem pole".
Steps
-
1Select a support pole. Go to a local nursery or lumber company and purchase a bamboo pole that's at least 3/4 inch in diameter. If you can't find bamboo, a treated 1 X 1" piece of wood, or if you don't like treated lumber, a 1 x 1 of rot resistant cedar could also be used. If you grow your own bamboo, it doesn't have to be perfectly straight to work well, but do select a piece you've previously cut and dried.
- Cut your pole to the desired length, about 4.5 feet long. Make a pencil or marker line about 8 inches from the bottom of your pole after cutting. That is to allow some room to press the finished product into the potted plant.
-
2Obtain some natural burlap. Go to a fabric store or crafting store and have them cut a piece of burlap for your project. For a 4.5 feet tall pole, you'll need about 1/2 yard. The burlap will work well for the project because the roots of the philodendron or pothos will grow into and be able to hold on to the loosely woven fabric, and it will look natural too.Advertisement
-
3Cut your burlap into a long strip about 8-12" wide. It's fine if its a little crooked on this step, as long as you cut fairly straight. Lay your pole on the straightest edge of the burlap, and place the pole on the burlap so that the burlap fabric extends 2-3 inches past the top of the pole. If your burlap is not long enough to extend all the marked length of the pole, then cut another piece that's also 8-12 inches wide and long enough to extend down to your 8" mark with a couple inches of overlap towards the center.
-
4Plug in your hot glue gun and let it warm up. Place the shortest piece of burlap about 8" from the bottom of the pole at your mark, and place your pole on the edge of the burlap. You will need to glue the edge of the burlap to the pole in several places about 6" apart.
- Be careful when gluing the pole to the burlap because the hot glue is HOT! You will need to use a pencil, skewer, or stick to press the burlap into the hot glue as shown, so that you don't burn your hands. Let cool a few minutes.
-
5Take the second piece of burlap, if necessary to cover a long pole, and lay your glued pole on top of the burlap. Arrange this piece of burlap so that it's extending about 2-3 inches past the top of the pole. It also must overlap the first piece you put on for good coverage towards the bottom. Then place your pole so that it's at the edge and glue it into place as you did with the first piece. At the top, just fold the burlap so that the pole is inside the fabric, and glue it down so that it's folded over extending past the end of the pole. Let this cool a few minutes to set up the glue.
-
6Wrap and fold the burlap around the pole. At the top end of your pole, you will have a flap of burlap that you previously folded onto itself and glued. Take that piece and fold it down towards the bottom of the pole, encasing the end of the pole. Tack that folded edge down to the pole with glue, pressing it down securely with a pencil or skewer so you don't burn yourself, and let it set up a few minutes.
-
7Roll your pole up in the burlap, fairly tightly, and roll until it's completely rolled up. You want it to be rolled up like toilet paper around a roll. It's desirable to have several laps of burlap rolled around your pole, not just one layer. When it's completely rolled up, secure the edge about every 6 inches with hot glue, again pressing down with a pencil or other instrument so that you don't burn yourself. Let this cool down for the glue to set up. Unplug your glue gun, you're finished with it now.
-
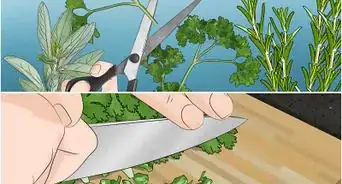
8Take your selected twine, line, or wire and tie it about 1 or 1.5 inches from the top end of the pole. Tie it into a secure knot. Then start wrapping the wire, twine, or fishing line around the pole in a spiraling downward direction. Spiral the tie material in the same direction the burlap is wrapped, and try to have your spirals about 1 to 1.5 inches apart, and spaced evenly down the length of the pole. Continue wrapping until you reach about an inch below the wrapped burlap and then securely tie it off using a knot. Cut your line or twine. You have completed your philodendron totem pole.
-
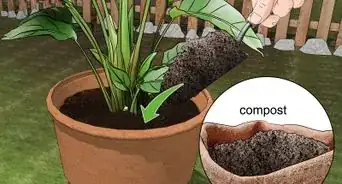
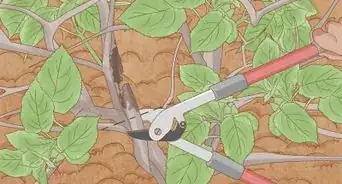
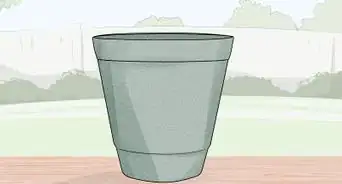
9Take your desired plant and pot it into a larger pot if needed. Water to settle the plant into the soil. Take your completed totem pole and press it gently into the center of the pot, trying to avoid stems and roots. Secure your plant, one vine at a time, to the pole, winding the plant gently around the pole. Cut a piece of jute twine about 6 inches long, and tie the vine to the pole loosely, about 2 or 3 inches from the end of the vine. Continue until your plant is wound around the pole as desired.


Advertisement
Warnings
- Do not burn yourself with the hot glue; it's very hot!⧼thumbs_response⧽
Advertisement
Things You'll Need
- A support pole (bamboo or lumber)
- A piece of natural burlap
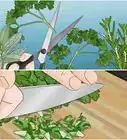
- Scissors
- Glue gun and glue
- Twine, fishing monofilament line, or craft wire
- Your plant and pot


-Oven-Step-15.webp)


About This Article
Advertisement