Explore this Article
IN THIS ARTICLE
Other Sections
X
wikiHow is a “wiki,” similar to Wikipedia, which means that many of our articles are co-written by multiple authors. To create this article, 19 people, some anonymous, worked to edit and improve it over time.
This article has been viewed 93,535 times.
Learn more...
Making a clay tiger is an easy and fun project! In this article, we'll walk you through the entire process for forming a standing tiger out of clay, including the clay colors you'll need and what details you can add to make your clay tiger really stand out. Read on for our complete guide!
Steps
1
Find a flat, clean workspace.

2
Start with a big piece of orange clay.

3
Roll a smaller piece of orange clay into a ball.
-
This will be the tiger's head. Stick the head at the end of the body with a toothpick. To stick the head on, break a toothpick in half, then poke one of the halves of the toothpick in the place you're going to put the head. Stick the head onto the toothpick.
- The toothpick will help the head stay and not fall off. Don't let any of the toothpick show up at the bottom, and make sure the toothpick doesn't stick out.

Advertisement
4
Roll 2 small yellow balls of clay.

5
Roll another small ball of yellow clay.

6
Roll 2 small orange pieces of clay into balls for the ears.

7
Flatten 2 smaller pieces of black clay.

8
Make eyes using 2 small balls of black clay.

9
Add a nose using pink or black clay.

10
Make front legs by rolling 2 cylinders of orange clay.

11
Make back legs by rolling 2 cylinders of orange clay.

12
Make a tail by rolling a thin cylinder of orange clay.

13
Make lots of strips of black clay.

Community Q&A
-
QuestionHow do I make a real looking tiger?
 Community AnswerTry adding some features like a more detailed face and more stripes. You could add whiskers by cutting small pieces of cord and sticking them into the clay before it dries.
 -
QuestionHow could I add a mane for a lion?Community AnswerAdd some extra clay around the neck and spread it out to look like a mane.
Advertisement
Warnings
- Do not cook clay that can't be cooked in the oven! It may cause a bad smell if it melts, or even a fire! Read the clay instructions before cooking first.⧼thumbs_response⧽
Advertisement
Things You'll Need
- Yellow, pink, orange, and black clay
- Toothpick
You Might Also Like
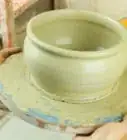
How to
Make a Clay Pot
How to
Create Clay Animals
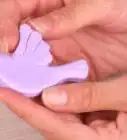
How to
Make a Clay Bird
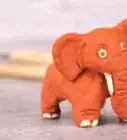
How to
Make a Clay Elephant
How to
Make a Clay Horse
How to
Make a Clay Dragon
Advertisement
About This Article
wikiHow is a “wiki,” similar to Wikipedia, which means that many of our articles are co-written by multiple authors. To create this article, 19 people, some anonymous, worked to edit and improve it over time. This article has been viewed 93,535 times.
163 votes - 83%
Co-authors: 19
Updated: June 15, 2022
Views: 93,535
Categories: Featured Articles | Clay Animal Projects
Advertisement