This article was co-authored by wikiHow Staff. Our trained team of editors and researchers validate articles for accuracy and comprehensiveness. wikiHow's Content Management Team carefully monitors the work from our editorial staff to ensure that each article is backed by trusted research and meets our high quality standards.
There are 16 references cited in this article, which can be found at the bottom of the page.
This article has been viewed 463,813 times.
Learn more...
Making clay animals is a great way to turn a dull afternoon into an exciting craft day. With a little effort and a lot of imagination, you can turn your clay dough into a jungle. Once you've mastered animal how-tos, you can create creatures of all colors, shapes, and sizes. All you need is some clay, some around-the-house tools, and a love of animals to create your own mini zoo.
Steps
Rolling Clay Snakes
-
1Roll a piece of clay between your fingers. Choose your favorite color or just a color you think would make a good snake. Put a piece of clay between your hands and roll it back and forth until you make a long, log shape. You can continue rolling until the snake is as thin or thick as you'd like.[1]
- Go as quickly or slowly as you like, depending on how closely you want to monitor your clay log's length.
- Be careful not to make your clay log too thin, as it will progressively get more delicate the thinner it gets.
-
2Flatten one end of the snake for a head. Poke two holes into the head with a toothpick for eyes, or add a pair of small googly eyes. You can also roll two tiny clay balls between your finger and your thumb and attach them for eyes, if you have neither a toothpick nor googly eyes available.[2]Advertisement
-
3Make a tiny clay tongue. For a tongue, grab a piece of red or pink clay and place it between your finger and thumb. Roll it into a log shape, much like how you rolled your snake but on a smaller scale. Split your log in two at one end to create a forked tongue, and attach it to the end of your snake's mouth.[3]
-
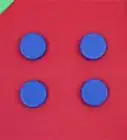
4Add patterns to its skin, like polka dots or stripes. For polka dots, flatten tiny clay balls with your finger and thumb and attach them to your snakes body. You can make stripes by rolling tiny clay logs and spacing them across the length of your snake.[4]

Making Clay Snails
-
1Choose two different colors of clay. Choose colors that stand out next to each other and do not clash. Red and pink, for example, might not be a great idea. Red and orange, though, can make a pleasant sunset-like effect.
- Complementary colors, or colors opposite from each other on the color wheel, look especially bright when next to each other.[5]
-
2Roll one color into a log. This will be your snail's shell. Continue rolling the clay until it is long and thin. Make the log as long as possible to make a shell with a detailed spiral. Stop rolling when the log is thin enough to fold in on itself but thick enough that it won't break apart.[6]
- You might have to try a few times before you find the right thickness for your shell.
-
3Fold the log in on itself. Once you've achieved a good length for your shell, fold the log into a spiral. Start at one end of the clay, which will become the middle of your spiral, and keep folding until your clay shape resembles a cinnamon roll. Set the spiral aside after you finish so you can attach it to the body later.[7]
-
4Roll a small log to be the snail’s body. This will be your snail's body, so make it thicker and shorter than your snail shell. After you're done rolling, attach the snail's shell into the back of its body. All you have left to add now are facial details.
-
5Add antennae and a face. Roll two small logs for the antennae and attach them to the top of your snail's body. Then, poke two holes with your toothpick for the eyes (or add two small googly eyes).
- For a mouth, roll another small log and curve it into a smile. Attach it below the snail's eyes.[8]

Sculpting Clay Dogs
-
1Start with a thick oval-shaped ball. This will be your dog's body. You can make it out of a normal color for a dog (like brown, black, or white) or you can use vibrant colors like violet, aquamarine, or pink. Lay the oval down horizontally, and prepare to add the dog's head and four legs.
-
2Make a round ball for the head. Attach it to the top of your dog's body. Press it in until the head sticks. Form two triangles or long ovals from the clay, and attach it to the top of your dog's head for ears. Add eyes and a smile, and top off your dog's face with a round oval for a nose.[11]
- Place a flattened red or pink half-circle on your dog's mouth for a floppy tongue.
-
3Add four rectangles for the legs. For legs, shape four rectangles out of the clay. Place the legs onto the dog in pairs. Two go in the front of the body and two in the back. Scratch in two or three lines at the bottom of the legs for paws.[12]
-
4Attach a tail to your dog's body. Roll a small piece of clay back and forth between your hands, much like how you made the snake. Continue rolling until the tail gets to the desired length. Attach the tail to the back end of your dog's body.[13]
Creating Clay Birds
-
1Roll an oval for the body. For a bird body, the oval should be long and oblong. Make the bottom end of the oval larger than the top end. Place the oval upright and prepare to add the bird's head.[14]
-
2Make a sphere for the bird's head. Attach the head to the top of the oval and press down until it sticks. Stick on (or poke in) two eyes for your bird. For a beak, roll an orange or yellow ball between your finger and thumb. Use the toothpick to draw a slit lengthwise on the ball. Press the back end of the ball onto your bird's head.[15]
- Stretch the top and bottom ends of the beak into points for a less cartoonish beak.
-
3Add wings to your bird. Form two ovals out of your clay and flatten them until they are two-dimensional. Place one wing on either side of your bird's body. If desired, you can use the toothpick to draw designs (like feather prints) on your wings.[16]
- For a two-colored wing, form two teardrop shapes out of clay and flatten it until it is also two-dimensional. Place one on each of your bird wings.
-
4Sculpt two bird feet. Feet on clay birds are optional but can add a nice touch to your bird. Form six small cylindrical tubes. Place the tubes in threes on the bottom of your bird's feet. These will form claws poking out of your bird's body.
- Your bird's feet will not be strong enough to support it and may get flattened if placed on a flat surface.
Community Q&A
-
QuestionHow do I make a butterfly?
 Community AnswerIt's really easy. You just make a worm for the body, and make the wings like you make it into a circle, and you kinda make a curve in the middle. Then you can decorate it.
 -
QuestionHow do I make a fish?
 Community AnswerTake a ball of clay, roll it into a ball, and flatten it. Then, mold it into the desired shape, depending on the type of fish you are making. Make the eyes with black clay and add the details, such as fins. Scales can be made using a toothpick.
 -
QuestionHow do I create a clay dolphin?Community AnswerCurve your log of clay slightly. Pinch one of the ends in the middle so the clay splits off into two parts at the end, and smooth out the two parts of the tail. At the other end, squeeze a tiny bit of the end to create the beak. Poke holes for eyes, and, using a butter knife or your fingernail, press lightly all around the beak to form the mouth. Then, with a toothpick, poke a blowhole on the top of the head. Behind the head, squeeze clay on the back up to make the dorsal fin, and smooth and curve towards the tail. Finally, make the flippers by squeezing clay on the sides directly under the dorsal fin, and smooth out the flippers.
Things You'll Need
- Clay
- Toothpicks
- Googly eyes
References
- ↑ https://www.youtube.com/watch?v=CwlRnTbso54
- ↑ https://www.youtube.com/watch?v=1oYxoCV6dcI
- ↑ https://www.youtube.com/watch?v=vN1Bd2hjtYk
- ↑ https://www.youtube.com/watch?v=Ju8zTTiNHkg
- ↑ http://www.apartmenttherapy.com/color-theory-101-making-complementary-colors-work-for-you-179143
- ↑ https://www.youtube.com/watch?v=DVPpK-y9AGk
- ↑ https://www.youtube.com/watch?v=gKNJo1R3Aeo
- ↑ https://www.youtube.com/watch?v=CG-bsbMbqTk
- ↑ https://www.youtube.com/watch?v=-9bfJWygDJk
- ↑ https://www.youtube.com/watch?v=K8dFYmVeK_8
- ↑ https://www.youtube.com/watch?v=JOv996_DEFE
- ↑ https://www.youtube.com/watch?v=kJaFj6ojV-o
- ↑ https://www.youtube.com/watch?v=ITZejRYmWto
- ↑ https://www.youtube.com/watch?v=PgjkLTsa74o
- ↑ https://www.youtube.com/watch?v=L4IeVXlH_s4
- ↑ https://www.youtube.com/watch?v=YBeQyCeX9aM
About This Article

To make a clay bird, start by rolling a piece of clay into a large oval for the body. Then, roll a smaller clay sphere and set it on top of the oval to make the head. Stick 2 small clay spheres on opposite sides of the head for eyes, and then attach a thin, pointed piece of clay to the front of the head for the beak. To make the wings, roll 2 oval pieces of clay, flatten them, and stick them on opposite sides of your bird's body. For tips on making a clay dog, snail, and snake, scroll down!