X
wikiHow is a “wiki,” similar to Wikipedia, which means that many of our articles are co-written by multiple authors. To create this article, 13 people, some anonymous, worked to edit and improve it over time.
This article has been viewed 105,003 times.
Learn more...
A fast and easy way to make a clean, empty, large can into a simple stove for cooking outdoors whether you're camping, living outdoors full-time, or in a developing country.
Steps
-
1Get a can that is large, both somewhat tall and wide. A coffee can, particularly a three-pound coffee can, or a gallon commercial food can would be perfect. Width is particularly important if you want to use a cooking vessel on your can rather than just grill on it.
-
2Decide whether you want your stove to have a bottom, a top, both, or neither (being essentially a ring with some holes around the top and bottom).
- If your stove has a bottom, you can load it with fuel and then set it in its final position. If your stove has no bottom, you'll have to load it in its final position or set it over a stack of fire materials on the ground, and not shift it as you add fuel.
- If your stove has a top, you can cook on it directly as a grill, and soot will not accumulate as heavily on cookware. If your stove has no top, it will be more efficient with pots, pans and other cooking vessels because the hot gases will touch them directly and not be insulated by an air gap. You can also warm yourself near it with the top off; it should radiate more efficiently though less powerfully than an open fire because it is not cooled by an excessive amount of air pulled in at the bottom. (Don't burn yourself or expose your face to the rising smoke, which might contain sparks from time to time.)
- If you want your stove to have a bottom and a top, find one that has a solid bottom and top, not a peel-off top like some coffee cans, and remove its original contents not by opening an end, but by punching a hole in the side near an end (which is easiest if the original contents are liquid or granular). This hole will be enlarged to form the fuel door. Choosing which end to make the hole near, designating it as the bottom, follows.
Advertisement -
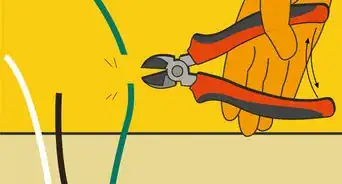
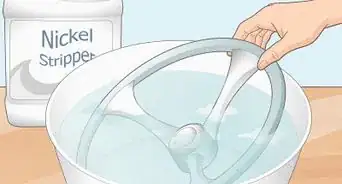
3Peel any labels off of the can and wash it well. Leave no flammable paper or glue on the can. (These would burn or scorch on the first use; a little residue is fine.) Make sure that the can has one end intact, and one end completely gone (unless you're making a stove with a top and a bottom). If necessary, finish removing one end with a can opener. Use the more-common kind of can opener which leaves a smooth can rim and a sharp removed lid, not the kind which leaves the rolled lip on the lid and makes the can sharp.
-
4Cut the fuel door/bottom vent, a rectangular hole in the side at the bottom, with about one-fourth of the height and one-sixth of the circumference of the can. A nice finishing touch would be to extend the cuts for this a little past the hole, and roll the edges in and back flush a fraction of the inch to reduce sharp edges (use a pliers).
- If you're making a stove with a top, open at the bottom: Turn the can upside down, so that the open end is down. Cut a rectangle out of the can, cutting through the rim. Detach and discard the rectangle.
- If you're making a stove with a bottom, open at the top: Make the hole at or very close to the bottom. Use a nail (a big framing nail) or punch to make starting hole(s), then finish cutting with a tinsnips, diagonal cutters, or similar.
- If you're making a stove with a bottom and a top: Proceed as with making a stove with a bottom, after deciding which end you want to be the bottom of the stove (and draining the contents through a hole you made near it). If you make the end with the rim (normally the top of a can) the bottom, then the top will be rimless and seamless, which could be nice for grilling. If you make the end without the rim (normally the bottom of a can) the bottom, then the top will have a rim, which would be nice for cooking with smaller cans (though that practice is inefficient; use a topless stove with a cooking vessel).
-
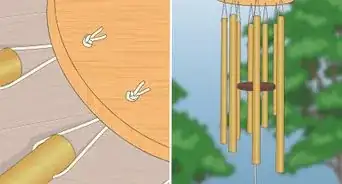
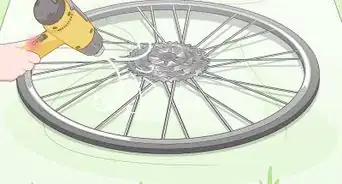
5Make the smoke vents. Turn the can around to the side opposite your rectangle. In the upper half near the closed top of your stove/can, punch lots of holes, using a hammer and fairly large nail. Brace the can securely somewhere that does not involve your hands (such as against a concrete step, driving diagonally into it). Make as many holes as will fit about 1/2 to 3/4 of an inch apart, in that top half of the back of your stove. If you're making a can without a top, avoid distorting the can by pounding into it. You might support the can on something inanimate and sturdy, such as a log, extended into it so that it doesn't tend to flatten.
-
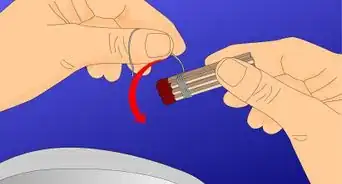
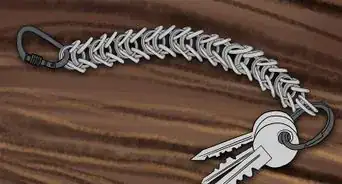
6For a stove without a top, you may want to install some kind of support for a cooking vessel (a small one, such as a can slightly smaller than the stove) so that it can sit above the fire but slightly inside the rim for stability. One kind could be a few parallel metal rods, such as coat-hanger pieces, passed through holes at a given level a little below the top and bent over at the ends so they stay in place.[1]
- A very efficient design, although complicated to make, might have a bottom, and a top in which a hole is cut to wrap around a smaller can/cooking vessel, which is supported off the fire but not quite at the top of the big can so that it is surrounded by hot smoke, whose heat it has a large area and long time to conduct. If you make something like this, be sure to roll the sharp edges.
-
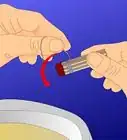
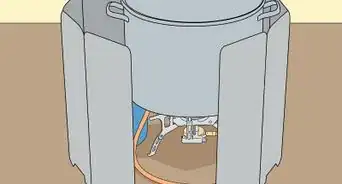
7To use your stove, build a fire inside the stove (or, if it has no bottom, on the dirt under the stove) using matches and tinder. Build the fire on a piece of ground with no grass or other flammable material. Clear a space around the fire as well. There should be nothing but dirt in the vicinity of your fire. Gather a supply of twigs to feed your fire. Then, once the fire is going, place your stove over the fire. The rectangle gives you an entrance to blow on the fire or to feed it twigs, while smoke should escape through the holes in the back.
-
8To grill something on a stove with a top, test its heat first by throwing droplets of water onto the top. When they steam off, try frying an egg or heating up something on the surface of your stove.
-
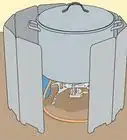
9To boil something on a stove without a top, put a vessel on top of the stove. These stoves are top-heavy so don't boil a large quantity, use a tall vessel, or one with a long handle to reduce the risk of it falling over and of burns if it does fall over. A slightly-wider can, whose corrugated bottom will tend to make it stay put, or a pan with a curved or rough bottom would be good.
- If you put in supports, set a small can on the supports.
-
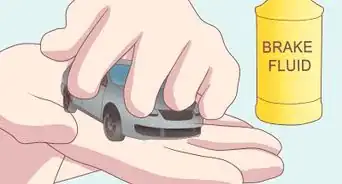
10The heat can be high and uneven. It will probably mark and may cause surface damage to cookware. Don't use fancy pots and pans. Consequently, the heat will not be evened out by the cookware. At least at first, don't try to make thick soups or other things prone to scorching.
-Step-1.jpg)
-Step-2-Version-2.jpg)
-Step-3.jpg)
-Step-4.jpg)
-Step-5.jpg)
-Step-6.jpg)
-Step-7.jpg)
-Step-8.jpg)
-Step-9.jpg)
-Step-10.jpg)
Advertisement
Community Q&A
-
QuestionI want to make a portable stove, possibly with charcoal fuel, that can be used to cook fish for a shore lunch. What would be my best option?
 Dolly CookCommunity AnswerThe most handy option would be a piece of sheet metal however tall you'd like; I would recommend at least 8" tall by 20" long. Then, I would bend the ends so they can be hooked together easily (or simply use a metal coffee can) and break pieces of charcoal in half. Leave a little room at the bottom, maybe 1/4" or so for circulation. Your fire will make your charcoal turn white, which indicates that it's ready for use.
Advertisement
Warnings
- When building a fire, be careful what materials you use. Pine needles, for instance, will sometimes make tons of sparks in a manner much like a natural firework, which can be pretty, but very dangerous. Always assume the standard fire proximity position when near a fire, squatting on your heels so that you can easily jump back if the fire becomes dangerous. Wear closed-toe shoes.⧼thumbs_response⧽
- Do not use this near anything flammable.⧼thumbs_response⧽
- You could tip this over or it could break (it will eventually fail due to heat and corrosion, or could break quickly), so do not use large quantities of liquid or sit too close and risk being seriously burned by boiling liquid if something dumps.⧼thumbs_response⧽
- Cut metal can be sharp, so watch out for your fingers even after this is done. Also, tools can be sharp. Be careful while you cut the can.⧼thumbs_response⧽
- Do not play with fire! Keep a bucket of water handy whenever you have a fire going. If you don't have water, dig up some loose dirt to throw on the fire if it gets out of hand. Or, keep a fire blanket nearby. When you feed the fire, be careful. Fire may seem tame, but it can easily burn you or get out of hand.⧼thumbs_response⧽
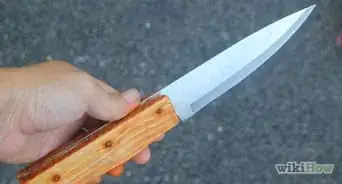
- Be very careful when making this. Wear eye protection. Use proper metal-cutting tools (a big nail is OK for making the holes). Do not use a knife or scissors. Arrange things so that if a cutting tool slips, it is unlikely to hurt you. For pounding holes in the can, brace the can between inanimate objects, such as logs, not your legs.⧼thumbs_response⧽
- This and everything on it will get very hot. Pick them up carefully with appropriate protection.⧼thumbs_response⧽
- Do not heat an unopened can or bottle. It may well explode.⧼thumbs_response⧽
- Do not use this or any other wood or charcoal-burning chimney-less stove indoors or in an enclosed space. It could, without necessarily making much smoke, emit quantities of carbon monoxide, a colorless, odorless, poisonous gas.⧼thumbs_response⧽
Advertisement
Things You'll Need
- A large can, about the size of the big cans of packaged ground coffee that you see in the supermarket. Other good kinds are big cans that might be used in a restaurant kitchen or cafeteria for canned ingredients.
- A metal cutter suitable for a can, such as a tinsnips. (Check its blades carefully after you begin to check that you are not damaging them.)
- Hammer
- Nail(s)
- Matches and kindling.

References
About This Article
Advertisement