X
wikiHow is a “wiki,” similar to Wikipedia, which means that many of our articles are co-written by multiple authors. To create this article, 15 people, some anonymous, worked to edit and improve it over time.
The wikiHow Video Team also followed the article's instructions and verified that they work.
This article has been viewed 49,564 times.
Learn more...
A toothpick gun is made from a few items found at home. It will shoot toothpicks at a high speed when you are done. The toothpicks will be able to pierce many surfaces when shot from this gun. This is a toy that requires adult supervision when using and making it.
Steps
Part 1
Part 1 of 3:
Preparing to Make Your Gun
-
1Wear safety goggles. When making your gun, using your gun, or in the same area with someone using your gun, it is very important that you wear safety goggles. The toothpick can easily injure an eye and have negative effects on your vision.
-
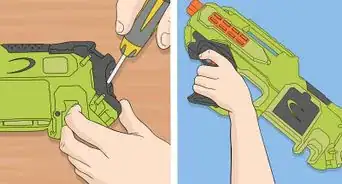
2Gather your materials. In order to make your toothpick gun, you’ll need 5 items. If you don’t have them at home, you can find them at any hardware store.
- Clothespin
- Steel hand saw or X-acto knife
- Wire cutters
- Rubber band
- Toothpicks
Advertisement -
3Break your clothespin. Before you start to assemble your gun, you need to break the clothespin into two separate pieces. Rip the two pieces apart and untwist the metal spring. Remove the spring and set it aside. You should have two even pieces of wood.[1]


Advertisement
Part 2
Part 2 of 3:
Constructing Your Gun
-
1Cut a piece of your clothespin. Take one side of your clothespin and hold it with the skinny end in your right hand. The indent closest to your right hand is the guideline you’ll use to make your cut. Place this indent in the mouth of your wire cutters. Squeeze until it breaks off.
- You may have to move your clothespin piece up and down to give the wire cutters some leverage to break it.
- Remember to wear your safety goggles!
-
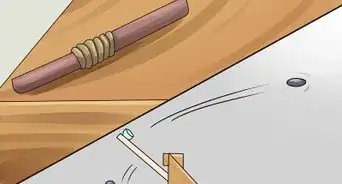
2Saw down the second piece of your clothespin. Once again, take the piece of wood with the skinny part in your right hand. The indent closest to you is the one you’ll saw. Take your steel hand saw and saw half way through from the indented side of your clothespin.
- This will create an indent that will eventually hold your spring.
-
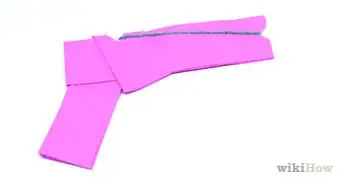
3Use your elastic to attach your pieces. Take the side of the clothespin that you used your saw on and hold it with the flat side facing up. Now, take the wider side of the piece that you cut and place its flat side up against this so that it sits flush. Wrap your elastic around the first indent from the wide end.[2]
- This elastic needs to be securely holding the two pieces together. If you leave it too loose, it won’t hold.
-
4Attach your wire spring. Use the spring that you took off of your clothespin before you began. Slide one of the open ends into the crease you made with the saw. The other open end will wrap around this piece of wood and give it a secure hold. It will rest on right in front of your cut piece of wood.[3]
- The coil of the spring will be on the bottom of your sawed piece.
-
5Slide the spring into an indent. Hold on firmly to your spring and slide the smaller piece of the clothespin over it until the first indent envelopes the spring. If you’re elastic is too tight, unwrap it once. If it is too lose and doesn’t hold onto the spring, wrap it one more time.[4]
- Once you have this part securely in your indent, slide the wooden piece back to its original position. The two ends of the wood pieces should meet up and your spring will still be in your indent. Your gun is now fully constructed.
Advertisement
Part 3
Part 3 of 3:
Using Your Toothpick Gun
-
1Load your toothpick. Hold your gun with the spring on the bottom. This is your trigger. Slide a toothpick in between the two pieces of wood. Slide it back so that it reaches the indent holding your spring.
-
2Hold behind the elastic. Use two fingers to hold your gun behind the elastic. Place another finger on the trigger (the coil of the spring). Pull back the trigger and watch your toothpick fly.
-
3Set up targets. Apples make great targets and are easily shot into with your toothpick gun. Set up some apples at different distances and try shooting them. Do not shoot the toothpicks at other people. Remember to wear your safety goggles.[5]
Advertisement
Community Q&A
-
QuestionDo I absolutely need a rubber band?
 Community AnswerYes, you do.
Advertisement


References
- ↑ http://deuceofclubs.com/randumb/clothespingun/clothespingun01.htm
- ↑ http://deuceofclubs.com/randumb/clothespingun/clothespingun06.htm
- ↑ http://deuceofclubs.com/randumb/clothespingun/clothespingun03.htm
- ↑ http://www.popsci.com/article/diy/how-turn-clothespin-matchstick-gun
- ↑ http://www.popsci.com/article/diy/how-turn-clothespin-matchstick-gun
About This Article
Advertisement