This article was co-authored by wikiHow Staff. Our trained team of editors and researchers validate articles for accuracy and comprehensiveness. wikiHow's Content Management Team carefully monitors the work from our editorial staff to ensure that each article is backed by trusted research and meets our high quality standards.
wikiHow marks an article as reader-approved once it receives enough positive feedback. In this case, several readers have written to tell us that this article was helpful to them, earning it our reader-approved status.
This article has been viewed 402,638 times.
Learn more...
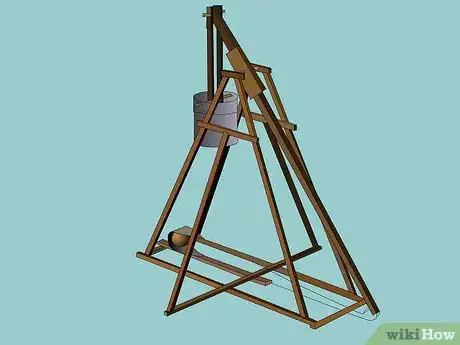
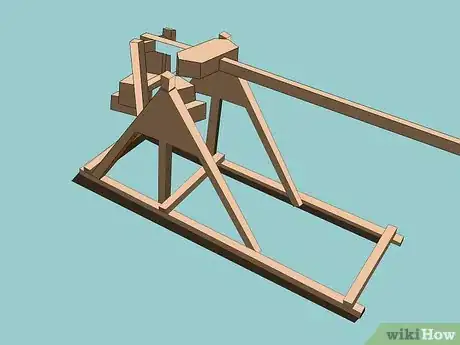
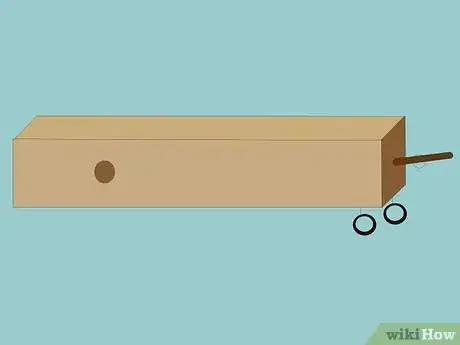
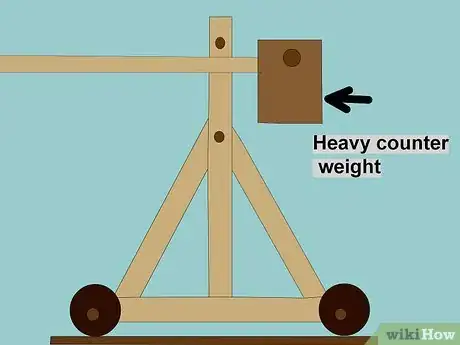
A trebuchet (pronounced TREB-you-shay) is a medieval English siege engine or catapult that consists of a large arm mounted on a cart or stand. In the counterpoise style of trebuchet[1] , a counterweight pulls down the arm, launching a large stone or other projectile from its resting place in the sling opposite the counterweight toward the target, much like David using his sling against Goliath [2] Trebuchets can be built large or small but all trebuchets, correctly built, illustrate the principle of leverage.
Steps
Planning
-
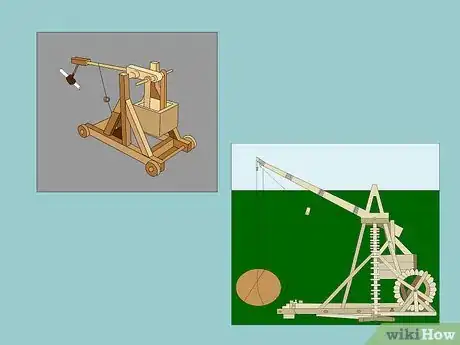
1Decide where you will use your trebuchet. This will determine what size of trebuchet you’ll want to make and what materials make it out of.
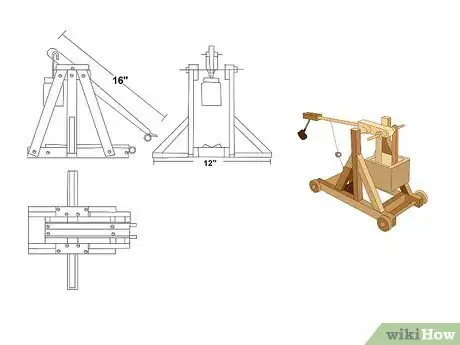
- If you plan to use your trebuchet indoors, you’ll want to make a small trebuchet. You can make a wooden trebuchet with a base about 12 inches (30 cm) and a swing arm of about 16 inches (40 cm) or a smaller and lighter model out of popsicle sticks.
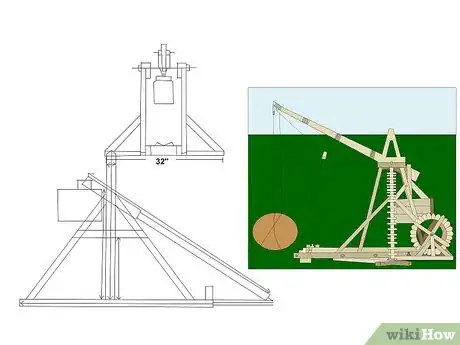
- If you plan to use your trebuchet outdoors, you’ll want to make a larger trebuchet. A backyard trebuchet could be made of wood or PVC pipe with a 24-inch (60 cm) base and a 32-inch (80 cm) swing arm. A trebuchet to demonstrate at a Renaissance faire could be several times larger than this, if you have sufficient space to launch its projectiles, but you’d have to design it to be taken apart for transport and reassembled on site unless you have a pickup or trailer to haul it around in.
- The instructions in the section “Building Your Trebuchet” are written for building a trebuchet using pieces of wood. You can adapt them to whatever building material you choose to use.
-
2Consider what you want to launch with your trebuchet. This will have an impact on what material you make your trebuchet from, how large and durable your sling must be, and how heavy a counterweight you should obtain.
- An indoor trebuchet could launch grapes, paper wads, or Nerf balls, while an outdoor trebuchet could launch water balloons, tennis balls (perfect for Renfaire mixed doubles), golf balls (for Renfaire golf), clay balls, ball bearings, croquet balls, billiard balls, or even actual rocks. (Medieval trebuchets launched not only rocks, but also chunks of burning pitch and dead horse carcasses, a Middle Ages form of chemical warfare.)
- Whatever you decide you want to launch with your trebuchet, your counterweight should be from 100 to 133 times the weight of your projectile.[3] If you want to launch items of various weights, you can set up your trebuchet with a bucket or bag to hold and adjust the counterweight. (If you use a bucket, its weight forms part of the overall counterweight.)
Building
-
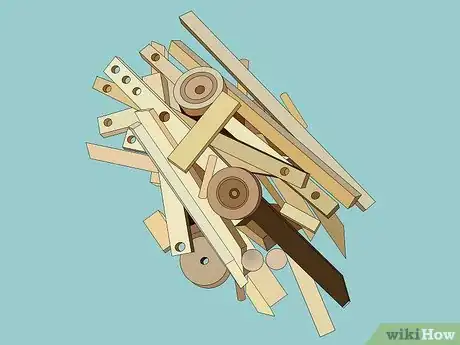
1Cut and sand the frame pieces and swing arm. For an indoor trebuchet, you can use 1 x 6-inch (2.5 x 15 cm) planking. For an outdoor trebuchet, you can use 2 x 4-inch (5 x 10 cm) planking. You’ll need to cut 8 pieces:
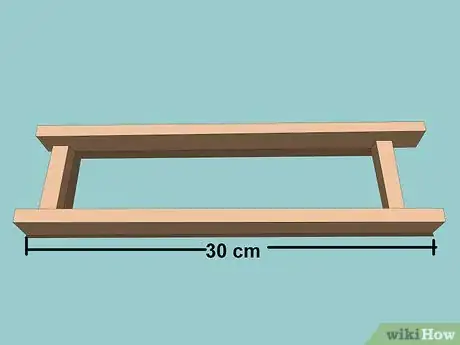
- Two long base pieces. For a small trebuchet, you may want to make them 1 foot (30 cm) long; for a larger trebuchet, they can be longer.
- Two uprights. These should be about 5/6 the length of the base pieces or as long as the base pieces, but no longer. If you made the long base pieces 1 foot (30 cm) long, they would be 10 to 12 inches (24 to 30 cm) long.
- Three cross pieces. These can be 1/2 the length of either the uprights or of the long base pieces. You want the trebuchet to be fairly narrow to ensure that it throws its projectiles in a straight line.
- One swing arm, or beam.[4] This piece should be 1 1/3 times the length of the base pieces; if the base pieces are 1 foot (30 cm) long, the swing arm should be 16 inches (40 cm) long.[5]
-
2Cut and sand the support braces. The simplest way to make these is from a piece of plywood at least 1/4 inch (6.25 mm) thick. It should be 1/2 the length of either the uprights or the long base pieces. Draw a line from one corner of the square to the other and cut along this line, making a pair of right triangles.[6]
- If you prefer, you can design the support braces to look like isosceles triangles so that they will slope on both sides of the uprights when assembled.
-
3Obtain an axle. You’ll need either a metal bar or wooden dowel the same length as one of the cross pieces or slightly longer. The bar should be strong enough to stand up to the weight of the swing arm, the weights you plan to launch, and your counterweight.
- A piece of rebar would make the strongest axle, but you can also use a screwdriver blade or the axle from a wheeled garbage can. For a small enough trebuchet, you can use the axle from a toy car. When you decide what to use as your axle, measure its diameter.
-
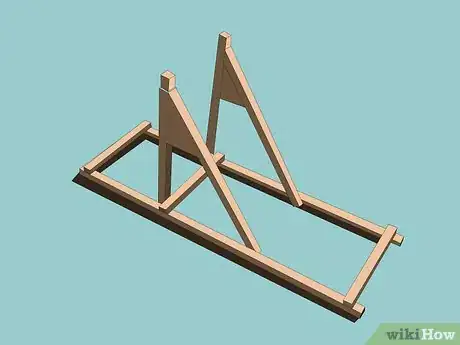
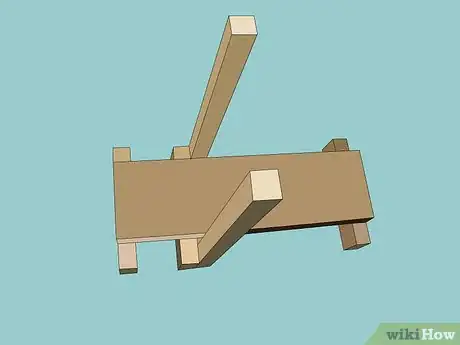
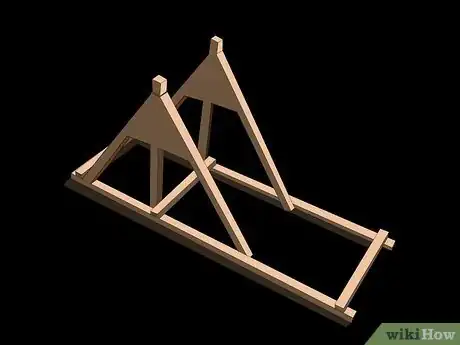
4Attach the uprights to the long base pieces. Measure 1/4 of the distance from one end of one of the long base pieces, and mark it. Place an end of one of the uprights against this mark and glue it in place, then reinforce the connection with nails or screws. Repeat for the second base piece and upright, using the first as a guide.[7]
-
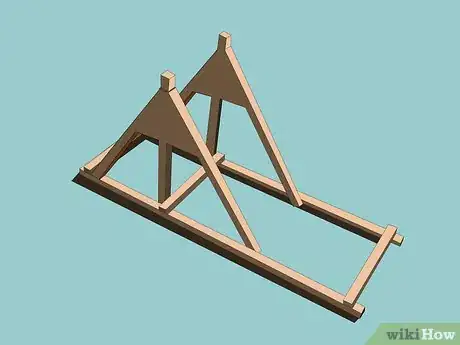
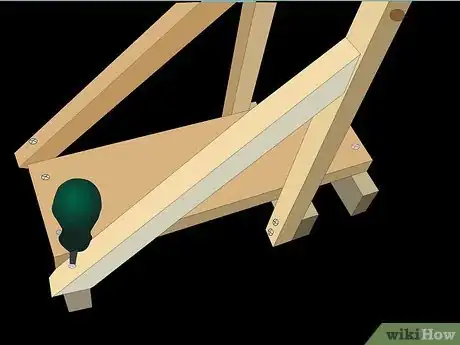
5Attach the braces to the assembled base pieces and uprights. Lay one of the assembled pieces down and lay a brace over it, flush with the bottom of the base piece and back edge of the upright and sloping toward the long end of the base piece. Glue the brace in place and reinforce it with nails or screws.
- Repeat this process for the other assembled piece and brace, but this time point the long end of the base and the brace’s hypotenuse in the other direction.
- For a large trebuchet, you may instead want to cut lengths of planking to serve as braces instead of using plywood sheeting, and either cut the edges at an angle or use two pieces on each side to make a rectangular brace.[8]
-
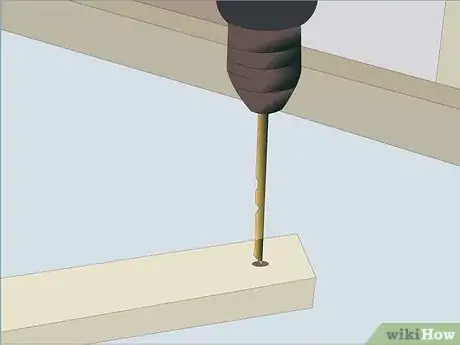
6Drill holes near the top of the uprights. When you assemble the base, you’ll thread an axle through these holes for the swing arm to turn on.
- Mark the drill holes about 1/10 of the way down from the top. You’ll want to use a drill bit that’s the same diameter or only slightly larger than the diameter of the axle.
-
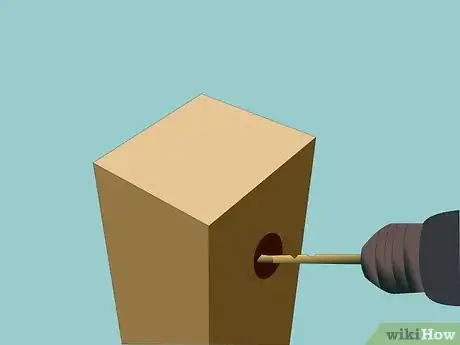
7Drill holes into the swing arm. You’ll want to have the primary hole 1/4 of the way from one end to the other, with secondary holes on either side of it. (This will allow you to adjust the fulcrum point of the swing arm.)
- When drilling holes through the swing arm, use the bit the next diameter larger than that of the axle or possibly even 2 sizes larger. The swing arm should turn freely on the axle without wobbling.
- Space the secondary holes out far enough that they won’t break out and form a larger hole would allow the swing arm to slip if threaded through it.
-
8Attach eye hooks to either end of the swing arm. These eye hooks are what you will attach the sling and counterweight to, respectively.
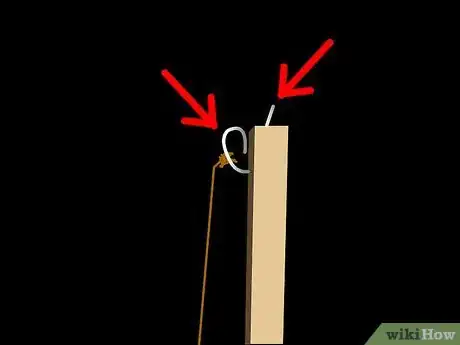
- The eye hook for the sling will go on the end furthest from where you drilled the holes. It should be open to serve as a release pin,[9] allowing one end of the sling to open and allow the swing arm to hurl the projectile forward. To keep the sling from opening too soon, drive a nail into the end, partially covering the release pin.
- Cut the head off the nail to keep the sling from catching.[10]
- The eye hook for the counterweight should be closed, unless you plan to change the counterweight often. Even then, you may want to attach a carabiner or split ring to the counterweight eye hook.
-
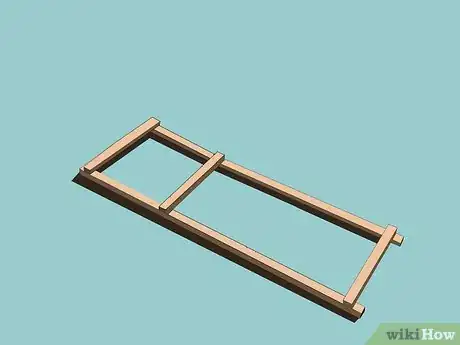
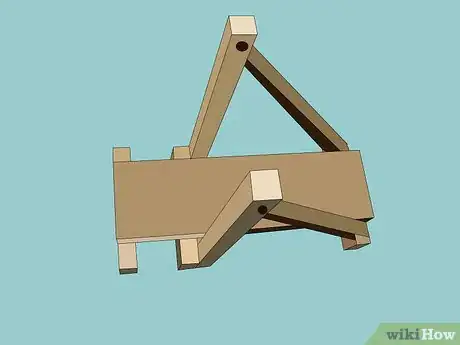
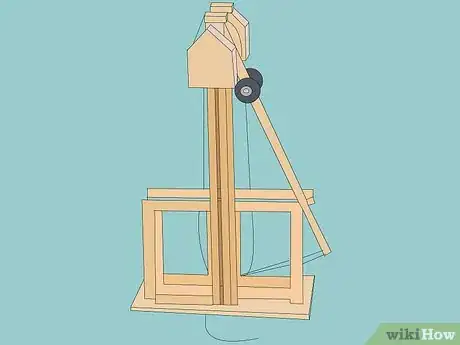
9Assemble the trebuchet frame. Connect the 3 cross pieces to the long base pieces using glue, nails, screws, or bolts, depending on the size of your trebuchet. One of the cross pieces should be at each end of the frame, with the third just ahead of the uprights.
- For a tabletop trebuchet, you may want to attach a piece of posterboard or cardboard to the bottom of the frame to protect the surface the trebuchet rests on when firing it. [11]
-
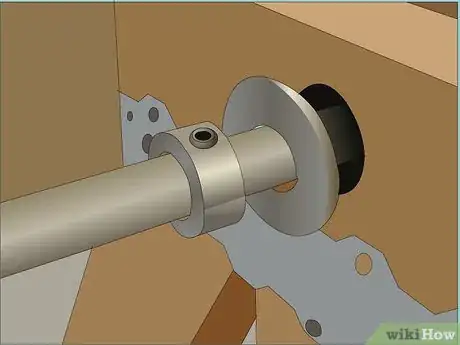
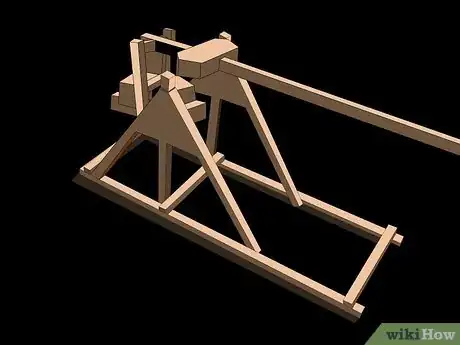
10Mount the swing arm. Place the arm between the uprights with the long end of the arm toward the short end of the frame and the nail over the hook pointing up. Thread the axle through the hole in one of the uprights, then through one of the holes in the swing arm, and finally through the hole in the other upright. [12]
- The throwing side of the swing arm should rest on the short side of the trebuchet frame because the force generated when it moves will thrust the frame downward. If this thrust falls on the short side of the frame, it could pitch the trebuchet forward.
- The nail should be pointing up to ensure that the sling will open without coming off the swing arm entirely.
- If the axle extends past the frame, you may wish to affix cotter pins or caps to its ends to keep it from slipping out when you launch projectiles.
-
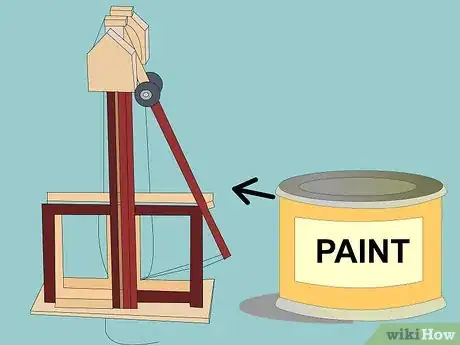
11Paint and decorate the trebuchet. If your trebuchet is made of wood, paint will help preserve it, particularly if you plan to keep it outdoors when not in use. You can decorate the support braces with a historic flag, your family crest, or the logo of your SCA or Amtgard chapter.
-
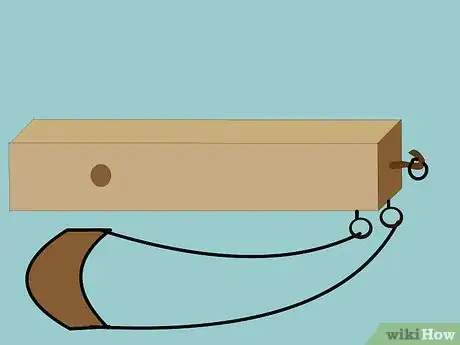
12Make the sling. Take a piece of heavy cloth (or burlap, for a very large trebuchet) and fold it in half. Gather the corners on the two sides together and tie them with string, cord, or rope, forming a pouch. Tie loops in the loose ends of the string so you can slip them over the hook on the launching side of the swing arm.
- If you like, you can tie the string holding the sling to the trebuchet directly to the hook and tie the other end to a loop of thin wire to make it easier to slide off the hook when launching the projectile. You can also tie both string ends to wire loops to make it easier to put the sling on and remove it from the hook.
Using
-
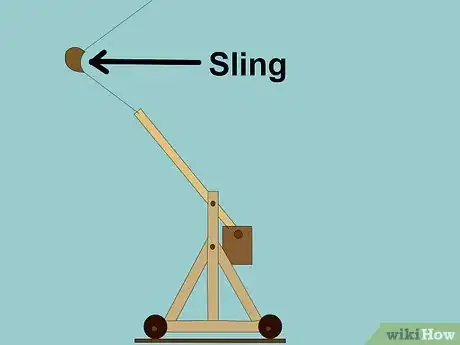
1Mount the sling on the launching hook. Slip the end of one of the sling strings over the hook, unless you chose to tie it to the hook.
-
2Load the projectile into the sling. Once you do, slip the other cord of the sling over the launching hook.
-
3Prepare the counterweight. You can use a single heavy item as the counterweight or a number of smaller items, contained in a bag or bucket.
-
4Attach the counterweight to the trebuchet.
-
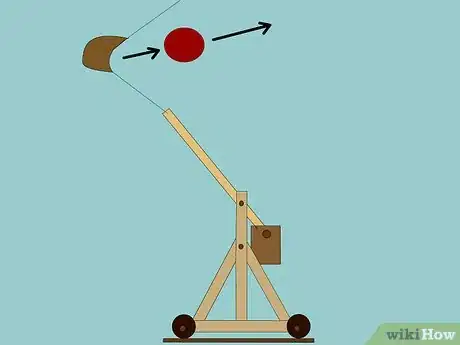
5Release the counterweight. The weight will pull the short end of the arm down and the long end up. The sudden acceleration will swing the projectile backward in the sling, causing one end of the sling to slip off the hook and propel the projectile forward.
- If your trebuchet releases the projectile too soon, the projectile could fly upward or even backward. If it releases too late, the projectile will slam into the ground in front of the trebuchet. You can control the point at which the sling opens and the projectile releases by bending the release pin nail: bend it more if the projectile flies too high and bend it less if the projectile flies too low.[13]
- If you have trouble with the trebuchet releasing the projectile at the right time, you can adjust the weight of the counterweight or remount the swing arm through a different hole.
Community Q&A
-
QuestionHow far can it launch a 90 kg stone projectile?
 Community AnswerIf built right, the superior siege weapon can fire a 90 kg projectile over 300 m.
 -
QuestionWill a trebuchet be a superior siege weapon?
 Community AnswerTrebuchets are superior to catapults, balistias, and all other siege weapons invented in its era. They can use a counterweight to launch a 90 kg projectile over 300 meters.
 -
QuestionHow do I make the counterweight fall?
 SoramastersCommunity AnswerThere is a pin to hold it in place, and it's attached to a string you pull to launch the trebuchet.
Warnings
- Use only soft projectiles for an indoor trebuchet, and for an outdoor trebuchet, make sure to have a wide open space in front of the siege engine. Also, stand or sit to the side when launching projectiles with it.⧼thumbs_response⧽
Things You’ll Need
- Lengths of wooden planking (can substitute PVC pipe for a large trebuchet)
- Square of plywood
- Cylindrical metal bar or wooden dowel
- Heavy object for counterweight
- Screws (for a small trebuchet) or bolts (for a large trebuchet)
- Nails
- Eye hooks (2)
- Wire or twist ties (optional)
- Carabiner (optional)
- Cotter pins or endcaps (optional)
- Electrical or masking tape
- String, cord, or rope
- Piece of cloth or burlap
- Sandpaper
- Saw
- Hammer
- Paints
References
- ↑ https://en.wikipedia.org/wiki/Catapult
- ↑ http://www.redstoneprojects.com/trebuchetstore/how_a_trebuchet_catapult_works.html
- ↑ http://www.stormthecastle.com/trebuchet/trebuchet-build5.htm
- ↑ http://www.redstoneprojects.com/trebuchetstore/how_a_trebuchet_catapult_works.html
- ↑ http://www.stormthecastle.com/trebuchet/how-to-build-a-trebuchet.htm
- ↑ http://www.stormthecastle.com/trebuchet/how-to-build-a-trebuchet.htm
- ↑ http://www.stormthecastle.com/trebuchet/how-to-build-a-trebuchet.htm
- ↑ http://houseplans.glitven.com/trebuchet-building-plans/
- ↑ http://www.redstoneprojects.com/trebuchetstore/how_a_trebuchet_catapult_works.html
- ↑ http://www.stormthecastle.com/trebuchet/how-to-build-a-trebuchet.htm
- ↑ http://www.stormthecastle.com/trebuchet/how-to-build-a-trebuchet.htm
- ↑ http://www.stormthecastle.com/trebuchet/how-to-build-a-trebuchet.htm
- ↑ http://www.stormthecastle.com/trebuchet/how-to-build-a-trebuchet.htm
- ↑ https://en.wikipedia.org/wiki/Catapult
- ↑ https://en.wikipedia.org/wiki/Catapult
- ↑ http://www.trebuchet.com/
About This Article
If you want to build your own trebuchet, first cut and sand the frame pieces and the swing arm. You’ll need 2 long base pieces, 2 uprights about the same length as the base pieces, and 3 cross braces the width of the trebuchet, and 4 support braces for the uprights. Your swing arm should be 1 and 1/3 times the length of the base. Assemble the base and the support braces, then attach the uprights and braces to the base pieces. Finally, attach your axle, swing arm, sling, and counterweight. Keep reading to learn how to use your trebuchet!
