This article was co-authored by Amy Guerrero. Amy Guerrero is an Arts and Crafts Specialist and the Owner of Sunshine Craft Co., a crafting studio based in Phoenix, Arizona. Amy specializes in macrame, DIY crafting, and teaching fiber arts. She offers monthly in-person and online workshops along with having developed a range of DIY craft kits for at-home projects. Amy holds a BS in Industrial Design from Philadelphia University. She worked as a graphic designer before starting her own business. Sunshine Craft Co. is a creative hub that offers a wide range of workshops, tools, and resources for any craft project to inspire creativity and community engagement.
This article has been viewed 66,134 times.
Venetian masks are great for Halloween costumes, masquerade parties, or plays, but they can be expensive to purchase from costume stores. Making your own Venetian mask from paper mâché is a fun way to create your own personalized effect. This article will teach you how to make a Venetian mask with your own personal flair.
Steps
Creating Your Paper Maché Mask
-
1Make the paper maché paste. The process is incredibly simple and requires items you probably have laying around your house already.[1]
- Put two tablespoons of white flour into a bowl and add about lukewarm water slowly.
- Begin with just under one cup of water, stirring with a fork, whisk, or kitchen mixer to get the lumps out and ensure an even texture.
- Keep adding water little by little until you reach the consistency you desire.
- It should have a smooth texture: not runny, but not thick like dough.
- Another option would be to take elmer's glue and water it down for a simple paper maché paste..
-
2Tear some newspaper strips. You will cover the mask form with newspaper strips to give yourself a nice surface to decorate. Keep in mind that glossy paper from magazines and coupon mailers won’t work very well, so find actual newspaper.
- Cut the newspaper into long strips about 1 inch in width.
- You’ll need to layer the mask about three times, so make a lot of newspaper strips.
- The length of the strips doesn’t matter as much as the width, but extremely long strips the length of an actual newspaper page will be unwieldy and messy when soaked in paper maché paste.
Advertisement -
3Obtain a Venetian mask template. You can purchase Venetian mask molds inexpensively at craft stores or online. If you have access to a printer, you can simply find a template for Venetian masks online and transfer it to cardboard using iron-on transfer film.
- Load your inkjet printer with the transfer film.
- Print the template image onto the transfer film.
- Peel off the plastic cover and press the template image against a piece of cardboard.
- Use an iron to apply heat to the back of the transfer film for 20 seconds or so (follow the instructions that come with your specific brand of transfer film.)
- Slowly peel back the film to reveal the transferred image on the cardboard
- Use an exacto knife to carefully cut along the borders of the template to create a cardboard mold of the mask.
- Make sure to cut out the eye holes as well.
-
4Cut holes in the corners of the mask. You need holes in the corners of the mask so you can insert string or elastic to hold the mask onto your face. Use a hole puncher or a sharp object like an exacto knife or scissor blade to create the holes.
-
5Cover your mask template in paper maché strips. This process can be very messy, so you may want to do this outdoors, weather permitting. If you’re working indoors, spread newspaper over the surface you’re using to protect it from the paper maché paste, which will drip everywhere.
- Dip a strip of newspaper into the paper maché paste so it’s completely soaked from end to end.
- Run your fingers along the length of the strip to remove excess paste.
- Layer it over the Venetian mask template, making sure to smooth out bumps and wrinkles.
- Repeat this process with your newspaper strips until you have completely covered the template.
-
6Cut out the eye and string holes. While the newspaper strips are still fairly wet, use your exacto knife to locate and cut out the two eye holes from the template and two string holes you created. If you wait until you’ve completed the entire paper maché process to do this, you may have trouble locating the holes, so you want to do this step for each layer of newspaper strip you apply.
-
7Apply two more layers of newspaper strips. Layer the strips in different directions — horizontal, vertical, and diagonal — in order to achieve an even, natural effect.
- Remember to cut out the eye and string holes from time to time, so you don’t lose track of where they are.
-
8Let the mask dry. When you’ve created at least three layers of paper maché over your mask template, you’re ready to let the project harden.
- Put the mask somewhere it won’t be disturbed and let it air dry for about a day.
- You can put it in the refrigerator to speed up the hardening process.
- When it’s completely hard and dry, you’re ready to decorate your mask.


Decorating Your Venetian Mask
-
1Cover the mask in gesso. Gesso is a paint primer that will prepare your newspaper surface for the smooth application of acrylic paint. Use a clean paint brush to coat the mask entirely in gesso, then set the mask aside to dry.
- Gesso can be purchased in any craft or art supply store.
-
2Paint the mask with acrylic paint. If you want to use a single color on your mask, go ahead and paint the entire surface. However, if you plan to have a design with multiple colors, draw your design onto the mask using a pencil first. Painting in the lines will result in a more professional finish than trying to free-paint.
- You may need to apply multiple layers to create an opaque surface of paint. Let the paint dry in between layer applications.
- Let the paint dry completely before moving on to the next step.
-
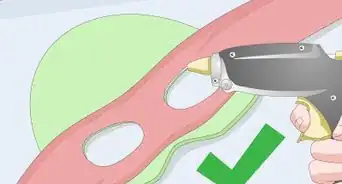
3Garnish with feathers and sequins. Once your paint is completely dry, use a hot glue gun to attach sequins and feathers to your mask, if you wish. You can make the entire mask sparkle, or you can create a pattern of sequins that leaves a lot of painted surface revealed. Attaching a single large feather to one corner of the mask is a common decoration for Venetian masks.
- Be careful when using a hot glue gun, as the glue will burn your skin if you touch it before it’s cooled down.
-
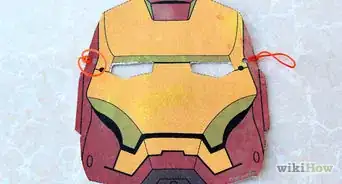
4Attach string or elastic to your mask. When you’ve finished decorating your mask, insert either string or elastic through the two holes you created in the corners to keep it on your face. Elastic will work much better than regular string.
- Insert the string or elastic through one hole and tie it into place using a sturdy knot.
- Place the other end of the string through the other hole, but don’t tie a knot yet.
- Place the mask on your face, with the string going around the back of your head.
- Pull the loose end of the string tight to see how tight the string should be to hole the mask up against your face.
- Mark where on the string it should be tied to the other string hole, and tie the second knot there after removing the mask from your face.


Community Q&A
-
QuestionCan I make a Venetian mask out of paper?
 Community AnswerYes. It will work with paper as directed in the article.
 -
QuestionHow do I make a homemade mold of a Venetian mask?
 Community AnswerUse an inflated balloon as the mold and apply the paper mache on half of it. Cut out the eye and mouth holes accordingly.
 -
QuestionAfter painting a clay mask with acrylic paints, should I use a finishing/holding spray?Community AnswerYou could possibly use a matte or gloss varnish spray. This would help protect the paint but could alter the colors slightly.
Things You'll Need
- Flour
- Water
- String or elastic
- An exacto knife
- Cardboard
- Iron-on transfer film
- An inkjet printer
- Gesso
- Acrylic paint and paint brushes
- Feathers and sequins for decoration

About This Article