This article was co-authored by Amy Guerrero. Amy Guerrero is an Arts and Crafts Specialist and the Owner of Sunshine Craft Co., a crafting studio based in Phoenix, Arizona. Amy specializes in macrame, DIY crafting, and teaching fiber arts. She offers monthly in-person and online workshops along with having developed a range of DIY craft kits for at-home projects. Amy holds a BS in Industrial Design from Philadelphia University. She worked as a graphic designer before starting her own business. Sunshine Craft Co. is a creative hub that offers a wide range of workshops, tools, and resources for any craft project to inspire creativity and community engagement.
This article has been viewed 58,459 times.
Iron Man just is not himself without his signature mask. If you want to dress up as him, but not spend money on a store bought mask, there are ways to make your own. When creating your own mask, you can go as detailed as you want. Get creative, and build whatever style mask fits you.
Steps
Using Masks
-
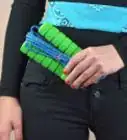
1Gather your supplies. For this design, you'll use two separate masks to create an Iron Man mask. You'll need a red ski mask, hockey mask, a marker, and gold spray paint. A standard balaclava-style mask with a single opening will work. Be sure that the masks are your size.
-
2Prepare a hockey-mask. Research the Iron Man mask online and print off a clear image. Take a marker and outline the gold design onto the hockey mask. Do your best to match the design of the image to your mask.Advertisement
-
3Cut and paint the hockey mask. Use a pair of scissors and cut along the lines of the outline you made. After cutting out the hockey mask, you’re ready to paint. Use gold spray paint to color the cut hockey mask to look like Iron Man.
- Allow the mask to dry for at least two hours before trying to assemble anything.
-
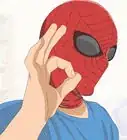
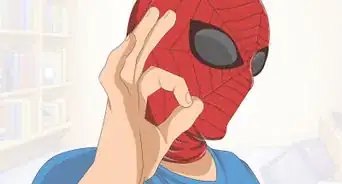
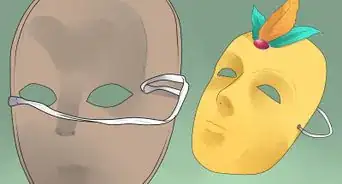
4Assemble the mask. Once the hockey mask is fully dried, you’re ready to assemble everything together. Put your red ski mask on first and make sure the eye hole is properly aligned. Put on the gold hockey mask.
- You don’t need to glue the two masks together, but you can if you want.


Using Paper Mache
-
1Gather your materials. To create a paper mache style mask, you'll need a balloon, newspaper, flour, a brush, red paint, gold paint, and cardboard scraps.
-
2Inflate a balloon. The first step to many paper mache projects begins with the mold of a balloon. The balloon acts as a mold for the paper mache to be constructed around. Once you’ve inflated and tied it shut, tape the opening flap down to a table or solid work surface.
- You can also buy a styrofoam head from a dollar store, instead of using a balloon. Make sure to coat it with vaseline prior to gluing the paper mache strips, though.
- Taping the balloon will make it easier to work with.[1]
-
3Mix the paper mache. In a bowl, mix two cups of flour with two cups of water. Mix the mixture until it is creamy and smooth.[2]
- You can also add salt to prevent mold growth.
-
4Tear up strips of newspaper. If you want, you could substitute newspaper for paper towels. Position your newspaper horizontally and cut three inch strips. Use scissors for a clean finish.
-
5Apply the paper mache. Dip each strip in the flour mixture before placing onto the balloon. You could alternatively use a brush to apply your adhesive. Position a few strips then apply your glue with a brush.Cover the balloons entirety with the paper mache. The more strips you use to overlap the balloon, the stronger your mask will be.
- If any clumps are leftover, evenly disperse it.
- Make a mess and don't feel weird getting your hands dirty.[3]
-
6Let it dry. Now you can go out and fix yourself a sandwich while the paper mache dries. Place a fan by the balloon for a faster drying time. This can take between 2 to 5 hours. Plan ahead of time. The paper mache needs to be completely dried before you can continue.[4]
-
7Cut out the bottom. Create a large hole on the bottom of the balloon to create an opening for the helmet. This is where you’ll put your head through, so make sure it is large enough to fit.[5]
-
8Create the sides. To create a realistic looking Iron Man mask, you’ll need to remove the sides where your ears are. After cutting out the sides, cover the holes completely with masking tape. Don’t cover the opening for your head.[6]
- This removes the wide curves of the balloon, and simulates a better looking mask shape.
-
9Cut out details. It might help having a photo of Iron Man’s mask at this point. You’ll need to cut out eye slits to see out of. You can also cut details out of the forehead like the real Iron Man mask. Go as detailed as you want. Make sure you detail everything before painting.[7]
- You can also add sleek circles for ears. If you look at the mask, you’ll understand this detail.
-
10Paint the mask. The easiest way to paint the mask is by using standard paint. Look at a familiar Iron Man picture to understand the color combination. Spray paint will also work, but it'll take longer.
-
11Allow it to dry. Wait until the mask is completely dried from the paint job. Wearing a mask with wet paint could expose you to toxic chemicals. Once it is dried, you’re ready to showcase your mask to the world!


Making the Mask with Cardboard
-
1Gather your supplies. Using cardboard is another easy way to build a potentially complex design. You’ll need a fair amount of sturdy and clean cardboard. You’ll also need scissors, glue, black markers, and red and gold paint.
-
2Print your research. You’ll need to decide how detailed you want to make your mask. There are ways to create a practically realistic version of the mask, but it is a long and patient process. Print out pictures of the Iron Man mask, and also print out other people’s masks that you’re inspired by.
-
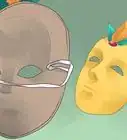
3Prepare the main parts. Essentially there are two parts of the Iron Man mask: the red background and the gold plate on the front. These are the two parts of the mask you’ll need. If you want to create a more realistic mask, you’ll need to assemble the jaw line, ear piece, forehead, and more.
- Trace out the gold front piece on a piece of cardboard before cutting and assembling.
- Make sure the dimensions fit your face.
-
4Paint the parts. After preparing the main components of the mask, you can paint them. For the foreground part of the mask, you’ll need to paint it red. For the front part of the mask, paint it gold.
-
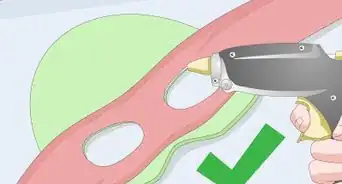
5Assemble the parts. If you don’t want to fashion the red background, you could use a red cloth instead. Glue the two pieces together once the paint has dried. You now have the mask to look the part of a crime fighting super hero.


References
- ↑ http://www.stormthecastle.com/how-to-make-a/how-to-make-the-iron-man-helmet.htm
- ↑ http://www.stormthecastle.com/how-to-make-a/how-to-make-the-iron-man-helmet.htm
- ↑ http://www.firstpalette.com/tool_box/art_recipes/Papier_Mache_Paste/Papier_Mache_Paste.html
- ↑ http://www.stormthecastle.com/how-to-make-a/how-to-make-the-iron-man-helmet.htm
- ↑ http://www.stormthecastle.com/how-to-make-a/how-to-make-the-iron-man-helmet.htm
- ↑ http://www.stormthecastle.com/how-to-make-a/how-to-make-the-iron-man-helmet.htm
- ↑ http://www.stormthecastle.com/how-to-make-a/how-to-make-the-iron-man-helmet.htm
About This Article