This article was co-authored by wikiHow Staff. Our trained team of editors and researchers validate articles for accuracy and comprehensiveness. wikiHow's Content Management Team carefully monitors the work from our editorial staff to ensure that each article is backed by trusted research and meets our high quality standards.
wikiHow marks an article as reader-approved once it receives enough positive feedback. In this case, 81% of readers who voted found the article helpful, earning it our reader-approved status.
This article has been viewed 64,558 times.
Learn more...
A wigwam is a type of Native American dwelling, primarily used by the Algonquin Indians. Often mistaken for a teepee, a wigwam is actually quite different. While a teepee is pointed, portable, and made from hides, a wigwam is dome-shaped, stationary, and made from wood.[1] This wikiHow will show you the traditional way of making a wigwam. If you are a student making a wigwam for a project, you can use this tutorial as a guide on a much smaller scale.
Steps
Preparing the Materials
-
1Gather some ash and basswood saplings. You will need 16 15-foot (4.5-meter) ash saplings that are about 2 inches (5.08 centimeters) thick for the frame. You will also need at least 12 ash or basswood saplings that are 15 feet (4.5 meters) tall and 1 inch (2.54 centimeters) thick for the horizontal hoops.[2] The saplings need to be straight as possible.
- Ash and basswood are the most traditional, but you can use other hardwoods, such as: cedar, chestnut, elm, or hickory.[3]
- If you are making a model, use thin, bendy twigs instead. You can also use wire instead. Florist's wire coated in brown paper would work well.
-
2Prepare the saplings for the frame's poles. Start by trimming off any bark and branches. This will help reduce wood rot and help the wigwam last longer. Next, cut the ends of the saplings into points. This will make it easier to insert them into the holes.[4]
- Make your poles extra-strong by hardening the pointy ends in a fire. This will also help them last longer once you drive them into the soil.[5]
- If the saplings aren't flexible enough, soak them in a lake or river for at least two days first.[6] Be sure to tie them down so that they don't float away.
Advertisement -
3Prepare cattail leaves for the thatching. Gather 50 bushels of cattail leaves. A bushel is a bundle that is thick enough to wrap your arms around. Separate the cattails into 2-inch (5.08-centimeter) thick bundles. Secure each bundle at one end with some string. Set them out in the sun to dry.[7]
- If you don't have access to cattails, you can use heavy canvas, which was used to cover wigwams from the late 1700s onwards.[8] You will need 12 to 14 sheets that are 5 by 10 feet (1.5 by 3.5 meters).
- If you want to be more traditional, you can sew cattail leaves into large mats. Plan on using 12 to 14 mats, each 5 by 10 feet (1.5 by 3.5 meters).[9]
- If you are making a model, you could use pieces of grass, raffia, or straw instead. You can also use pieces of cotton, linen, or canvas fabric.
-
4Prepare the birch bark sheets for the covering. Gather 7 to 10 sheets of birch bark, about 3 feet (cc meter) square. Use a hot nail or wood burner to make holes along the top edge of each birch bark sheet.[10]
- You can also use elm bark, or weave mats out of cattails.[11]
- If you are making a model, you can use white paper instead. For a more realistic effect, go over it lightly in a dry brush dipped in brown paint to make the streaks.


Building the Frame
-
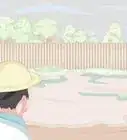
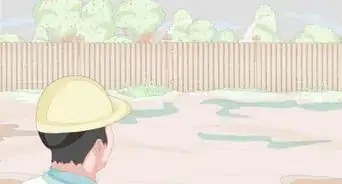
1Choose the right location. The ground needs to be flat and level. The soil needs to be soft to dig into, but not so soft that it won't support the poles. It's okay if there is some bedrock, but it needs to be deeper than 12 inches (30.48 centimeters).[12]
- If there is any scrubby vegetation, you will need to clear it away.
- If you are making a model, build this on top of a sheet of Styrofoam or cardboard. You can even paint it brown to make it look like dirt. You can also paint it with glue, then sprinkle real dirt on top.
-
2Draw a 14-foot (4.2-meter) circle on the ground. Drive a stake into the ground and tie a 7-foot (2.1-meter) long rope to it. Tie a stick to other end of the rope. Pull the rope taut, then use the stick to draw a circle in the ground around the stake, like a compass.[13] Pull the stake out when you are done.
-
3Use a wooden stake and hammer to make 16 holes around the circle. Each hole needs to be about 8 to 12 inches (20.32 to 30.48 centimeters) deep.[14] Space the holes as evenly as you can, about 9 to 12 inches (22.86 to 30.48 centimeters) apart. If you want to, you can space two of the holes further apart for the entrance.[15]
- Try to make the holes at a slight, outward angle. This will help create a higher dome once you start building the frame.[16]
- If you are making a model, use a pen, pencil, or skewer to make the holes.
-
4Insert eight of your prepared ash poles into the holes in the ground. Skip one hole between each pole. When you are done, you should have eight holes left.[17] Make sure that you are using the 2-inch (5.08-centimeter) thick poles for this.
- If you are making a model, you might want to glue your "poles" into the holes. Hot glue would work best.
-
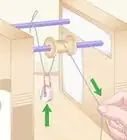
5Lash the poles together to form a dome shape. Find two poles that are straight across from each other. Bend them together so that they overlap by 2 to 3 feet (0.6 to 0.9 meters). Lash them together in two places, 3 inches (7.62 centimeters) from the tip of each pole. Continue lashing together opposite poles until you have a dome shape.[18]
- Do not overlap any poles just yet; you want the poles to be all oriented in the same direction (ie: north-and-south).
- If you can to be traditional, use tough bark fibers from a basswood tree.[19]
- If you want to be less-traditional, or simply don't have access to basswood, you could use heavy jute cording or sisal twine.[20]
- If you are making a model, you can use baker's twine, jute cord, thread, or even brownish yarn.
-
6Tie the poles together at the joints. You should have four sets of poles crossed over each other to form a grid. Lash the poles together at each of the four joints, where they connect.[21]
-
7Add the remaining poles and lash them together using the same method. Place eight more poles into the remaining eight holes. Lash them together using the same method as you did for the first set. This time, orient the arches perpendicular to the first set, creating a lattice-like pattern. At the end, lash all of the poles together at the joints.[22]
-
8Mark out a space between two poles for the doorway. Choose a spot between two poles on your frame that is facing east. Mark it somehow so that you will remember where it is.[23] You can do this with a piece of rope, a line of small stones, some leaves, or drawing a line in the dirt.
- If you spaced two holes further apart earlier, use that as your entrance.
-
9Add the first horizontal hoop over the frame and fasten it in place. Wrap 2 to 3 saplings around your wigwam frame, about 2½ feet (0.76 meters) up from the ground. Overlap the ends of the saplings and tie them together. Lash them to the wigwam frame itself, wherever the poles intersect. Be sure to skip the space between the two poles where you marked your entrance.[24]
-
10Add two more rows of hoops. Use the same technique as you did for the first hoop. As you climb further up the wigwam, you will use fewer saplings. The last hoop should go all the way around the wigwam, including the entrance you marked out.[25]
- Use the thinnest saplings for the last hoop.
- If your wigwam doesn't feel sturdy enough, add a fourth horizontal hoop near the top.


Covering and Finishing the Wigwam
-
1Lash the bundles of cattail thatching to the frame. Secure the cattail thatching directly to the hoops, starting from the bottom-most hoop. Leave a patch empty between the two poles you marked off for the doorway. Also, leave a hole at the top for the smoke to come out of.[26]
- Try to use one long, continuous piece of string for this.
- Give the wigwam a gentle shake when you are done. This will fluff out the thatching and make it water and windproof.[27]
- If you are making a model, you can hot glue the thatching to the frame instead.
-
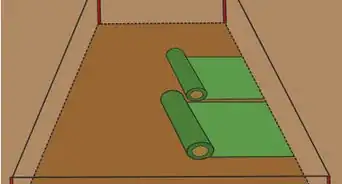
2Add a large, woven cattail mat for the doorway. Weave or sew enough cattail leaves to fit over the gap you left in your wigwam. Secure the mat to the hoop just above your doorway with pieces of rope. If you don't have enough cattail leaves, you can use a blanket or hide instead.
- Lash a stick to the bottom of your mat. This will make it easier to roll it up and tie it in place.[28]
- If you are making a model, you can use a scrap of loosely-woven fabric, such as linen or burlap. You can also use a piece of dried corn husk, or paint a piece of paper to look like a woven mat.
-
3Tie the birch bark sheets to the top two hoops of your wigwam. Start with the lower hoop first, then do the top one. This will create an overlapping, shingle effect. Tie the largest birch bark sheet to the smoke hole at the top of the wigwam. Be sure to tie just one side of it, and leave the other three sides untied. This way, you can open and close it like a flap.[29]
- Remember to leave a gap on the lower hoop for the doorway.
- If you are making a model, you can hot glue the sheets instead.
-
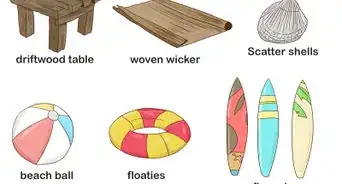
4Consider adding additional layers of protection. This is not absolutely necessary, but it can help make the wigwam warmer and more waterproof. Great options include: blankets, canvas, dried bark, or hides. You only need to place them over the birch bark shingles. Remember to leave spaces for the doorway and smoke hole.[30]
- If you are making a model, you might want to skip this step. If you really want to do it, try using suede or velvet for the fur, or felt for the blankets.
-
5Build a hearth or fire pit in the center. Start by digging a 6-inch (15.24-centimeter) deep, 3-foot (0.91-meter) wide well into the center of your wigwam. Line the hole with small stones or clay. Add a ring of stones around the pit to help rein in the fire.[31]
- If this is a model, you can make the hearth using pebbles or pieces of clay. You don't have to line the hole with anything.
-
6Consider building benches or sleeping platforms halfway around the wigwam. You don't have to do this, but it can make the wigwam more livable. Cover the benches with dried grass or hides. You can use the benches for seating during the day, and sleeping during the evening. You can also store items under the benches.[32]
- If this is a model, you could build sleeping platforms using popsicle sticks, twigs, or paper, then carefully slide them into the wigwam through the doorway.


Community Q&A
-
QuestionCan I use dry wood instead of saplings?
 Community AnswerNo. The dry wood won't bend as easily and will snap. If you feel bad about uprooting the saplings, plant some more.
 -
QuestionCan I live in the woods at age 11?
 Community AnswerYes, but I do not recommend it because you have to worry about your source of food and drinkable water; you would have to cope with being alone and possibly scared. If your family is abusive, call the cops or run away to a nearby family member.
 -
QuestionIs it a good idea to train and get physically prepared before I go off to try living in the wild?Community AnswerYes. Being knowledgeable and strong is important. You need to be able to take care of yourself with just the resources around you.
Things You'll Need
- 16 15-foot (4.5-meter) ash saplings, 2 inches (5.08 centimeters) thick
- 12+ 15-foot (4.5-meter) ash or basswood saplings, 1 inch (2.54-centiemter) thick
- 50 bushels dried cattail leaves
- 7 to 10 sheets of birch bark
- 300+ feet (91.4+ meters) jute, sisal, or basswood bark twine
- Axes, knives, machetes, saws, etc. (for cutting)


References
- ↑ http://www.native-languages.org/houses.htm
- ↑ http://www.primitiveways.com/wigwam.html
- ↑ http://www.woodlandindianedu.com/wigwamframes.html
- ↑ http://www.nativetech.org/wigwam/construction.html
- ↑ http://www.woodlandindianedu.com/wigwamframes.html
- ↑ http://www.primitiveways.com/wigwam.html
- ↑ http://www.primitiveways.com/wigwam.html
- ↑ http://www.nativetech.org/wigwam/construction.html
- ↑ https://www.uwlax.edu/loadedpages/academics/archaeology/schultz/
- ↑ http://www.primitiveways.com/wigwam.html
- ↑ https://www.uwlax.edu/loadedpages/academics/archaeology/schultz/
- ↑ http://www.nativetech.org/wigwam/construction.html
- ↑ http://www.nativetech.org/wigwam/construction.html
- ↑ https://www.warpaths2peacepipes.com/native-american-houses/wigwam.htm
- ↑ http://www.woodlandindianedu.com/wigwamframes.html
- ↑ http://www.woodlandindianedu.com/wigwamframes.html
- ↑ http://www.nativetech.org/wigwam/construction.html
- ↑ http://www.nativetech.org/wigwam/construction.html
- ↑ https://www.warpaths2peacepipes.com/native-american-houses/wigwam.htm
- ↑ http://www.nativetech.org/wigwam/construction.html
- ↑ http://www.nativetech.org/wigwam/construction.html
- ↑ http://www.nativetech.org/wigwam/construction.html
- ↑ http://www.primitiveways.com/wigwam.html
- ↑ http://www.nativetech.org/wigwam/construction.html
- ↑ http://www.nativetech.org/wigwam/construction.html
- ↑ http://www.primitiveways.com/wigwam.html
- ↑ http://www.primitiveways.com/wigwam.html
- ↑ http://www.primitiveways.com/wigwam.html
- ↑ http://www.primitiveways.com/wigwam.html
- ↑ https://www.warpaths2peacepipes.com/native-american-houses/wigwam.htm
- ↑ http://www.nativetech.org/wigwam/construction.html
- ↑ https://www.warpaths2peacepipes.com/native-american-houses/wigwam.htm
- ↑ http://www.primitiveways.com/wigwam.html
- ↑ http://www.woodlandindianedu.com/wigwamframes.html
- ↑ http://www.woodlandindianedu.com/wigwamframes.html
- ↑ http://www.primitiveways.com/wigwam.html
- ↑ http://www.primitiveways.com/wigwam.html
- ↑ https://www.warpaths2peacepipes.com/native-american-houses/wigwam.htm
About This Article