This article was co-authored by wikiHow staff writer, Janice Tieperman. Janice is a professional and creative writer who has worked at wikiHow since 2019. With both a B.A. and M.A. in English from East Stroudsburg University, she has a passion for writing a wide variety of content for anyone and everyone. In her free time, you can find her working on a new crochet pattern, listening to true crime podcasts, or tackling a new creative writing project.
wikiHow marks an article as reader-approved once it receives enough positive feedback. In this case, 90% of readers who voted found the article helpful, earning it our reader-approved status.
This article has been viewed 86,108 times.
Learn more...
Worm farms are bins or containers of bedding, compost, and worms that help produce worm casings—a super nourishing fertilizer for plants. Despite the name, you don’t have to live on a large property to make your worm farm. As long as you live in a relatively warm area and have some basic gardening supplies, you’re ready to get started.[1] In as quickly as 3 months, you may be able to harvest some nourishing casings for your own garden!
Steps
Assembling the Worm Bin
-
1Poke twenty 1⁄4 in (0.64 cm) holes in the bottom of 2 large plastic bins. Flip 2 large, 8 to 10 US gal (30 to 38 L) plastic bins upside down so the bottoms are facing up. Drill around 20 large holes along the bottom of each bin, which will make it easier to harvest worm casings later on.[2]
- If you don’t have an electric drill on hand, measure out multiple large holes along the bottom of the bin and cut them out with a box cutter.
- The easiest way to do this is make a grid of 5 rows and 4 columns.
-
2Drill small holes that are 1 1⁄2 in (3.8 cm) apart along all sides of the bins. Replace the large bit with a 1⁄16 in (0.16 cm) bit. Create a line of small holes that are about 1 1⁄2 in (3.8 cm) apart just below the rim of each bin. For extra ventilation, drill a second line of holes around the bin that’s about 4 in (10 cm) below each bin’s rim.[3]
- It’s important that your worm farm gets a lot of air, which will help them stay healthy and well-nourished.
Advertisement -
3Create 30 holes on both bins’ lids with a 1⁄16 in (0.16 cm) drill bit. Make the holes even by drilling 5 rows and 6 columns of small holes along the lids. Set these lids aside for later, since you’ll need them when the worm farm is fully assembled.[4]
-
4Cut a newspaper into thin, 1 in (2.5 cm) strips. Take 50 sheets of black-and-white newspaper and begin cutting or ripping it into smaller strips. Don’t use any colored sections of newspaper, as the dyes may be bad for the worms.[5]
- You’ll probably need about 10 lb (4.5 kg) of newspaper to make enough bedding for your farm.
-
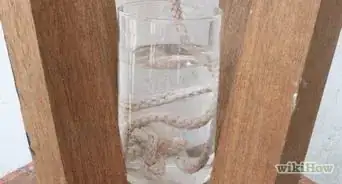
5Soak the cut newspaper in lukewarm water for 1 day. Place the newspaper strips in a large bucket or basin of lukewarm water. Let them sit for around a day so they can soak up as much water as possible. Once 24 hours pass, squeeze any leftover water out of the strips and set them aside.[6]
- You don’t want the strips to be sopping wet, but more like the consistency of moist soil.
-
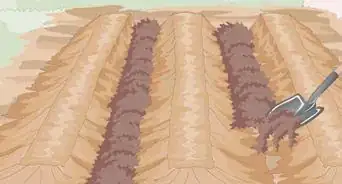
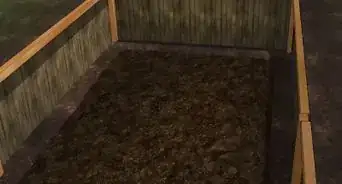
6Arrange the wet newspaper strips in the bottom 8 in (20 cm) of the bin. Lay out the strips in your plastic bin. Keep in mind that the newspaper serves as the base of the bedding, and will take up the most space in the bin. Place this down first, so the worms have a comfortable place to call home.[7]
-
7Add in a handful of leaves on top of the newspaper. Grab some old leaves from your yard or sidewalk and arrange them on top of this newspaper. This gives your worms more material to work with as they nest.[8]
- It’s not a big deal if you don’t have leaves lying around.
- You only need to use a thin layer of leaves for this, as the newspaper will be the bulk of the bedding.
-
8Mix a scoop of dirt into the bin. Pick up a large portion of soil with a garden trowel and layer it on top of the newspaper and leaves. Note that dirt helps worms digest their food, which will improve your worm farm in the long run.[9]
- Like the leaves, the dirt can be dumped in a thin layer on top of the newspaper and then mixed in.


Introducing the Worms
-
1Place a piece of wet cardboard outside overnight to collect some worms. Soak a piece of cardboard under running tap water until it’s dripping wet. Arrange this cardboard somewhere outside on a section of open soil. Leave the cardboard out overnight, then check the next day to see how many worms have gathered.[10]
- Red wigglers are a great worm to include in your farm, since they can be found in a lot of different places.[11]
Tip: If you don’t feel like catching your own worms, you can buy some at a store that sells fishing bait.
-
2Weigh the worms on a scale to see if you have 1 lb (0.45 kg). Transfer the worms to a small bucket or container and place it on a scale. Subtract the weight of the bucket to get an idea of how heavy the worms are. For a beginner worm farm, start off by raising 1 lb (0.45 kg) or so of worms.[12]
- It’s important to know how many worms you have, so you know what to feed them.
Did You Know? You can find about 500 worms in 1 lb (0.45 kg).
-
3Transfer the worms into your bin. Pour the worms into the bedding and let them get comfortable in the newspaper, soil, and leaves. Don’t worry about moving the worms around manually—they’ll find their way around the farm soon enough.[13]
-
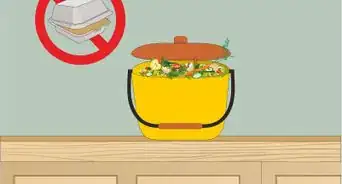
4Add 1⁄2 lb (0.23 kg) of food scraps when first starting your farm. Save your food scraps after each meal in a large bag, then spread them on top of the bedding. Start by adding a small amount of food scraps, like egg shells, fruit and vegetable peels, coffee grounds, dryer lint, and leftover cereal and pasta.[14]
- Common scraps like apple skin, carrot peels, leftover cereal, discarded coffee grounds, and leftover lint from your dryer are great options to include in your bin.
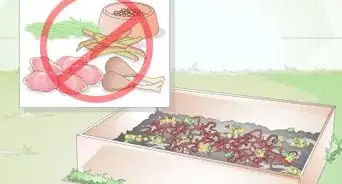
- Don’t add leftover meat, animal waste, oily food, leftover dairy products, citrus peels, or onion scraps to your worm bin, as these foods will entice other pests.
- Worms will have an easier time eating your food scraps if you break them into small chunks.[15]


Sealing off the Bin
-
1Insulate the top of the bin with a piece of dry newspaper. Take a dry section of black-and-white newspaper and layer it on top of the food and bedding. This can prevent your worm farm from smelling really bad, and stops fruit flies from hovering around your farm.[16]
- You can also use a piece of wet cardboard instead, as the worms will eat this over several months.[17]
-
2Place your perforated lid on top of the worm farm. Grab 1 of your lids and secure it on top of the bin. Check that your worm farm has plenty of air and drainage so it stays in great condition.[18]
-
3Stack the worm farm in a second bin to help with drainage. Place your second, perforated lid face-down in a flat area. Arrange your worm farm in the empty, perforated bin, which you can put on top of the upside-down lid. To give your bins more height, stack them on 4 upside-down cups.[19]
- If your lid catches any leftover liquid from the worm farm, you can use it as liquid fertilizer.
- Sturdy plastic cups may be a good option for this.
-
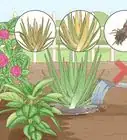
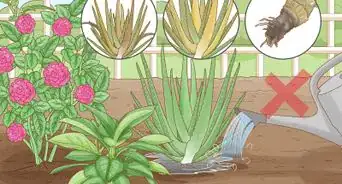
4Move the worm farm to an open area that’s between 60 and 80 °F (16 and 27 °C). Find an outdoor or indoor area that’s a warm temperature. While your worms will be okay between 40 to 60 °F (4 to 16 °C) or 80 to 90 °F (27 to 32 °C) temperatures, they’ll really thrive in warm conditions.[20]
- Worm farms do well in a variety of places, like a laundry room, shady outdoor area, garage, or beneath a kitchen sink.[21]


Maintaining the Worm Farm
-
1Increase the food scraps you add over the next few weeks. Give your worms time to adjust to their new surroundings. After giving them small rations of scraps for 1-2 weeks, slowly add more food to the bin until you’re feeding the worms twice their body weight in scraps. Choose a specific time each week to refill the bin with food scraps so your worms stay nourished.[22]
- You may want to mix some of the food scraps beneath some of the newspaper. This can prevent fruit flies from hovering around.
-
2Replace the top piece of newspaper on an as-needed basis. Keep an eye on the insulation newspaper and see if it looks soggy or mushy. Remove the wet newspaper and replace it with a clean, dry sheet, so your worm farm stays fresh and insulated.[23]
- It may help to have a container of dry newspaper near your farm for safekeeping.
-
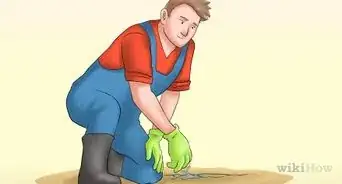
3Fluff and spritz the newspaper bedding with water to keep it damp. Slip on a pair of gloves and move around the bedding to give your worms some fresh air. If the bedding seems dry, spray over it with lukewarm water until it’s slightly wet.[24]
-
4Replace the bedding as it gets used up by the worms. Examine the bedding whenever you tend to your worm farm. As the worms use up the bedding, add in 2 in (5.1 cm) of wet newspaper strips.[25]
- You may need to replace the bedding if it starts getting really smelly or if fruit flies start gathering around.
-
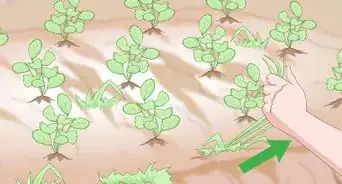
5Harvest the worm casings after about 3-6 months. Look for a black, dirt-like substance collecting in your worm farm. Slide on some gloves and push this black dirt to 1 side of the bin, while pushing the bedding and food to the opposite side. Scoop out these worm casings and place them in a bucket or pot so you can put them to good use.[26]
- Over time, your worms will start leaving the casings on 1 side of the bin and living in the other side.
-
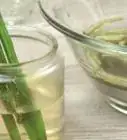
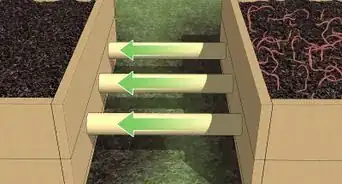
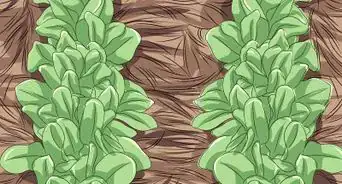
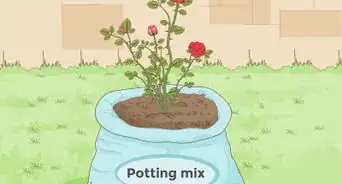
6Incorporate the casings in your gardening as a source of compost. Add the casings to your potted plant soil in a 1:3 ratio, or use it to fertilize the different plants in your garden. To make a liquid fertilizer or “tea,” soak the casings in water, then transfer the liquid to a watering can.[27]
- For instance, you can add 1 to 2 in (2.5 to 5.1 cm) of worm casings along the base of the plants in your garden, like cucumbers, tomatoes, or your favorite perennial flower.
- Worm casings aren’t great for woody trunks and stems, so steer clear of those.


Community Q&A
Did you know you can get answers researched by wikiHow Staff?
Unlock staff-researched answers by supporting wikiHow
-
QuestionShould I wet the soil for my worms if it gets dry?
 wikiHow Staff EditorThis answer was written by one of our trained team of researchers who validated it for accuracy and comprehensiveness.
Staff AnswerwikiHow Staff EditorStaff AnswerYes! If the newspaper bedding and soil mixture begin to dry out, spritz them with some water. If you end up spraying too much water, add some dry newspaper strips to your worm farm instead.
Support wikiHow by unlocking this staff-researched answer.
-
QuestionIf doing a worm farm outside any concerns about high temps and how do you resolve thatwikiHow Staff EditorThis answer was written by one of our trained team of researchers who validated it for accuracy and comprehensiveness.
Staff AnswerwikiHow Staff EditorStaff AnswerWorms are pretty hardy and can live in temperatures up to 90 degrees Fahrenheit (32 degrees Celsius). Ideally, worms do best in warm temperatures, so try and find a shady area to keep your worm farm.Support wikiHow by unlocking this staff-researched answer.
-
QuestionCan worm farms just be a jar with dirt and food or do I need a bigger containerwikiHow Staff EditorThis answer was written by one of our trained team of researchers who validated it for accuracy and comprehensiveness.
Staff AnswerwikiHow Staff EditorStaff AnswerWorm farms are generally made with a large container like a plastic bin or bucket, so you can harvest a lot of casings eventually.Support wikiHow by unlocking this staff-researched answer.
Warnings
- While worms thrive on most food waste, they don’t like leftover meat, oily foods, pet waste, citrus fruits, leftover dairy, or onions.[29]⧼thumbs_response⧽
Things You’ll Need
- 2 8 to 10 US gal (30 to 38 L) bins
- Electric drill
- 1⁄4 in (0.64 cm) drill bit
- 1⁄16 in (0.16 cm) drill bit
- Newspaper strips
- Leaves
- Dirt
- Wet cardboard
- 1 lb (0.45 kg) of worms
- 2 lb (0.91 kg) of food scraps
- Dry newspaper
- Gloves
- Water
- Bucket or basin


References
- ↑ https://hgic.clemson.edu/factsheet/worm-composting/
- ↑ http://whatcom.wsu.edu/ag/compost/easywormbin.htm
- ↑ http://whatcom.wsu.edu/ag/compost/easywormbin.htm
- ↑ http://whatcom.wsu.edu/ag/compost/easywormbin.htm
- ↑ https://aggie-horticulture.tamu.edu/archives/parsons/publications/worm/worm.html
- ↑ https://lancaster.unl.edu/pest/resources/vermicompost107.shtml
- ↑ https://hgic.clemson.edu/factsheet/worm-composting/
- ↑ http://whatcom.wsu.edu/ag/compost/easywormbin.htm
- ↑ https://hgic.clemson.edu/factsheet/worm-composting/
- ↑ http://whatcom.wsu.edu/ag/compost/easywormbin.htm
- ↑ https://hgic.clemson.edu/factsheet/worm-composting/
- ↑ http://whatcom.wsu.edu/ag/compost/easywormbin.htm
- ↑ http://compost.css.cornell.edu/worms/steps.html
- ↑ https://hgic.clemson.edu/factsheet/worm-composting/
- ↑ http://compost.css.cornell.edu/worms/steps.html
- ↑ http://compost.css.cornell.edu/worms/steps.html
- ↑ http://whatcom.wsu.edu/ag/compost/easywormbin.htm
- ↑ http://whatcom.wsu.edu/ag/compost/easywormbin.htm
- ↑ http://whatcom.wsu.edu/ag/compost/easywormbin.htm
- ↑ https://aggie-horticulture.tamu.edu/archives/parsons/publications/worm/worm.html
- ↑ http://whatcom.wsu.edu/ag/compost/easywormbin.htm
- ↑ https://hgic.clemson.edu/factsheet/worm-composting/
- ↑ http://whatcom.wsu.edu/ag/compost/easywormbin.htm
- ↑ http://compost.css.cornell.edu/worms/steps.html
- ↑ https://hgic.clemson.edu/factsheet/worm-composting/
- ↑ https://hgic.clemson.edu/factsheet/worm-composting/
- ↑ https://hgic.clemson.edu/factsheet/worm-composting/
- ↑ https://m.youtube.com/watch?v=CvCCuvi6eHw&t=1m43s
- ↑ https://hgic.clemson.edu/factsheet/worm-composting/