This article was co-authored by Lauren Kurtz. Lauren Kurtz is a Naturalist and Horticultural Specialist. Lauren has worked for Aurora, Colorado managing the Water-Wise Garden at Aurora Municipal Center for the Water Conservation Department. She earned a BA in Environmental and Sustainability Studies from Western Michigan University in 2014.
wikiHow marks an article as reader-approved once it receives enough positive feedback. In this case, 87% of readers who voted found the article helpful, earning it our reader-approved status.
This article has been viewed 287,975 times.
Through the magic of composting, you can turn organic matter, like food waste or leaves, into fertilizer that you can use around your yard or in your garden. Pit composting, also sometimes called trench composting, is less unsightly than a compost pile and less work than building a homemade compost bin. All you need to do is grab a shovel, dig a hole, and you’ll be ready to add compost material to it.
Steps
Digging a Pit and Adding Compost Materials
-
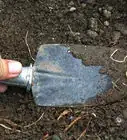
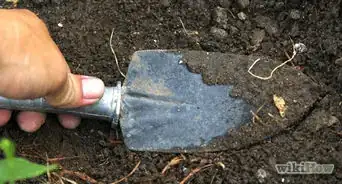
1Dig the hole for your compost pit. Your compost hole should be about 1 ft (30.5 cm) deep. The area of the hole will be determined by the amount of organic matter you want to add. At most, the compost material should reach a depth of 4 in (10 cm) in the pit.[1]
- When estimating the hole's size, keep in mind that the compost material will be finely chopped or torn to pieces before being thrown in the hole.
- Your pit can be as wide as you like. Garden rows, for example, can be enriched with a compost trench dug at standard pit depth.
- If you have a lot of compost material, you can dig a deeper pit, but avoid going deeper than about 3.2 ft (1 m). Important decomposing organisms cannot live beneath this depth.[2] Try making your pit longer or wider if you need room for more material.
-
2Chop your compost materials finely. Underground composting happens at a much slower rate than aboveground setups. Exposing as much surface area of the compost materials as possible is the key to speeding the process.
- Kitchen scraps can be ripped apart by hand, chopped with a knife, or even pulverized in a blender or food processor.
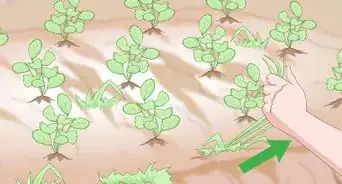
- Yard scraps can be broken down using a lawn mower. Aim for pieces no bigger than 2 to 3 in (5 to 8 cm) long, wide, and thick.[3]
Advertisement -
3Add the organic materials to the compost pit. It’s time to start composting! Dump your food scraps and yard waste into the hole, but remember – you don’t want the materials you'll be composting any taller than about 4 in (10 cm).[4]
- Use a shovel to mix the materials together so that they decompose as evenly as possible.
- It’s especially important to make sure your carbon-rich materials (such as paper and dried leaves) are mixed thoroughly with your nitrogen-rich materials (like vegetable scraps and fresh grass clippings).
- Well-mixed compost materials are important from the outset, as you generally do not turn the materials like you would with other kinds of compost setups.


Maintaining a Filled Pit
-
1Cover the hole with a board if you plan to add more to it. If your compost pit isn’t quite full, you can add more to it later. Cover the materials in the pit with a fine layer of soil or carbon-rich material, like shredded paper or dead leaves, then close it up with a board.[5]
- Animals may be enticed to your compost pit in hopes of getting an easy meal. Use heavy rocks to keep your board in place over the pit.[6]
- So you don’t overfill the pit, use a permanent marker to write the date and height of the materials on the board covering.
- Each time you insert fresh compost materials, cover the top layer with more soil or carbon-rich material. When the materials reach 4 in (10 cm) in height, it's ready to be filled.
-
2Cover your compost with soil when full. Once you have finished adding compost materials to the pit, you can backfill it with the soil you removed. Fill the pit until it is level with the surrounding soil.[7]
- To prevent unsightly patches of dirt where you’ve dug the pit, cover it with sod or seed it with grass.
-
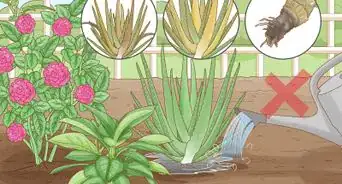
3Improve decomposition by watering the compost area. Underground compost decomposes more slowly than above ground piles. Speed up this process by ensuring the area stays fairly wet with a garden hose.
- During dry weather, soak the ground above the compost pit with a hose. Dryness will make it more difficult for microbes to break down your scraps.
- If the area is kept sufficiently moist, underground compost should be fully decomposed in about a year.[8]
-
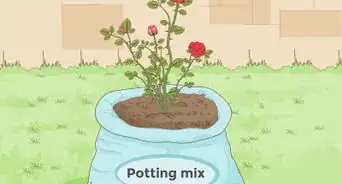
4Grow plants above the compost pit when it has decomposed. A major benefit of underground composting is that you don't have to perform any extra steps to harvest the compost. The best way to take advantage of this is to plant your plants directly over the compost pit.[9]
- During the year, the decomposed scraps will work themselves into the soil, enriching it naturally.
- If you can, wait at least 1 year before planting to ensure that your plants will have access to the maximum amount of composted nutrients.


Using a Three-Season Rotation
-
1Divide your garden area into 3 rows. Each row should be roughly 1 ft (30.5 cm) wide. The rows containing your compost trench and plants should be separated by an empty middle row.
- Using a 3-season rotation will keep garden soil nutrient rich even after many years of growing.
- If you keep your garden in the same place every year, the plants will deplete the soil’s nutrients over time, making it harder to grow things.
-
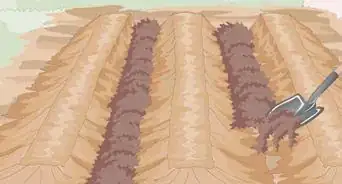
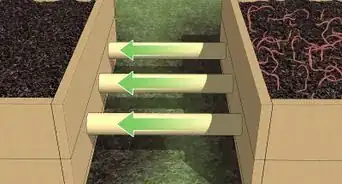
2Dig a compost trench that runs the length of the row. To ensure the entire row receives an equal amount of compost enrichment, dig a 1 ft (30.5 cm) deep trench that runs down its middle. A hoe works well for this purpose.[10]
- Remember to keep an empty row between your compost row and the row containing plants during your first year of composting.
-
3Maintain the trench as you would a normal pit. Fill the trench evenly with compost material until it reaches 4 in (10 cm) high. When you reach that level, the trench is ready to be refilled with dirt. Water the refilled compost trench regularly to improve its decomposition.
- If you plan on adding more compost later, cover compost materials with soil and seal it with a board, as described in the “Maintaining a Filled Pit” method above.
-
4Rotate the position of plants and the compost trench in the second year. At the start of the new planting season, you’re going to move the rows containing your plants and trench. Dig your compost trench in the row the plants were last year, and shift the row with plants to the one left empty last year.[11]
-
5Reposition plants and the compost pit in the third year. At the start of the planting season in the third year, the trench-row will continue to chase after the plant-row (in a manner of speaking). The second-year plant-row becomes your new trench-row, and the empty row becomes your new plant-row.
- By continuing to rotate plant-rows and compost trench-rows in this fashion, you can keep your garden well supplied with nutrients so it can thrive.


Can You Mix Compost With Soil?
Expert Q&A
Did you know you can get expert answers for this article?
Unlock expert answers by supporting wikiHow
-
QuestionWhat do you mean by the 4 in (10cm)?
 Lauren KurtzLauren Kurtz is a Naturalist and Horticultural Specialist. Lauren has worked for Aurora, Colorado managing the Water-Wise Garden at Aurora Municipal Center for the Water Conservation Department. She earned a BA in Environmental and Sustainability Studies from Western Michigan University in 2014.
Professional GardenerYour layer of compost won’t exceed a depth of 4 in (10 cm) in the pit. If your pit is 12 inches (30.5 cm) deep, your compost layer will be 4 in (10 cm) and the fill dirt will be 8 in (20 cm).
Support wikiHow by unlocking this expert answer.
-
QuestionWhat is a compost pit?
 Kate ZhangCommunity AnswerIt's basically a compost, but simpler. It is used when you only need compost in a certain area. The compost is done underground rather than in a compost bin. Therefore, it is easier for the good compost dirt to be transferred. You can just place the plants in the compost pit and you will have good dirt for months.
 -
QuestionHow is it useful to the environment?
 Community AnswerCompost is useful to the environment because it reuses the nutrients in organic waste (like food and yard clippings) rather than throwing them away in a landfill, where your yard won't benefit from them at all.
Warnings
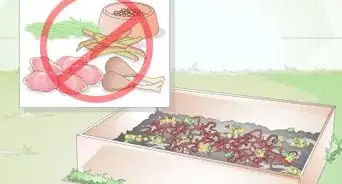
- Never add animal products to your compost pit. Meat, bones, dairy, and fats can all go rancid, present a health risk, and attract rodents and other unwanted pests to your compost.⧼thumbs_response⧽
Things You'll Need
- Food processor (optional)
- Garden hose
- Hoe
- Knife
- Lawn mower (optional)
- Organic scraps (like food waste and leaves)
- Shovel (or spade)
- Wooden board


References
- ↑ http://web.extension.illinois.edu/homecompost/methods.cfm
- ↑ http://www.fao.org/docrep/014/i2230e/i2230e14.pdf
- ↑ http://web.extension.illinois.edu/homecompost/methods.cfm
- ↑ http://web.extension.illinois.edu/homecompost/methods.cfm
- ↑ http://web.extension.illinois.edu/homecompost/methods.cfm
- ↑ http://www.fao.org/docrep/014/i2230e/i2230e14.pdf
- ↑ http://www.fao.org/docrep/014/i2230e/i2230e14.pdf
- ↑ http://www.fao.org/docrep/014/i2230e/i2230e14.pdf
- ↑ http://web.extension.illinois.edu/homecompost/methods.cfm
About This Article

To make a compost pit, start by digging a hole 1 foot deep and as large as you want depending on how much compost you plan to make. Then, chop up your scraps from the kitchen or yard finely to help speed up the decomposition process. Next, spread your yard waste and kitchen scraps in the pit, taking care not to have a layer of organic material any deeper than 4 inches. Additionally, make sure items like paper and dried leaves are well mixed with vegetable scraps, as this will aid decomposition. Finish by covering your pit with a board to keep animals out. For tips on how to speed up the composting process, read on!