This article was co-authored by Anthony "TC" Williams. Anthony "TC" Williams is a Professional Landscaper in Idaho. He is the President and Founder of Aqua Conservation Landscape & Irrigation, an Idaho Registered Landscape Business Entity. With over 21 years of landscaping experience, TC has worked on projects such as the Idaho Botanical Garden in Boise, Idaho. He is a Idaho Registered Contractor and a previously Licensed Irrigator in the State of Texas.
This article has been viewed 68,932 times.
If you've always wanted a lush, emerald-green lawn but yours is weedy with patches of bare dirt, the answer lies in sod. When you buy sod, you're essentially paying for someone else to do the tough work of growing healthy, thick grass from seed. All you have to do is make sure the soil underneath provides the right conditions for the sod to take root, and you'll have that perfect lawn you've dreamed about. Read on to learn how to get the soil ready, select and lay your sod, and care for your grass so it lasts for years to come.
Steps
Preparing the Soil
-
1Check out the composition of your soil. If you've had trouble growing healthy grass in the past, the problem is probably related to the makeup of your soil. If it has a lot of tightly-packed clay, the grass roots aren't able to get the oxygen they need to grow. If it has too much sand, it won't hold water and nutrients near the roots. Grass grows best in loamy, fertile soil that drains well, and you'll need to amend the soil to fit that description. You can take a soil sample to your local nursery and ask an expert to help you determine its composition, or do it yourself by digging a hole in your yard and filling it with water. Watch what happens:
- Sandy soil will drain in a split second. This means you'll need to work in 2 inches (5.1 cm) of extra compost or topsoil to hold nutrients around the grass roots.
- Clay-packed soil holds water and drains very slowly. Plan to work in 2 inches (5.1 cm) of extra organic matter like peat moss, composted animal manure, composted leaves or yard waste so the grass roots won't suffocate.
-
2Test the pH of the soil. The alkalinity of the soil will also greatly affect how well your grass grows. Take a few soil samples from multiple locations, both near the surface and at a depth of 6 to 8 inches (15–20 cm). Label them well to keep them distinct, then send them to your local agricultural extension or a soil testing lab. Allow two weeks to receive the results.
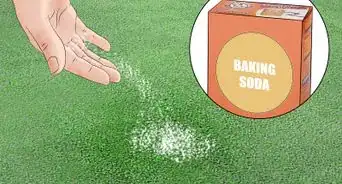
- If the soil has pH of 6 or below, it's too acidic. This can be amended with the addition of lime. Talk with an expert at the garden center to determine exactly how much lime you need to add, or contact a turf professional.
- If the soil has a pH of 6.5 or higher, it's too alkaline for grass. This can be amended with the addition of sulfur or gypsum. To find out exactly how much you need to add, talk with a professional.
Advertisement -
3Clear the yard of obstructions. Remove lawn decorations, large sticks and rocks, and anything else that could get in the way. Take out bricks and construction materials, too. Remove anything larger than about 3 inches (7.6 cm) in diameter so that the tiller won't catch on objects as you work the yard.
-
4Remove weeds. For best results, use a complete vegetation herbicide at least two weeks (if not longer) prior to beginning the project. This will kill all undesirable weeds and help prohibit re-growth.
-
5Rough grade areas that aren't level. If you have a ditch, an uneven hill or a big hole in your yard, it'll be more difficult to lay the sod neatly. Rough grading levels out the ground, creating a smooth surface and helping eliminate drainage problems. It's not absolutely mandatory, but it's a good idea if you want to go the distance to get the perfect lawn.
- To rough grade a large area, use a tractor mounted blade. They're quite expensive to purchase, but you can rent one from a home and garden store.[1]
- For smaller areas, you can rough grade by hand. Use hand tools like garden hoes or large landscaping rakes to break up the soil and soften the edges and slopes around holes and ditches.
-
6Till the soil to a depth of at least 6 inches (15.2 cm). Borrow, rent or buy a soil tiller you can use to loosen the top 6 inches (15.2 cm) of soil in your yard. Tilling the soil loosens it up so that the roots of the grass you lay can breathe and get established. Till the soil using the same method you'd use to mow the lawn, loosening it row by row in sections. Go in a different direction with each pass for a more even surface.
- Tilling the soil not only prepares it for the grass you're about to lay, it also helps with weed control by turning over the weeds that are about to sprout.
- If your soil is especially compact and laden with clay, till to a depth of 8 inches (20.3 cm) instead of 6, to make sure the grass roots will have plenty of space to grow without getting compacted.
-
7Spread 2 inches (5.1 cm) of topsoil or compost and other amendments over the soil. Use a good-quality topsoil or compost to provide a rich bed on which to lay the sod. If you determined that your soil needs extra compost, organic matter, lime or sulfur to achieve the right conditions, spread it at the same time. Run the tiller over the yard once more to mix in the compost, topsoil and other amendments.[2]
- You can spread the topsoil, compost and amendments by hand or using a rented soil spreading machine.
-
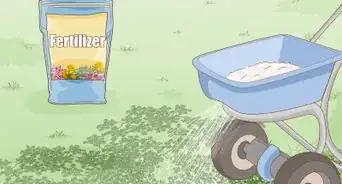
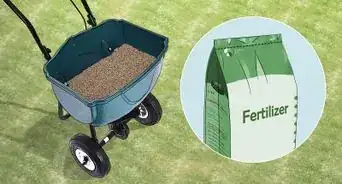
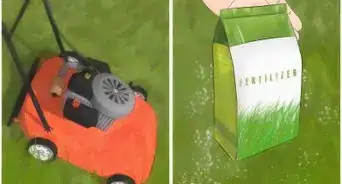
8Use a spreader to lay down fertilizer. This last step ensures that the sod you lay will have all the nutrients it needs to get a healthy start. High-phosphate starter fertilizer is usually recommended.[3] Lay it evenly and work it into the soil according to the instructions that come with the packaging.


Buying Sod
-
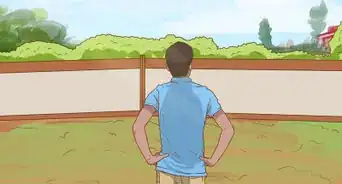
1Measure your lawn. Use a measuring tape to measure the length and width of the lawn. Multiply the two together to get your lawn's area. Try to get exact measurements so you purchase the right amount of sod. Too little sod will result in an uneven-looking lawn that doesn't grow in as healthy as it should. Too much sod can get very expensive, since it usually runs about $0.40 per square foot.[4]
- If your lawn is not rectangular, sketch your lawn and divide it into rectangles, triangles, or other easily measured sections. Find the area of each section and add them all together.
-
2Buy sod from a local turfgrass company. Choose a company that other people in your area have used before with successful results. The company should provide you with a few different options as to what type of grass will do well in your region. Don't be tempted to order from a faraway place just because it showcases beautiful grass on its website; chances are, the grass won't establish well in your climate. Choose a good company and talk with sales representatives to make a smart choice about what grass to grow.
- It's best to choose a grass that's native to your area. This way you can ensure it will grow well in your climate. Cool season grasses (grasses that grow fastest in the spring and fall) like Kentucky bluegrass, perennial ryegrass, tall fescue, and fine fescue grow best in the northern US states, where the winters are cold and the summers are hot. Warm season grasses (grasses that thrive in very hot weather) like Bermuda grass, centipedegrass, St. Augustinegrass, bahiagrass, and zoysiagrass, grow best in the southern states and subtropical regions.
- When you're deciding which grass to get, take use into account as well. Do you plan to walk over your grass frequently, and play sports or have parties on the lawn? Or do you just want a pretty lawn to gaze upon from the window? Some varieties are sturdy, some are soft, some are high maintenance, and some are more colorful than others. Tell the sales representative what you're looking for.
- Ask the representative whether they cut and deliver their sod the same day. Sod that sits around for several days before delivery won't be as fresh and healthy.
-
3Time the delivery so you can lay sod the same day. It's important to lay sod the same day it's delivered. Waiting too long will give the sod time to dry out, and can damage the roots. Give your sod the best chance to grow healthy by laying it as soon as it comes. It'll be delivered to you in long rolls, and the entire process of laying it should only take a day.
- Sod is quite heavy and usually comes on a heavy duty pallet in amounts of 450 square feet or more. A single pallet of sod can weigh over a ton (2,000 lbs), so a half ton pickup truck will not carry it well. Before placing your order, check whether there is a minimum delivery amount, and whether the sod farm or nursery can transport it to your site.


Laying Sod
-
1Water the soil. In order for the sod to establish, it's best to start with freshly watered soil. It doesn't need to be soaking wet; just use a sprinkler to lightly moisten everything before you get started.
-
2Start by laying sod along a long edge. Unroll the first piece of sod next to a driveway or a street. Line it up so that the edge of the sod is exactly aligned with the edge of the yard, with no extra dirt exposed. Carefully unroll the entire piece of sod so that the first long edge is covered. This provides a strong edge against which you'll lay the rest of the sod.
- Starting from the middle instead will make it tricky to lay the sod in a logical matter without leaving any gaps or short ends.
- Make sure to roll each piece of sod in the same direction. If you roll a piece in reverse it will look very different from its neighbor, although they will eventually grow to an even appearance.
-
3Lay it in a brick-like pattern. Cut the second strip of sod in half lengthwise, and lay it directly adjacent to the first. Keep laying sod in a staggered, brick-like pattern. Laying sod in this fashion will make the seams less apparent later.[5] Make sure that the edges of the sod butt up against each other without overlapping. Don't leave gaps at the seams; these exposed edges will be prone to drying out and leaving brown spots in the yard. Continue laying sod in this manner until the entire yard is covered and no seams are visible.
- Use a box cutter to cut shorter pieces of sod where you need to fill in gaps or lay sod around corners.
- However, leave the sod pieces as large as possible. Don't cut them into smaller pieces unless you need to, since the smaller pieces are more prone to drying out before they get established.
- Seam all the edges by firmly rolling them together.
- Avoid walking or kneeling on the sod as you lay it, since this can cause air pockets and indentations to form.
-
4Lay sod around hills instead of from top to bottom. Laying the sod horizontally across the hills, rather than vertically along the hills, will prevent the hill from eroding. When the grass roots establish themselves they'll hold the dirt underneath in place. If you lay them vertically, especially on steep hills, you might encounter problems with the strips of sod bunching toward the bottom instead of staying in place on the hill.
- If needed, purchase sod or landscape "fabric staples" to pin the sod in place. Be sure to mark them clearly or paint them a visible color for removal once the sod has rooted.
-
5Shape the sod around curves. Since the key is to keep the sod in large pieces whenever possible, you can lay around curves by reshaping it instead of cutting it apart. Drape a large piece of sod next to the curve and pinch it together in a few spots so that the shape of the piece wraps neatly around the curve. Use your cutter to chop off the the raised areas that you pinched, and set aside the two smaller triangular pieces. Now you've essentially created two darts in the sod, allowing it to take on a semi-circular shape. Pull the cut edges of the darts together so that they lay right next to each other, with no gap remaining.[6]
-
6Cut the sod to lay it around trees and other obstacles. If you encounter a tree or another obstacle you need to lay the sod around, drape it over the object and carefully cut the sod so that it fits around the object's base. Save the cutouts so you can use them if you have any small gaps to fill in later.
- If you're laying sod around a tree, don't lay it right up against the tree's base. Laying it over the roots could damage the tree. Instead, cut out a circle so that the edge of the sod is a few feet from the tree.
- If you have a lot of trees or other obstacles to work around, you might want to get a sod cutter to make the job a little easier. Cutting shapes out of the sod using just a box cutter can get time consuming.


Caring for Your Lawn
-
1Walk over the lawn with a lawn roller. Fill a lawn roller ¾ full of water and walk it over the entire sod. This presses down the sod to ensure good root contact with the soil before watering.
-
2Water it thoroughly for the first two weeks. Keeping the grass moist during the first few weeks is essential. During this time, the grass roots are establishing and growing. Without plenty of water, this process will slow or halt, and the sod die before it takes. After the first two weeks, water the grass a few times a week to keep it from drying out.
- Use a sprinkler system to ensure the grass gets evenly watered.
- Don't wait until the grass looks brown to water it. Do a soil test by sticking your finger into the dirt. If the soil feels moist to a depth of several inches, it's fine. If the dirt feels dry on the surface or to a depth of an inch or two, it's time to water it.
- Shade-grown grass should be watered less frequently, since it holds dew longer.
- Water just to the point of puddling, then stop. If the sod lifts up off the soil, it has been overwatered.
-
3Mow once the grass is at least 3 inches (7.6 cm). Mowing before the roots are well established can pull them out of the soil and damage your sod. Wait patiently until the grass is at least 3 inches (7.6 cm) tall, and gently pull up on several areas of sod to confirm it is firmly attached. Once the lawn is ready, mow it down to no shorter than ⅔ of its height, and never below 2 inches (5 cm).
- Always be sure the mower blades are sharp, straight and clean, Mow in a different directional pattern each time the grass is mowed to ensure even growth.
- You can bag the clippings, but leaving them on the lawn will actually improve its health, since they act as free fertilizer.
-
4Fertilize the lawn again after a month. Use the same starter fertilizer to dress the lawn after a month has passed. This is necessary to replace the nutrients that may have been washed away during a month of heavy watering. After the first month, you need only fertilize your grass once or twice a season to replace nutrients in the years to come.
-
5Maintain your lawn to keep it free of weeds. Keeping up with watering, mowing and fertilizing your lawn is the best way to grow thick, healthy grass, and it's also the best way to keep weeds away. Weeds tend to move in when the grass gets patchy. They're nature's way of covering up bare spots in the ground. If you make sure there aren't bare spots to begin with, you won't have to worry much about weeds.
- If you notice an area where the sod seems to be dead, replace it as soon as possible. Tear up the old sod, enrich the soil underneath with compost, and add fresh sod, making sure the seams lay right next to the healthy grass on either side. This will prevent weeds from coming up where the sod is dead.


Expert Q&A
-
QuestionHow do I keep thin strips of sod along the edges from moving out of a narrow trench?
 Anthony "TC" WilliamsAnthony "TC" Williams is a Professional Landscaper in Idaho. He is the President and Founder of Aqua Conservation Landscape & Irrigation, an Idaho Registered Landscape Business Entity. With over 21 years of landscaping experience, TC has worked on projects such as the Idaho Botanical Garden in Boise, Idaho. He is a Idaho Registered Contractor and a previously Licensed Irrigator in the State of Texas.
Experienced LandscaperIt's best to try and avoid placing narrow strips on the edges but, if necessary, purchase some sod or landscape fabric staples and pin them into place. Make sure to remove all staples once the sod is established. -
QuestionHow do I start the stagger of sod when laying it in a pool-damaged area of fresh topsoil?Anthony "TC" WilliamsAnthony "TC" Williams is a Professional Landscaper in Idaho. He is the President and Founder of Aqua Conservation Landscape & Irrigation, an Idaho Registered Landscape Business Entity. With over 21 years of landscaping experience, TC has worked on projects such as the Idaho Botanical Garden in Boise, Idaho. He is a Idaho Registered Contractor and a previously Licensed Irrigator in the State of Texas.
Experienced LandscaperIn the same manner as laying a new installation. Overlap the first piece somewhat into existing grass, cut the next piece in half and lay it, and so on. -
QuestionHow soon can I walk on new sod, and can I let my dogs go to the bathroom on it?
 Community AnswerNever allow animals to urinate on fresh sod for at least 60 days when the roots have begun to take to the soil. Conversely, I would encourage defecation. You still need to check the pH balance of your pet's urine to prevent the roots from ambering, this will occur until the grass has gone twice-dormant. A kit can be purchased at most farm supply shops and many drug stores to check animal urine pH levels.
Things You'll Need
- Soil tester
- Tiller
- Compost and other soil amendments, such as lime, organic matter or sand
- Starter fertilizer
- Rolls of sod
- Sod cutter or box cutter
- Sprinkler


References
- ↑ http://www.modernturf.com/how-to-lay-sod
- ↑ http://www.thisoldhouse.com/toh/article/0,,1082742-2,00.html
- ↑ http://www.thisoldhouse.com/toh/article/0,,1082742-2,00.html
- ↑ http://www.thisoldhouse.com/toh/article/0,,1082742,00.html
- ↑ http://www.thisoldhouse.com/toh/article/0,,1082742-3,00.html
- ↑ http://www.thisoldhouse.com/toh/article/0,,1082742-5,00.html
About This Article

To lay sod, start by clearing your yard of any obstructions and pulling out any weeds. Then, use a soil tiller to till the soil to a depth of at least 6 inches, which will make it easier for the roots on the sod to grow. Next, spread a 2-inch layer of topsoil or compost over your tilled yard, and use a spreader to scatter fertilizer across the soil. Finally, water the soil before rolling out the sod in a brick-like pattern. For more tips from our Landscaping co-author, like how to buy sod, scroll down!