This article was co-authored by wikiHow Staff. Our trained team of editors and researchers validate articles for accuracy and comprehensiveness. wikiHow's Content Management Team carefully monitors the work from our editorial staff to ensure that each article is backed by trusted research and meets our high quality standards.
There are 15 references cited in this article, which can be found at the bottom of the page.
This article has been viewed 70,294 times.
Learn more...
The Eiffel tower is one of the most famous and distinctive buildings in the world. Many people choose to make models of it just for fun, while others are assigned to do it for school. The finished model looks intricate and impressive, but it is actually quite simple to make. All you need are a few materials, patience, and a little bit of time. Keep in mind that you don't have to finish your tower all in one day.
Steps
Creating the Template
-
1Find a line drawing of the Eiffel tower. The drawing needs to be of the Eiffel tower from the side and straight-on. The lines must also be sharp and clear. Do not use a blurry or low-quality drawing.[1]
- Do not use photographs; the trees, people, and buildings will get in in the way.
- Do not use a drawing that includes more than 1 side of the Eiffel tower. You will make each side 4 times, then glue it together to make a 3D tower.
-
2Enlarge the drawing, if necessary. The drawing will be your final template, so make sure that it is the size you want your tower to be. If you found your drawing in a book, you may be able to enlarge it using a photocopier. If you found your drawing online, then use an image editing program, such as Photoshop or Paint, to make the drawing bigger.
- Photoshop, or a similar program, will be your best choice for enlarging the image because you can set the size to inches or centimeters.
Advertisement -
3Trace, photocopy, or print the drawing. If you are good at drawing, you can trace the drawing using tracing paper and a pen or pencil. If you found the drawing in a book, then you should photocopy it. If you found the drawing online, print it out instead.
- If you are printing a large image, be aware that you may need to print it out on multiple pages.
- Tape or glue multiple pages together to create a single image. Make sure that the lines flow smoothly into one another. Do not overlap the lines or leave gaps between them.
-
4Tape your drawing to a flat work surface. Place your drawing on a table, and tape down the bottom corners. If your drawing is on a single sheet of paper, tape down the top corners as well. If your drawing is on multiple sheets of paper, leave the top corners alone.
- If your drawing spans multiple pages, you will need to shift these pages down and re-tape them as you move from section to section.
-
5Cover your template with a piece of clear plastic. This will allow you to glue your pieces to the template, then peel them off. A page protector or clear page (like the kind you'd use in an overhead projector) will work the best. Place the plastic over the base of your drawing, and secure the edges to your table with tape so that it does not slide around.[2]
- You can use wax paper, parchment paper, or even freezer paper, as long as the drawing is dark enough. You must be able to see the lines clearly.


Choosing Your Materials
-
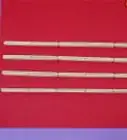
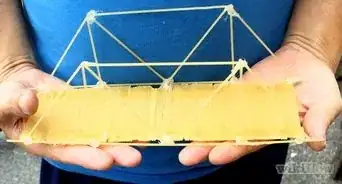
1Use wood if you want to make a traditional model. This is one of the more advanced materials because it requires a lot of cutting and precision. You will need to work with thin strips of balsa wood as well as coffee stirrers (not craft sticks), and tooth picks. You will also need to know how to bend balsa wood into curves.
- To curve balsa wood: soak it in hot water for 1 hour, then bend it to your desired shape. Hold it in place with tape or string until it dries before using it.[3]
-
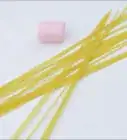
2Try dried pasta and spaghetti as an alternative to wood. Use thick noodles for the frame, and thin noodles for the details, such as railings and lattices. If you need to make a curved piece, cook the noodle long enough for it to become flexible, curve it into your desired shape, then let it dry.
-
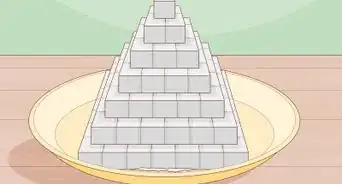
3Use thin cardboard if you don't want to use wood or pasta. Choose a thin cardboard, such as illustration board or Bristol board. You will also need a sharp craft blade to cut it, and a cutting mat to work on. Transfer your template to the cardboard directly and skip the plastic cover.[4]
- Do not use thin cardboard that is only white on the outside and brown on the inside.
- Have several craft blades handy. You will need to change them out as they will dull quickly. Dull craft blades won't make nice cuts.
-
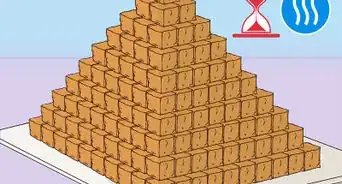
4Try hot glue if you are making a small model. This is best for models that are smaller than a standard sheet of printer paper, about 11 inches (28 cm) tall. Do not use hot glue on anything larger than that, it may collapse. If you want to make a larger model, try any of the other materials listed above.


Creating the Base and Sides
-
1Note the bottom, middle, and top sections. The Eiffel tower has 3 distinct sections: a base, middle, and top. These sections are divided by 2 horizontal railings. Of these sections, the top is the tallest, and includes a small roof. Pay attention to these sections, as you will be working on them individually.
-
2Glue the pieces to make the base's frame. Cut your desired material down for the angled sides of the base. Place a drop of white glue on the top and bottom of each piece, then set it down on the template. Make sure that pieces line up with the lines on the template.[5]
-
3Glue the pieces for the horizontal, vertical, and crisscrossing lines. Cut and glue each piece 1 at a time, otherwise the pieces will get mixed up. Do the horizontal lines first, then the vertical ones. Finish off with the crisscrossing lines. Use the glue sparingly: a single drop at each end of your stick/noodle will be plenty.
- Do not overlap the crisscrossing pieces or you will get too much bulk. Cut and glue the bars separately.
- If you are making a cardboard model, start off with the larger spaces, then move on to the small ones between the crisscrosses.[8]
- If you are using hot glue, follow the same process: horizontal lines first, then the crisscrossing lines. You can overlap the crisscrossing lines, however.[9]
-
4Let the glue dry and turn clear. How long this takes depends on the type of glue that you are using. If you are worried about the glue not being strong enough, you can reinforce all of the joints with a single drop of glue.[10]
- Skip this step if you are making a cardboard model. It might be a good idea to switch to a new blade if the old one is no longer giving you clean cuts.
- This step should only take a couple of minutes for hot glue at the most.
-
5Slide the finished piece off of the template. Use a thin, metal spatula or a ruler to separate the piece from the plastic covering the template. If you notice any glue stuck to the plastic, scrape it off with your fingernail.
- If you made a cardboard model, simply pick the piece up and set it aside. Create another template on another piece or section of cardboard.
- If you made a hot glue model, peel the glue off with your fingernail. Cut or pull off any threads left by the hot glue.
-
6Repeat the process 3 more times. You will need 4 identical pieces for the base. If you are making a cardboard model, you will need to create a new tracing each time. If you are making a stick, pasta, or hot glue model, you can simply work on top of the old template.[11]
-
7Repeat the process to make the 4 remaining sections. You will need 4 pieces for the middle section, and 4 pieces for the top section. If you are using a craft blade, be sure to switch it out for a fresh one whenever the old one starts to create ragged cuts.
- Skip this step if you made the entire model on a single sheet of paper. This includes hot glue models.
-
8Create additional pieces, such as the roof and railings, if desired. Whether or not you do this depends on how detailed you want your Eiffel tower to be. Use the same method as you did when creating the sides of the tower: start with the outline, then fill it in with vertical or crisscrossing lines.[12]
- When making the roof, create each of the 4 walls and 4 roof triangles separately.


Assembling Your Model
-
1Glue the base pieces together to form a square. Draw a line of glue along the inside edge of your first base piece. Place the next piece against it to form a right angle. Glue the final 2 pieces to complete the square. Make sure that the top and bottom edges are aligned.[13]
- Use hot glue or super glue for paper, wood, and pasta models. Tacky glue will work, but you'll need to hold the pieces until they dry.
- Use hot glue for hot glue models. Work 1 side at a time, or the glue will set too fast.
-
2Repeat the process for the middle and top sections. If you need to, use cans, bottles, and blocks to support the pieces as they dry. If you a hot glue model that is all 1 piece, skip this step.
-
3Stack and glue the 3 sections together. If you made platforms and railings, glue them down to the top of the base and middle sections first. Let them dry, then stack and glue all 3 sections together.[14]
- Skip this step if your model is all 1 piece.
-
4Glue on any additional railings. If you made additional pieces, such as railings, you should glue these on as well. Make sure that you align the railings with their designated places on your template. The bottom edge of each railing should align with the side edges of each side piece.
- Use a fast-setting glue for this, such as super glue or hot glue. A thick glue, such as tacky glue will also work, but you will need to hold the piece until the glue dries.
-
5Assemble the roof, if you made it. Glue the walls for the roof together to make a square first. Next, glue the top of the roof to make a pyramid. Glue the pyramid to the walls. Let it dry completely, then glue the entire piece to the top of your tower.
- If you made a tower out of hot glue, you can make a small, triangular mount using hot glue, then glue it to the top of your tower.[15]
-
6Add the spire to the top. Use a toothpick for wood or cardboard models, and a thin noodle for pasta models. Glue the spire to the top of your model with a thick or fast-setting glue. Super glue, tacky glue, and hot glue are great options. You may have to hold the spire for a few moments as the glue sets.
- If you made a hot glue model: draw a thin line of hot glue on a piece of plastic, parchment paper, or wax paper. Let it harden, then peel it off. Glue it to the top of your tower.


Things You'll Need
- Paper
- Clear plastic, parchment paper, or wax paper
- Tape
- Wood sticks, thin cardboard, pasta, or hot glue
- White glue
- Hot glue or super glue

References
- ↑ https://www.youtube.com/watch?v=vlYyV8nl2xk&feature=youtu.be&t=10s
- ↑ https://www.youtube.com/watch?v=vlYyV8nl2xk&feature=youtu.be&t=18s
- ↑ http://pldaniels.com/flying/balsa/howtos/bending-balsa/
- ↑ https://www.youtube.com/watch?v=QRbtNRvHu1k&feature=youtu.be&t=40s
- ↑ https://www.youtube.com/watch?v=vlYyV8nl2xk&feature=youtu.be&t=30s
- ↑ https://www.youtube.com/watch?v=QRbtNRvHu1k&feature=youtu.be&t=1m42s
- ↑ https://www.youtube.com/watch?v=LMWbgiI21Yo&feature=youtu.be&t=30s
- ↑ https://www.youtube.com/watch?v=QRbtNRvHu1k&feature=youtu.be&t=2m
- ↑ https://www.youtube.com/watch?v=LMWbgiI21Yo&feature=youtu.be&t=1m
- ↑ https://www.youtube.com/watch?v=vlYyV8nl2xk&feature=youtu.be&t=6m10s
- ↑ https://www.youtube.com/watch?v=vlYyV8nl2xk&feature=youtu.be&t=3m20s
- ↑ https://www.youtube.com/watch?v=LMWbgiI21Yo&feature=youtu.be&t=2m15s
- ↑ https://www.youtube.com/watch?v=vlYyV8nl2xk&feature=youtu.be&t=3m40s
- ↑ https://www.youtube.com/watch?v=vlYyV8nl2xk&feature=youtu.be&t=3m50s
- ↑ https://www.youtube.com/watch?v=LMWbgiI21Yo&feature=youtu.be&t=6m30s
About This Article

To make an Eiffel tower, start by taping a picture of the Eiffel tower on a flat surface and covering it with clear plastic. Next, glue individual thin wood pieces over the lines of the drawing to create one side of the tower. After the glue dries, slide the base piece off and repeat this process 3 more times. Then, create the middle and top sections in the same way you made the base. To assemble your model, glue the base pieces together to form a square and repeat for the middle and top sections. Finally, stack and glue the 3 sections together. For more tips, like how to use cardboard instead of wood, read on!