This article was medically reviewed by Luba Lee, FNP-BC, MS. Luba Lee, FNP-BC is a Board-Certified Family Nurse Practitioner (FNP) and educator in Tennessee with over a decade of clinical experience. Luba has certifications in Pediatric Advanced Life Support (PALS), Emergency Medicine, Advanced Cardiac Life Support (ACLS), Team Building, and Critical Care Nursing. She received her Master of Science in Nursing (MSN) from the University of Tennessee in 2006.
This article has been viewed 49,267 times.
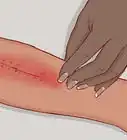
You probably learned about wound assessment and care in nursing school. But maybe so far you haven’t found much cause to use these skills at your job. If that’s about to change, it’s a good idea to review the most common methods for clinical wound assessment. To assess a wound, you need to inspect its appearance and odor, feel it, check for drainage, measure the wound, note the appearance of the wound’s edges, check for signs of infection, and ask the patient about the level of pain they are experiencing from the wound. Completing an accurate assessment will improve the effectiveness of the treatment and help you to identify the progression of the wound’s healing.
Steps
Measuring the Wound’s Length, Width, Diameter, and Depth
-
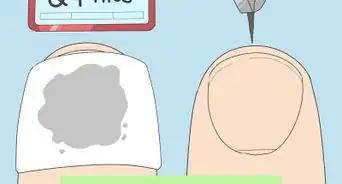
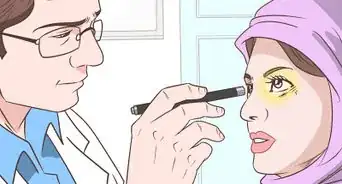
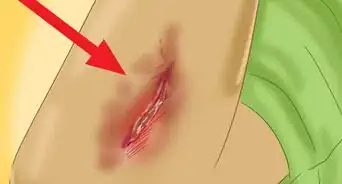
1Draw the shape of the wound and write a brief description. Look closely at the wound and its edges, and then draw the wound’s shape. Write a brief description of the wound’s appearance to go along with the drawing.
- For example, you might use words like jagged, red, puffy, or oozing to describe the wound.
-
2Use a ruler to measure the length. Use a ruler to measure the wound from top to bottom to get the length. Make sure to measure the longest part of the wound to find the full length.Advertisement
-
3Measure the width of the wound with your ruler. Place the ruler over the widest part of the wound.[1]
- You might measure this distance as 8 centimeters, for example.
-
4Find the diameter if the wound is round. If the wound is circular, then use a ruler to measure across the widest part of the circle. This measurement is the diameter of the wound.
-
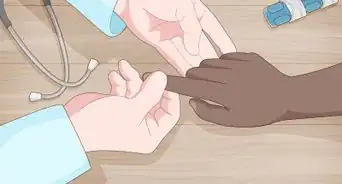
5Use a cotton-tipped applicator to measure the depth. Gently insert the applicator into the deepest part of the wound. This is the part of the wound where the applicator goes in the farthest. You might have to try a couple of different spots if it is not immediately evident which point is the deepest. Gently remove the applicator, using your fingers to hold it just above the point of wound entry. Use the ruler to measure from the bottom of the applicator to where your fingers are.[2]
- For example, the depth of the wound might be 2 centimeters.
-
6Check for undermining. When erosion occurs around the edges of wounds, that is known as undermining. This can result in a small opening in an otherwise large wound.[3] As you check the wound, stop to measure any undermining. Insert a cotton-tipped applicator into each area undermining and measure the same way you measured the depth. [4]
- You might measure the undermining as 3 centimeters, for example.
-
7Use a cotton-tipped applicator to measure tunneling. “Tunneling” refers to secondary wounds that form when there is an infection or other issue in the primary wound.[5] To measure tunneling, insert a cotton-tipped applicator into the tunnel. As in previous steps, grasp the applicator at the wound’s edge and use your ruler to measure in centimeters. [6]
- For example, you might measure the undermining as 2 centimeters.
-
8Record all of your measurements in centimeters using L x W x D. Use the same system to record all of your measurements. That will prevent any inconsistencies in documenting. Always record by writing down the Length (L) x Width (W) x Depth (D).[7]
- You will also need to note the measurements of undermining and tunneling, if any, after you record L x W x D.
- Wounds grow and heal at different speeds. You may only see changes every 2-4 weeks. If you notice movement before that, go ahead and perform your measurements and recordings.
-
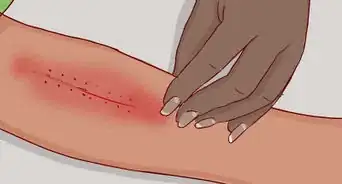
9Note any other features of the wound as you measure it. Along with the wound’s measurement, it is also important to note any unusual findings. These may include:
- Odor
- Color
- Drainage
- Appearance of the skin around the wound
- Signs of infection, such as redness, warmth, or swelling
- Pain level (as reported by the patient)


Measuring with Tracing
-
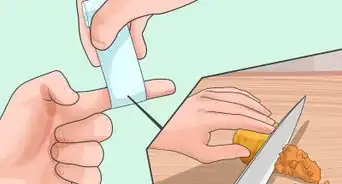
1Obtain 2 wound tracing sheets and clean one of them. You’ll need 2 different types of sheets. 1 is a transparent contact layer that you will place over the wound. Make sure to wipe it down with antibacterial wipes before letting it touch the wound. You’ll have a second sheet that has adhesive on one side. Your tracing will appear on both sheets. That sheet will later be attached to the patient’s chart or medical records. [8]
-
2Place the transparency over the wound and trace the wound. Make sure that the transparency covers the entire wound. Using a pencil or marker, trace the entire wound. Don’t press too hard--you don’t want to harm the patient.[9]
-
3Label the adhesive tracing with the patient’s information and wound size. You want to make sure that the patient’s file includes all of the necessary information. On the transparency, write down the patient’s name, date of birth, date of measurement, and wound size. You will simply use a ruler to measure the L x W x D on your tracing.[10]
- You will still need to measure depth directly. Insert a cotton-tipped applicator into the wound. With a ruler, measure from point of entry to the bottom of the applicator.
- Attach the adhesive sheet to the patient's chart of medical records.
-
4Decide how frequently to measure the wound. Each wound grows or heals differently. For most wounds, measuring once a week is adequate. If you notice rapid changes between measurements, measure more frequently. Some wounds will only show changes every 2-4 weeks.[11]
-
5Record all of your measurements in centimeters using L x W x D. Use the same system to record all of your measurements. That will prevent any inconsistencies in documenting. Always record by writing down the Length (L) x Width (W) x Depth (D).[12]


Things You'll Need
- Ruler
- Tracing Sheets
- Pencil or marker
- Cotton-tipped applicator


References
- ↑ https://www.aranzmedical.com/uncategorized/can-improve-accuracy-wound-measurements/
- ↑ https://www.ihca.com/rc_files/81/Clinical%20Solutions%20-%20May%202014.pdf
- ↑ http://www.woundsource.com/blog/how-assess-wounds-tunneling-and-undermining
- ↑ https://www.ihca.com/rc_files/81/Clinical%20Solutions%20-%20May%202014.pdf
- ↑ http://www.woundsource.com/blog/how-assess-wounds-tunneling-and-undermining
- ↑ https://www.ihca.com/rc_files/81/Clinical%20Solutions%20-%20May%202014.pdf
- ↑ https://www.skilledwoundcare.com/post/how-to-measure-wounds-the-right-way
- ↑ https://woundeducators.com/wound-size/
- ↑ https://woundeducators.com/wound-size/


Medical Disclaimer
The content of this article is not intended to be a substitute for professional medical advice, examination, diagnosis, or treatment. You should always contact your doctor or other qualified healthcare professional before starting, changing, or stopping any kind of health treatment.
Read More...