wikiHow is a “wiki,” similar to Wikipedia, which means that many of our articles are co-written by multiple authors. To create this article, 10 people, some anonymous, worked to edit and improve it over time.
The wikiHow Tech Team also followed the article's instructions and verified that they work.
This article has been viewed 302,636 times.
Learn more...
E-mail is simply one of the best ways to communicate in the digital age. It provides convenient correspondence between people, socially and professionally; but in order to read an email, you must first open it, no matter what email client you're using.
It is important that you first have an account opened with an email provider. If you have yet to create an account, then you can find more information on creating an email account here.
Steps
Opening an Email on Your Computer
-
1Go to your email provider's website.
-
2Log into your email account.Advertisement
-
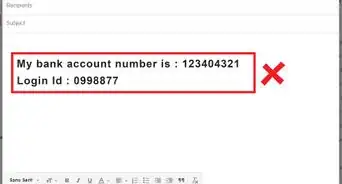
3Click on “Inbox.” A list of current emails will be listed on part of the screen. Most commonly, a sender and subject title will be displayed indicating who sent the email and what the email is in regards to.
-
4Click on one of your emails. Your email will open in either all or part of the screen for you to read. If your email covers all the screen, then there will most likely be a “back” button or arrow pointing to the left indicated that it will take you to the previous screen. Clicking this will take you back to your email list (your “inbox”) where you can open another email.
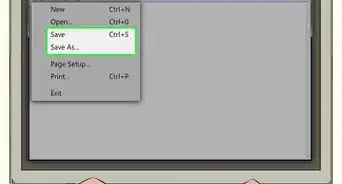
- Underneath the “Inbox” button are typically other kinds of folders. So you could click on the folder for “Sent Mail,” for example, and then click on the emails shown to open emails that you have sent to others. A “Drafts” folder refers to emails you have started writing but haven’t sent. Depending on your email provider, you may also have other folders with emails in each.


Using iOS
-
1Open "Settings" and click on "Mail, Contacts, Calendars."
-
2Tap on “Add Account.” Included mail options include “iCloud,” “Exchange,” “Google,” “Yahoo,” “AOL.” and “Outlook.” If your email account is one of these then click on the appropriate email account. If your email account does not include one of these then click “Other” and then “Add Account.”
-
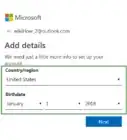
3Enter your name. This will appear on every email you send out, so if you are using this account for professional purposes, it may best to keep this field professional or consistent with how others know you.
-
4Enter your email address. This should be the email address you wish to read on your phone.
-
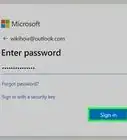
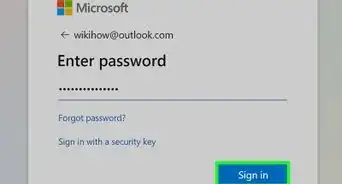
5Enter your password. This is the password associated with the email address you just entered.
-
6Enter a description. The description simply allows you to know which email you are accessing. For instance, you could title it “work” if it a professional account or “gmail” if it is your personal Gmail account.
-
7Tap “Next” in the upper right corner of the iOS device. The device will then verify the account.
-
8Push the home button to return to the main page. Tap on the Mail app. The new account will be listed with the description you chose. Tap on the name.
-
9Tap on a name listed in the list which appears. You have just opened an email. To go back to the list of emails, tap on “< Inbox” in the upper left corner of the device. Each time you tap on a new sender, you will open that email.


Using Android to Open Non-Gmail Email Accounts
-
1Open the Email (or Mail) application and choose “Set up a New Account.”
-
2Enter the email address you want to access and the associated password. Click “Next.” The phone will try to verify your email settings. If you have a common email type such as Yahoo or Outlook account, then your settings should verify relatively quickly.
- If the phone cannot find you account settings, then you are offered some advanced options. You would first pick an account type from IMAP, POP3, OR Exchange. Exchange is typically used for business accounts while IMAP and POP3 are more commonly used for general accounts. IMAP is more often recommended by email providers, but you should consult your email provider to find out their specific preferences.
- After picking your account type, enter the “Incoming server settings” and then “Outgoing server settings.” Again, consult your specific email provider to find your specific server settings.
-
3Select your options for the Account. A list of options will appear for you to check or uncheck to implement at your discretion. Click “Next” when you have chosen your settings.
- Check “Send email from this account by default” will make this email account the default email address. Any email that is sent will use this address.
- Check “Notify me when email arrives” if you want a notification for every email. This could be taxing on your battery life and use a fair amount of data since the phone will periodically check if you have any new email. You can also click on the top bar above these options to change the frequency that the phone checks for new email.
- Check “Sync email from this account” to automatically sync your email. This allows you to backup data.
- Check “Automatically download attachments when connected to WiFi” to download attachments automatically when you open an email with an attachment. This is typically useful unless you are on an extremely slow WiFi connection or open sensitive material over public, and less secure, networks.
-
4Enter a descriptive name for the account. This could be anything you like such as “Yahoo Email.” Entering different names comes in handy when you have several email accounts.
-
5Enter your name. This will appear on every email you send out, so you may want to keep the name professional if it is a business email. Click “Next” and your email account will be added to your phone.
-
6Tap your new account in your Mail app. Then tap the email you want to read. The email will open for you to read. To return to your list of emails, click on the back arrow on the bottom.


Using Android to Open Gmail
-
1Open “Settings” and scroll down to “Accounts.” Tap “Add Account.”
- Because Android is a Google product, it uses a specified Gmail app rather than the Email app.
-
2Tap “Google.” Then tap “Existing.”
-
3Enter your Google email and password. Tap “OK” to agree to the terms of service and privacy policy. You will be signed into your account.
- You may be asked to join Google+ or GooglePlay. Simply check or uncheck the options you would like to participate in.
-
4Tap on an email to open and read it. You can return to your email list by tapping on the back arrow on the bottom bar.


About This Article
1. Go to your email provider's website.
2. Log in to your account.
3. Click Inbox.
4. Click a message title.