This article was co-authored by Sam Adams. Sam Adams is the owner of Cherry Design + Build, a residential design and construction firm, which has been operating in the Greater Seattle Area for over 13 years. A former architect, Sam is now a full-service contractor, specializing in residential remodels and additions.
There are 7 references cited in this article, which can be found at the bottom of the page.
This article has been viewed 51,888 times.
Painting drywall in a smooth, clean way can take a bit of effort, but the final product is well worth it. It’s best to start by repairing any cracks or holes in the wall. Sand and wipe the entire wall down. Apply a coat of drywall primer and allow it to dry. Roll and brush on 2-4 coats of paint. Sand in between coats for an even better finish. Then, enjoy the view of your refreshed drywall.
Steps
Repairing and Prepping the Wall
-
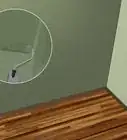
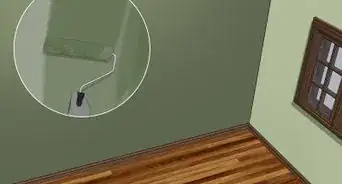
1Hold a work light over the surface to find any imperfections. Dim the overhead room lights and then hold a utility light 3 to 4 inches (7.6 to 10.2 cm) away from the wall. Go over all of the wall’s surfaces with the light, looking for imperfections. If you see cracks, holes, or dents, circle them with a pencil or place a small piece of painter’s tape on them.[1]
- Make sure to rotate the light around a bit, so that you can see the wall from different angles. This will reveal even more damaged spots, if there are any.
-
2Sand down and re-tape any exposed edges. If you see a spot where the drywall tape is peeling up and a seam is becoming visible, then sand over the entire seam with an 80-grit paper. Continue sanding until you reach the drywall base. Position a new piece of mesh over the sanded line. Apply a thin layer of joint compound over the tape using a drywall knife. After 24 hours of drying time, sand it down again and repeat until the seam is smooth.[2]
- It’s not enough to just sand directly over the seam. To keep it from cracking, try to sand down about 4 to 6 inches (10 to 15 cm) on both sides.
Advertisement -
3Fill any holes with compound. If the hole is nail-head sized or smaller, you can usually just plug it with a bit of compound. Then, smooth over the surface with a drywall knife. If the hole is larger, then you’ll need to purchase a drywall patch (available at hardware stores). Peel off the patch’s adhesive backing and press it firmly over the hole. Coat it with a bit of compound and sand it down with 80-grit sand paper.[3]
-
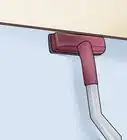
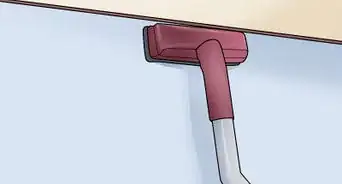
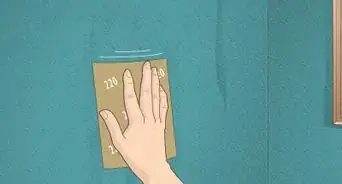
4Sand down any general rough spots. It’s possible that the work light might expose some random bumpy spots on your drywall, perhaps where any surface texture gathered. If this is the case, get a 120-grit sand paper and go over these areas. Continue until the wall feels smooth to the touch and passes another round of the light test.[4]
- Use a sanding pole with paper attached at the end to reach to the tops of walls. Sand gently when using a pole or it can move around and gouge the wall.
-
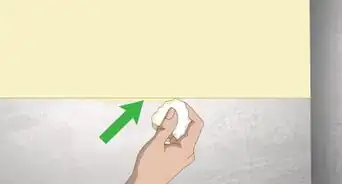
5Wipe down the wall with a damp cloth. Any dust left on your wall post-sanding will stick in your paint and lead to a bumpy final surface. To prevent this, get a damp rag and gently run it over all parts of the wall. Make sure that the rag is just damp, not soaking wet, or it will damp the drywall and any surface compound.[5]
- If you want an extra layer of protection, you can also go over the wall with a feather duster.
- Let the wall dry for at least 24-48 hours after applying compound, sanding, and wiping down before priming or painting.


Coating the Wall with Primer
-
1Set up drop cloths under the walls. Canvas drop cloths work the best. They will not get slippery like plastic ones. And, the paint will not soak through to the floor, as it might if you use bed sheets. Position the cloth so that it rests against the wall being painted and fans out a few feet away. This will allow it to catch any splatters, while not getting in your way.[6]
- You really don’t need to set drop cloths across the entire floor of a room unless you plan to paint the drywall ceiling as well.
-
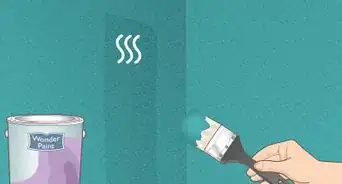
2Select the right primer for drywall. Applying primer is important because it helps to smooth out your drywall and allows the paint to bind more fully. Choose a tinted primer if you are going to use a dark paint. Use a moisture-barrier primer if you are worried about mildew. If you are worried about the wall absorbing smells, like in a kitchen space, select an odor-blocking primer.[7]
- The majority of primers come in light or white colors, but a paint professional can mix together an altered color for you upon request.
- For example, many people prefer to use a moisture-barrier primer in basement spaces or to add an extra layer of protection for exterior walls.
- Pro Tip: According to Sam Adams, full service contractor, PVA primer works great on fresh drywall. He says, “PVA is specifically made for new drywall, and it’s way cheaper than a regular primer. If you use something else, you’ll be spending twice as much for a primer you don’t need.”
-
3Apply a single coat of primer. Avoid using all-in-one paint and primer combos, as they may not stick fully to drywall. Instead, as a separate step, use a roller and paint brush to apply a coat of a polyvinyl acrylic (PVA) drywall primer. Continue until the entire wall is covered and appears smooth.[8]
- You’ll notice that the primer will go on a bit thicker than traditional paint. This is because of the adhesive PVA, which helps the primer to bind with the drywall.


Applying the Paint
-
1Paint within 2 days of priming your wall. Your primer should be fully dried with 24 hours of application. If you wait longer than 2 days to apply a top coat of paint, you’ll miss out on the extra binding properties of the primer. If you are forced to delay, it’s best to apply yet another coat of primer before moving on to painting.[9]
-
2Mix in a paint extender. Before you start painting, add a paint conditioner or extender into your buckets. Follow the instructions on the extender’s bottle to determine how much you need to add to each bucket. Then, mix thoroughly using a mixing stick before pouring it out in a rolling pan. Paint extenders help to minimize the appearance of brush strokes.[10]
-
3Paint around the wall’s edges with a brush. Once you’ve poured a bit of paint into a pan, dip the bottom of 1 inch (2.5 cm) of your brush into it. Then, use smooth strokes to apply a wide band of paint around the outer edges of your drywall space. This will make the trim area of your wall look cleaner when they are finished. It will also make it easier to quickly roll paint onto the middle of the wall.[11]
- To keep the paint from dripping off your brush, lightly bump the sides of the brush against the sides of the roll pan after loading it up with paint.
- It’s best to use a tapered, synthetic-bristle brush when painting the edges of a drywall space.
-
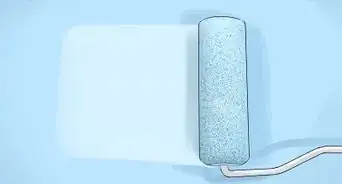
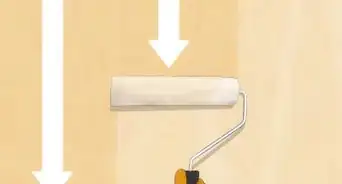
4Apply the paint with a roller to the middle sections of the wall. Choose a roller with a thin, 3⁄8 inch (9.5 mm) nap made out of lambswool or mohair. This helps to minimize splatter. Roll the roller in the pan until is just coated with paint. Then, place the roller against the wall and apply the paint in smooth, even moves. Continue until the wall is coated.[12]
- Try not to overload or saturate the roller with paint. If you do, you’ll end up with more splatters. You can also attach a plastic shield to the handle of the roller if you are worried about splatter.
-
5Sand with a 150-grit sandpaper between coats of paint. After you’ve finished the first coat of paint, give it 24-48 hours to fully dry. Place your hand against it to check it. Then, go over the entire space with 150-grit sandpaper. This will help your next coat of paint to adhere more fully to the prior one.
-
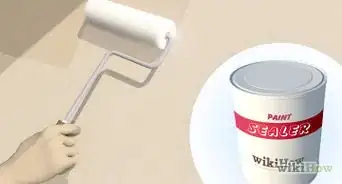
6Paint 1-2 more coats. A single coat of paint is usually not enough to cover a drywall surface over the long-term. It may fade through in patches over time, showing the primer. To prevent this, repeat the painting process until you have a total of 2-3 coats of paint on the wall, not including the primer layer.


Warnings
- Make sure to keep the room properly ventilated when sanding, priming, and painting. Go ahead and open up the windows. Or, wear a painting mask.⧼thumbs_response⧽
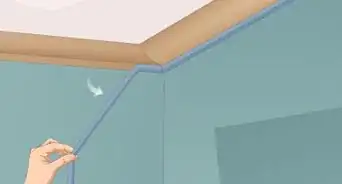
- Apply stripes of painters’ tape around the edges of your wall where it meets the trim. This will keep the paint and primer away from these areas until you are finished.⧼thumbs_response⧽


References
- ↑ https://www.familyhandyman.com/drywall/drywall-sanding-tips-and-techniques/view-all/
- ↑ https://homesteady.com/how-5556987-repair-painted-drywall-seam.html
- ↑ https://www.familyhandyman.com/drywall/drywall-repair/how-to-paint-walls-prepare-interior-walls-for-painting/view-all/
- ↑ http://www.popularmechanics.com/home/interior-projects/how-to/g151/13-painting-secrets-the-pros-wont-tell-you/
- ↑ https://www.uglyducklinghouse.com/paint-prep-drywall-repair/
- ↑ http://www.popularmechanics.com/home/interior-projects/how-to/g151/13-painting-secrets-the-pros-wont-tell-you/
- ↑ https://www.familyhandyman.com/painting/painting-how-to-choose-and-use-primers/view-all/
- ↑ https://www.familyhandyman.com/painting/painting-how-to-choose-and-use-primers/view-all/
- ↑ https://www.familyhandyman.com/painting/painting-how-to-choose-and-use-primers/view-all/
- ↑ http://www.popularmechanics.com/home/interior-projects/how-to/g151/13-painting-secrets-the-pros-wont-tell-you/
- ↑ http://www.popularmechanics.com/home/interior-projects/how-to/g151/13-painting-secrets-the-pros-wont-tell-you/
- ↑ https://www.familyhandyman.com/painting/techniques/paint-roller-techniques-and-tips/view-all/
- ↑ http://www.popularmechanics.com/home/interior-projects/how-to/g151/13-painting-secrets-the-pros-wont-tell-you/
About This Article