This article was co-authored by Patrick Coye. Patrick Coye is the owner and operator of Patrick’s Painting & Home Improvement in Alexandria, Virginia. With over 15 years of experience in residential construction, Patrick specializes in painting, wallpaper removal/installation, drywall, staining decks and fences, and kitchen cabinetry painting. To date, Patrick and his team have painted over 2,000 houses and stained over 800 decks. Patrick's Company won a "Top Job" award from the American Painting contractor magazine in 2020.
There are 21 references cited in this article, which can be found at the bottom of the page.
wikiHow marks an article as reader-approved once it receives enough positive feedback. In this case, 82% of readers who voted found the article helpful, earning it our reader-approved status.
This article has been viewed 784,459 times.
When the walls of your home are in desperate need of a new color palette, you might be tempted to just pick up a brush and go. But before you do, it will be helpful to be aware of a few painting fundamentals that can save you valuable time and effort. The key to achieving a smooth, seamless finish lies in the preparation—after cleaning the wall and applying a base coat of primer, you can direct your attention to the outer edges of the wall and work your way inward using a color that makes the room irresistible to the eye.
Steps
Preparing Your Work Area
-
1Remove all accessories from the wall. Start preparing the wall by locating any knobs, outlet covers, light switch faceplates, thermostats and other items along the wall and take them off. Starting with a smooth surface with no obstructions will help the project proceed much more efficiently.[1]
- Most accents can simply be unscrewed and lifted off. Be sure to keep track of small pieces like faceplates and separator, and put the screws back where they belong.[2]
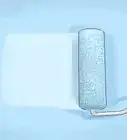
- Any accents that you’re unable to remove can be covered with painter’s tape later on.
-
2Clear your work area of furniture. Find a place to store nearby furniture, appliances and other belongings until you’ve wrapped up your project. If space is an issue, you can also simply scoot these items away from the wall you'll be painting. Be sure to cover any remaining furniture with a drop cloth or sheet of plastic to keep it protected.
- Paint can be virtually impossible to get out of upholstered fabrics, so it's a good idea to safeguard your furniture even if you think it's a safe distance away from the wall.
- Unplug all electronics and relocate them somewhere where they won't be damaged.
Advertisement -
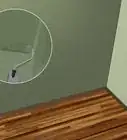
3Lay down a drop cloth. Stretch out a canvas drop cloth or plastic tarp that will help catch spills and splatters once you begin working.[3] For maximum protection, the drop cloth should extend all the way to the base of the wall.[4]
- Pass up flimsy floor coverings like newsprint or bedsheets. These materials are usually too thin to stop wet paint from soaking through.[5]
- There’s no need to cover the entire floor. Just slide the drop cloth along as needed as you make your way from one end of the wall to the other.
-
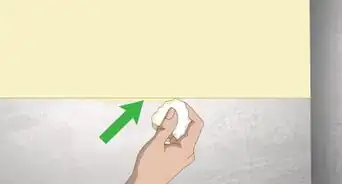
4Clean the surface of the wall gently. Wet a clean cloth or sponge with warm water and a mild liquid detergent, then wring out the excess moisture. Run the cloth over the walls from top to bottom to clear away dust and other debris that can interfere with the paint’s ability to set up properly.[6]
- Use a light touch—you just want to clean the wall off, not totally soak it.
- A small amount of diluted TSP (trisodium phosphate) will be useful for removing stuck-on dirt and grime from walls in dirtier areas like the kitchen or basement.[7]
- If there are any cracks or holes in the wall, fill those in before you prime or paint the wall.[8]
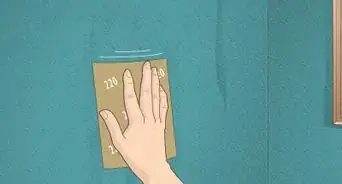
- You may also want to sand the wall before you paint it. This will help the paint adhere to the wall.[9]
-
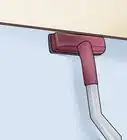
5Cover adjacent surfaces with painter’s tape. Painter’s tape can be used to protect the trim at the top and bottom of the wall and around doorways.[10] It will also come in handy for putting over accents that are a pain to remove, like dimmer switches. Make sure to line up the edges of the tape precisely, or you could end up with a lopsided paint job.[11]
- You can pick up painter’s tape from any home improvement store, as well as most major supermarkets and pharmacies.
- Look for tape in different sizes. This will give you more flexibility over how to apply it and provide more coverage to keep paint from accidentally getting on other parts of the wall.


Applying Primer
-
1Buy a bucket of primer. For most jobs, a standard white primer will be your best bet. That way, the new paint color will be able to stand out. A gallon of primer should be enough to take care of most painting projects.[12]
- Always use a primer when painting interior walls. Not only will it help the paint stick, it will also cut down on the number of coats you have to apply to achieve the same depth of color.[13]
- Primer is especially useful when painting a lighter color over a darker color.
- If you're repainting a wall and you're using a paint and primer in one, you probably don't need to use a separate primer. However, if you're painting a large section of wall that's never been painted, prime it first.[14]
-
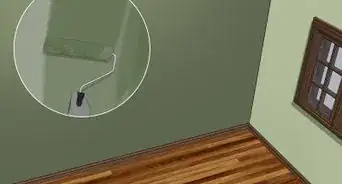
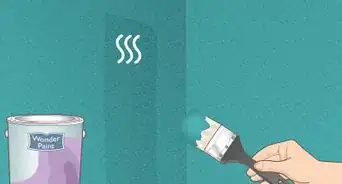
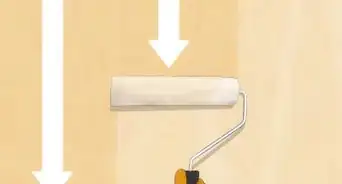
2Roll the primer onto the wall. Apply an even coat from the floor to the ceiling, covering the broadest areas near the center of the wall. The base coat doesn’t need to be too thick—as long as it's smooth and consistent, the paint will sit easily on top of it.[15]
- Try not to leave any bare patches, as this type of inconsistency can affect the final color of the paint.
-
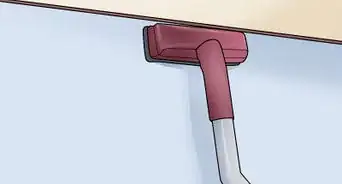
3Use a handheld paintbrush to fill in the gaps. Work the primer into tight crevices and other hard-to-reach areas with the tip of the brush. Pay particular attention to corners, alcoves and the spaces around the trim and wall fixtures. Try to match the thickness of the rolled sections as best you can.[16]
- Apply the primer using long, smooth strokes, then smooth it out by brushing it in multiple directions.
- Remember to use your painter's tape for more precise lines and angles.
-
4Let the primer dry completely. Give the base coat about 4 hours to set. It should be dry to the touch before you begin applying subsequent coats of paint. It may be more convenient to apply the primer in the afternoon or evening, then wait until the following day to tackle the paint.
- Painting over wet primer can cause clouding and smudging, effectively ruining the coat.
- Keeping your work area ventilated by opening a window or running an overhead fan or air conditioner will help the primer dry faster.


Painting the Wall
-
1Choose the right type of paint. When it comes to picking an interior paint, you have many options available to you. Consider not only color, but also the desired texture and finish you want for the wall. Pastels, for instance, can be used to brighten up the half-bath or sitting room, whereas darker shades can add a sense of size and dimension to communal areas like the kitchen.[17] You can use textured paint to hide the imperfections in a wall.[18]
- Stock up on enough paint to be able to finish the project without running out. A single gallon is usually enough to cover about 400 square feet of wall space.[19]
-
2Mix the paint thoroughly. Use an electric paint mixer or handheld stirrer to blend the paint to an even consistency, even if it was mixed when you purchased it. This will prevent the oils and pigments from separating, result in better coverage and a smoother finish. Once the paint reaches a uniform texture throughout, it will be ready to go.[20]
- To cut down on sloshing and splattering, pour the paint into a larger bucket before you begin mixing.
- Mixing your paint prior to starting a big project is essential, whether you're using a brand new can or one that's been sitting on the shelf for a while.[21]
-
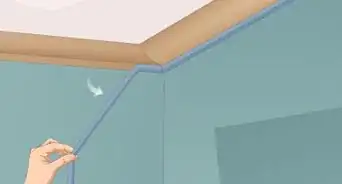
3Begin painting at the trim by hand. Dip the tip of your paintbrush about 2" into the paint, letting the excess drip off. Then, brush the paint onto the wall with the angled edge of the brush, starting at one of the room’s upper corners. Follow along the painter’s tape and work your way down using smooth, linear strokes until you’ve completed the outer perimeter of the wall.[22]
- Painting 2-3” outward from the trim will allow you to easily go over the rest using a roller.[23]
- Pause periodically to rewet your brush when your strokes become faint.
- It's a good idea to start by cutting in around the edges because this is the most difficult part of painting. If you do it first, you're still fresh, so you're less likely to make mistakes.[24]
-
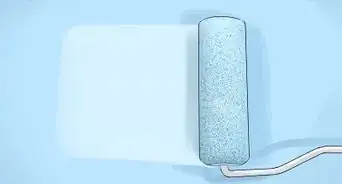
4Paint the interior of the wall. After you’ve painted the wall’s outer edges, use a wide roller to take care of the middle. The best method for painting with a roller is to apply it in alternating "M" or “W” pattern, working back and forth over the same section until it’s completely filled in. You can then move onto another section, repeating the same pattern.[25]
-
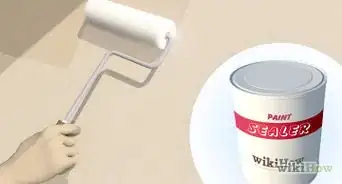
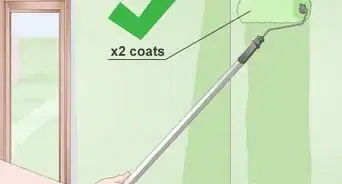
5Apply additional coats. Depending on how deep you want the new color to come out, you can roll on a second or even third coat of paint. Paint these follow-up coats the same way, starting with the outer edges of the wall and working your way inward. Be sure to wait about 2-4 hours between coats to give the fresh paint time to dry.[28]
- Most walls shouldn't require more than a couple coats of paint. However, extra coats may be useful for walls with coarse textures or when painting over a darker shade.[29]
- To avoid leaving obvious seams, make sure you go over the entire wall, including the area around the trim.
-
6Allow the paint to set up overnight. Take one last look over the wall to check for thin spots, lumps, drips or other problem areas before calling it a day. Be prepared to give the top coat of paint at least twice as long to dry as you did the primer. In the meantime, try to resist the urge to touch the paint in order to prevent accidental smudges.[30]
- It usually takes somewhere between 24-48 hours for interior paint to cure completely.
- Don’t forget to remove the painter’s tape once you’re satisfied with the look of the wall.[31]


Expert Q&A
-
QuestionHow can I protect my floors when painting the walls?
 Patrick CoyePatrick Coye is the owner and operator of Patrick’s Painting & Home Improvement in Alexandria, Virginia. With over 15 years of experience in residential construction, Patrick specializes in painting, wallpaper removal/installation, drywall, staining decks and fences, and kitchen cabinetry painting. To date, Patrick and his team have painted over 2,000 houses and stained over 800 decks. Patrick's Company won a "Top Job" award from the American Painting contractor magazine in 2020.
Painting Specialist
-
QuestionHow do you clean a paint roller?Patrick CoyePatrick Coye is the owner and operator of Patrick’s Painting & Home Improvement in Alexandria, Virginia. With over 15 years of experience in residential construction, Patrick specializes in painting, wallpaper removal/installation, drywall, staining decks and fences, and kitchen cabinetry painting. To date, Patrick and his team have painted over 2,000 houses and stained over 800 decks. Patrick's Company won a "Top Job" award from the American Painting contractor magazine in 2020.
Painting Specialist
-
QuestionWhat are common mistakes when painting the interior walls of a room?
 Barry ZakarBarry Zakar is a professional handyman and the founder of Little Red Truck Home Services based in the San Francisco Bay Area. With over ten years of experience, Barry specializes in a variety of carpentry projects. He is skilled at constructing decks, railings, fences, gates, and various pieces of furniture. Barry also holds his MBA from John F. Kennedy University.
Handyman
Warnings
- Keep small children and pets away from freshly-painted walls until they’ve had a chance to dry.⧼thumbs_response⧽
- Watch your step on stools and ladders. Accidents are often due to carelessness.⧼thumbs_response⧽
- If you've exposed any live wires in your outlets or switches, take care to avoid touching them as you paint.⧼thumbs_response⧽
Things You'll Need
- Interior paint
- Primer
- Paint roller
- Soft bristled handheld paintbrush
- Canvas or plastic dropcloths
- Painter's tape
- Water
- Mild liquid detergent
- Clean cloth or sponge
- Trisodium phosphate (optional)
- Extending roller handle (optional)
- Plastic furniture covers (optional)


References
- ↑ http://www.homedepot.com/c/painting_techniques_for_interior_walls_HT_PG_PA
- ↑ http://www.bhg.com/decorating/paint/how-tos/how-to-ready-a-room/
- ↑ Patrick Coye. Painting Specialist. Expert Interview. 22 July 2020.
- ↑ https://www.houselogic.com/remodel/painting-lighting/using-a-drop-cloth/
- ↑ http://www.popularmechanics.com/home/interior-projects/how-to/g151/13-painting-secrets-the-pros-wont-tell-you/
- ↑ https://www.realsimple.com/home-organizing/home-improvement/painting/paint-wall
- ↑ http://www.bhg.com/decorating/paint/how-tos/how-to-prep-paint/
- ↑ Barry Zakar. Handyman. Expert Interview. 16 July 2020.
- ↑ Barry Zakar. Handyman. Expert Interview. 16 July 2020.
- ↑ Patrick Coye. Painting Specialist. Expert Interview. 22 July 2020.
- ↑ http://www.homedepot.com/c/painting_techniques_for_interior_walls_HT_PG_PA
- ↑ https://www.familyhandyman.com/painting/painting-how-to-choose-and-use-primers/view-all
- ↑ http://www.popularmechanics.com/home/interior-projects/how-to/a3926/4286872/
- ↑ Barry Zakar. Handyman. Expert Interview. 16 July 2020.
- ↑ https://www.realsimple.com/home-organizing/home-improvement/painting/paint-wall
- ↑ http://www.homedepot.com/c/painting_techniques_for_interior_walls_HT_PG_PA
- ↑ https://www.thisoldhouse.com/ideas/how-to-choose-right-colors-your-rooms
- ↑ Patrick Coye. Painting Specialist. Expert Interview. 22 July 2020.
- ↑ https://www.lowes.com/projects/paint-stain-and-wallpaper/paint-a-room/project
- ↑ http://www.diyadvice.com/diy/painting/paint/techniques/
- ↑ https://www.bobvila.com/articles/what-to-do-with-old-paint/
- ↑ https://www.thisoldhouse.com/how-to/how-to-paint-room
- ↑ https://www.realsimple.com/home-organizing/home-improvement/painting/paint-wall
- ↑ Barry Zakar. Handyman. Expert Interview. 16 July 2020.
- ↑ http://www.behr.com/consumer/how-to/interior/how-to-paint-a-wall
- ↑ http://www.popularmechanics.com/home/interior-projects/how-to/g110/interior-painting-tips-how-to-paint-your-walls-like-a-pro/
- ↑ https://www.familyhandyman.com/painting/techniques/paint-roller-techniques-and-tips/view-all
- ↑ https://www.houzz.com/ideabooks/4536977/list/from-the-pros-how-to-paint-interior-walls
- ↑ http://www.soundpaintingsolutions.com/how-many-coats-paint/
- ↑ https://www.bobvila.com/articles/how-long-does-it-take-paint-to-dry/
- ↑ http://www.homedepot.com/c/painting_techniques_for_interior_walls_HT_PG_PA
About This Article

Before you start painting your wall, remove outlet covers and light switches as well cover adjacent surfaces with painter's tape. Then, apply a primer to help the paint stick as well as cut down on the number of coats you’ll have to apply. Wait 4 hours for the primer to dry, then paint the trim by hand. Once the trim is finished, use a wide roller to cover the middle section of the wall. Wait 2-3 hours for the paint to dry before applying another coat. To learn how to clean your wall before painting, keep reading!