This article was co-authored by Barry Zakar. Barry Zakar is a professional handyman and the founder of Little Red Truck Home Services based in the San Francisco Bay Area. With over ten years of experience, Barry specializes in a variety of carpentry projects. He is skilled at constructing decks, railings, fences, gates, and various pieces of furniture. Barry also holds his MBA from John F. Kennedy University.
This article has been viewed 66,848 times.
Ombre is a beautiful gradient between similar colors. It is simple, yet elegant. Lots of people use ombre on fabrics and furniture, but did you know that you can use it on walls too? You can paint your entire room using the ombre technique, or you can paint just one wall to use as an accent. Though time consuming, the efforts are well-worth it and bound to add a wow-factor to your room.
Steps
Cleaning and Preparing the Walls
-
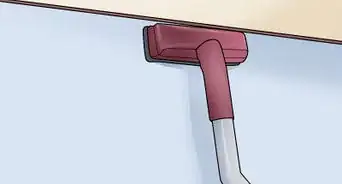
1Protect your flooring and furniture. Move any furniture that might get dirty away from the walls. Unscrew any fixtures, including switch and outlet plates. Finally, lay down a drop cloth over the floor in front of the wall you will be painting. The drop cloth can be made from canvas or sturdy plastic sheeting.
-
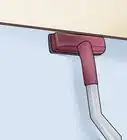
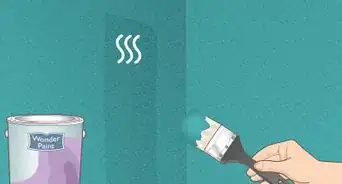
2Clean your walls and let them dry. Use a specially-made wall cleaner from the store or a mixture of soap and water. Allow the walls to air dry after you have finished cleaning them. Cleaning the walls will help remove any surface dirt or oils that may prevent the paint from sticking.Advertisement
-
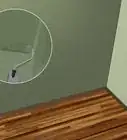
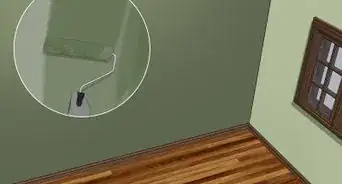
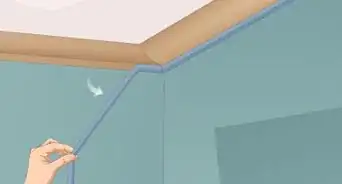
3Tape off trims and joints between ceilings and walls. Lay down painters tape along the trim on the base of your wall, making sure that the top edge of the tape is touching the wall. Next, lay down another strip of tape on the edge of the ceiling, right where the wall begins. Finally, lay down a strip of tape to either side of the first wall that you will be painting.
- Don't let the tape get wrinkled, otherwise the paint may seep under the wrinkles and get where you don't want it.
-
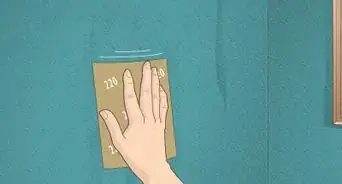
4Divide your wall into rows using a pencil, a ruler, and a level. How many rows you do is up to you, but you need at least two. The rows do not have to be all the same thickness.
- If you’ll be blending with a sponge, use a strip of painter’s tape to divide the rows instead.[3]
-
5Measure the length and height of each row. This will tell you how much paint you will need to buy. Most brands of paint are sold based on square footage, so you should take your measurements in feet/meters.


Applying and Blending the Paint
-
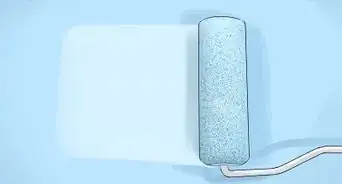
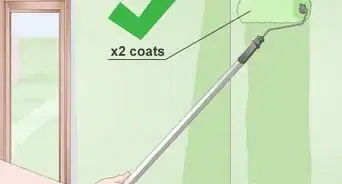
1Mix and pour the first two colors of paint. Open the can for your first color of paint on the bottom-most row. Give it a good stir with a wooden stir stick, then pour it out into a painting tray. Repeat this step for the second color of paint and the second row.
- Do not shake the can as this can introduce too many air bubbles.
- It is better to use good quality paint and primer in one, type of paint..[4]
-
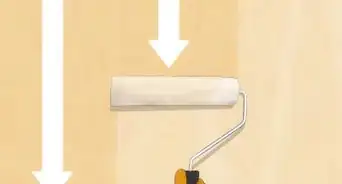
2Paint to the first two sections, leaving a gap between them. Use a paint roller to apply your first color of paint to the bottom-most row. Repeat the process with a clean roller for the second row and color. Leave a 6-inch (15-cm) gap between the two rows for blending.[5]
-
3Dip a 4-inch (10-cm) wide brush into your first two colors of paint. Pull the paint trays right next to each other. Dip the left side of the brush into the left pan, and the right side into the right pan. Make sure that the brush is centered.[8]
- If you prefer to use a sponge apply the first color to the left side of the sponge, and the second color to the right. Do not saturate the sponge with paint.[9]
-
4Run the brush along the gap until the white space is covered. Orient the bristles vertically, with the first color on the bottom and the second color on top. Run the brush back and forth along the gap, making sure that you off-set it with each pass. This will blend the two colors together and cover up any unpainted areas.[10]
- If you are using a sponge, simply pat your way along the wall, reapplying the paint as needed. You can go back along the line to help further smooth things out.[11]
- Again, if you are working on a large wall, work on a 5-foot long strip instead.
-
5Work your way along the wall, then do the next set of colors. Depending on the length of your wall, you may need to repeat the above process a few times. Remember, paint dries quickly, so it is best to work in 5-foot (1.5-m) long sections. Once you finish the first two rows, move onto the next two (if needed).[12]
- Your next two rows should consist of the second row and the third row.


Finishing the Job
-
1Remove the painter’s tape from the trim, ceiling, and adjacent walls. If you wish to paint other walls, you can move onto them at this time. Remember to apply painter's tape to the trim, ceiling, and adjacent walls so that you get nice, clean lines.
-
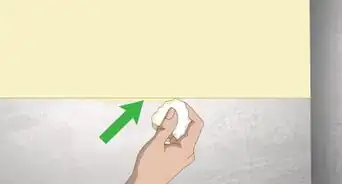
2Touch up any mixed patches with a smaller brush and matching paint. Take a close look at the blending between your ombre. If you see any missed patches, touch them up using a smaller paintbrush and the right paint color for that section.
-
3Touch up any bleeds on the trim, ceiling, and adjacent walls. The painter's tape is meant to prevent this from happening, but there is still a chance that some paint got underneath the tape. Check the trim, ceiling, and adjacent walls for any bleeds. If you see any, cover them up with a clean brush and a matching paint color.
-
4Allow the paint to finish drying and curing. Just because something feels dry to the touch does not necessarily mean that it is completely dry and ready to use. Many types of paint require a few days in which to cure. Check your can of paint for more specific drying and curing times.
-
5Remove the drop cloth and replace any outlet or light switch covers. At this point, your room is ready to use! If you notice any lingering paint smell, leave a window open for a few days so that it can dissipate.


Expert Q&A
-
QuestionHow do you mix ombre paint?
 Katherine TlapaKatherine Tlapa is an interior designer, currently working as a Design Specialist for Modsy, a design service based in San Francisco. She also runs her own DIY Home Design blog, My Eclectic Grace. She received her BFA in Interior Architecture from Ohio University in 2016.
Interior DesignerTry painting the colors directly next to each other for another approach to ombre. You have to work quickly to create an ombre effect with paint. The way I like to do it is to paint the walls as if I'm painting stripes with the colors I intend to mix, then I'll blur the lines by going back over them with a damp paintbrush. For an even more seamless look, go over the line with a dense sponge, which will get rid of any paintbrush stroke lines. -
QuestionWhich type of paint should I buy?
 Barry ZakarBarry Zakar is a professional handyman and the founder of Little Red Truck Home Services based in the San Francisco Bay Area. With over ten years of experience, Barry specializes in a variety of carpentry projects. He is skilled at constructing decks, railings, fences, gates, and various pieces of furniture. Barry also holds his MBA from John F. Kennedy University.
HandymanYou can buy good quality paint and primer in one type of paint. It is available in the Home Depot or Lowe's. -
QuestionHow do you prepare a wall for painting?Barry ZakarBarry Zakar is a professional handyman and the founder of Little Red Truck Home Services based in the San Francisco Bay Area. With over ten years of experience, Barry specializes in a variety of carpentry projects. He is skilled at constructing decks, railings, fences, gates, and various pieces of furniture. Barry also holds his MBA from John F. Kennedy University.
HandymanIf there are any holes and cracks in the wall, fill them. Sand the uneven portions if necessary before painting.
Things You'll Need
- Interior paint, at least 2 colors
- Paint roller, 1 for each color
- 4-inch (10-cm) wide brush
- Painter's tape
- Drop cloth
- Small paint brushes (for touch ups)
- Paint matching trim, ceiling, and walls (optional, for touch ups)


References
- ↑ Barry Zakar. Handyman. Expert Interview. 16 July 2020.
- ↑ Barry Zakar. Handyman. Expert Interview. 16 July 2020.
- ↑ https://www.grahambrown.com/uk/how-to/paint-ombre-walls/Blog-Inspirations-HowToPaintOmbreWalls.html
- ↑ Barry Zakar. Handyman. Expert Interview. 16 July 2020.
- ↑ http://www.colorhousepaint.com/blog/how-to-paint-an-ombre-wall/
- ↑ http://www.colorhousepaint.com/blog/how-to-paint-an-ombre-wall/
- ↑ https://www.grahambrown.com/uk/how-to/paint-ombre-walls/Blog-Inspirations-HowToPaintOmbreWalls.html
- ↑ http://www.colorhousepaint.com/blog/how-to-paint-an-ombre-wall/
- ↑ https://www.grahambrown.com/uk/how-to/paint-ombre-walls/Blog-Inspirations-HowToPaintOmbreWalls.html
- ↑ http://www.colorhousepaint.com/blog/how-to-paint-an-ombre-wall/
- ↑ https://www.grahambrown.com/uk/how-to/paint-ombre-walls/Blog-Inspirations-HowToPaintOmbreWalls.html
- ↑ http://www.colorhousepaint.com/blog/how-to-paint-an-ombre-wall/
- ↑ http://www.colorhousepaint.com/blog/how-to-paint-an-ombre-wall/
- ↑ http://www.colorhousepaint.com/blog/how-to-paint-an-ombre-wall/
- ↑ http://www.colorhousepaint.com/blog/how-to-paint-an-ombre-wall/
About This Article