wikiHow is a “wiki,” similar to Wikipedia, which means that many of our articles are co-written by multiple authors. To create this article, volunteer authors worked to edit and improve it over time.
This article has been viewed 31,108 times.
Learn more...
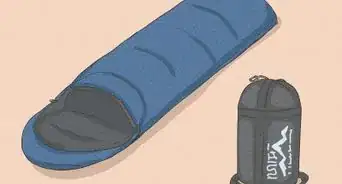
Whether you are an avid backpacker or a car camper, you will probably experience wear and tear on your outdoor equipment at some point. Between rocks, trees, fire, and wildlife you are bound to get a hole in your tent but instead of replacing the entire thing a simple patch can make your portable home good as new. In this article, you will get step by step instructions on how to patch a hole in your tent for various methods. These patching methods can also be used on other types of gear such as sleeping bags, hammocks, and clothing.
Steps
Patching a Small Hole
-
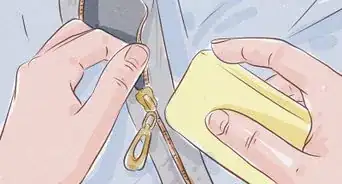
1Cut a small piece of patching tape, big enough to cover about ¼- ½ ‘’ past the sides of the hole. Using scissors, round the edges of the tape so that it is in a circular/ oval shape. You can buy patching tape at your local outdoor recreation store or online.
-
2Clean the area (alcohol swab or wipe it with a towel) where you are going to put the patch. The patch will go on the inside of the tent.Advertisement
-
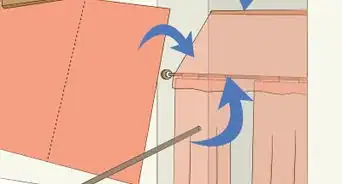
3Place the patch over the hole.
-
4Cover the patch with seam grip, extending the seam grip not more than ¼ to ½ inches past the edge of the patch. Seam grip is a flexible sealer that repairs tears and when dry it is waterproof and long-lasting. You can buy seam grip at your local outdoor recreation store or online. Keep a neat looking seam grip area. Use latex gloves to make it easier.
-
5Let dry 12 hours.
-
6Repeat on the outside. Now that 12 hours have passed, on the outside of the tent, apply seam grip over the same area as you did on the inside. Do not put another patch on the outside of the tent, just the seam grip.
-
7Let dry 12 hours. It is good as new!


Making a Waterproof Patch (Good for Rain Flies)
-
1Cut a small piece of patching tape, big enough to cover about ¼- ½ ‘’ past the sides of the hole. Using scissors, round the edges of the tape so that it is in a circular/ oval shape. You can buy patching tape at your local outdoor recreation store or online.
-
2Clean the area (alcohol swab or wipe it with a towel) where you are going to put the patch. The patch will go on the inside of the tent.
-
3Place the patch over the hole.
-
4Cover the patch with seam grip, extending the seam grip not more than ¼ to ½ inches past the edge of the patch. Seam grip is a flexible sealer that repairs tears and when dry it is waterproof and long-lasting. You can buy seam grip at your local outdoor recreation store or online. Keep a neat looking seam grip area. Use latex gloves to make it easier.
-
5Let dry 12 hours.
-
6Apply a patch on the outside. After waiting 12 hours for the inside to dry, apply another rounded patch on the outside of the tent.
- Apply seam grip around the patch just like you did previously, no more than ¼- ½ inch from the edge of the patch.
-
7Wait 12 hours for the second side to dry. The process of applying two patches, one on each side, ensures that water will not leak through the patch.