This article was co-authored by wikiHow Staff. Our trained team of editors and researchers validate articles for accuracy and comprehensiveness. wikiHow's Content Management Team carefully monitors the work from our editorial staff to ensure that each article is backed by trusted research and meets our high quality standards.
This article has been viewed 81,327 times.
Learn more...
Canopies are an easy way to provide shade and protection from the elements for parties or picnics. Make a freestanding canopy with 4 poles, or use a wall and 2 poles to support your canopy. A canvas drop cloth or tarp, some strong cord, and a few long poles provide the basic elements of a canopy that you will be able to set up in no time.
Steps
Making a Canopy with 4 Poles and a Tarp
-
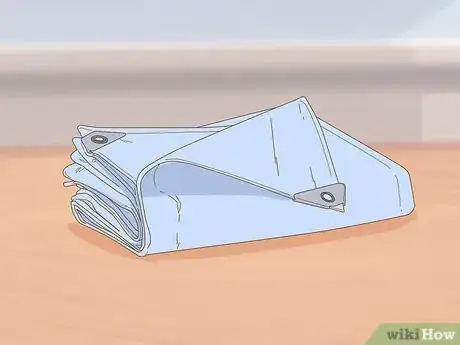
1Buy a high-quality tarp with grommets, big enough to cover the desired area. Use a silver tarp for the best protection against both sun and rain. Use a blue tarp if you can’t find a silver tarp.[1]
- Grommets are small metal rings in each corner of the tarp that will allow you to attach tent poles to create the canopy.
- You can find high-quality tarps at most home centers or outdoor supply stores.
-
2Clear the area for the canopy and lay out the tarp on the ground. Clear away any debris from the area where you will set up the canopy. Stretch out the tarp flat on the ground in roughly the position that you want to set it up.[2]
- It’s important to clear the area so that the tarp will lay flat on the ground, and so that there is nothing underfoot to trip on while you set up your canopy.
Advertisement -
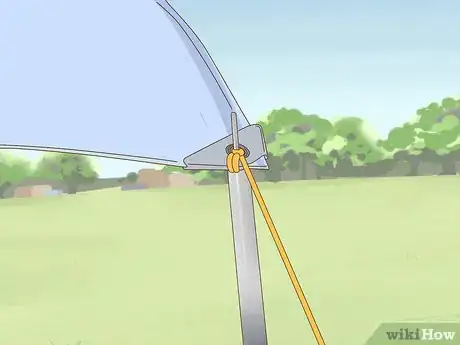
3Attach a tent pole to each corner of the tarp with nylon rope. Place 1 7 ft (2.1 m) tent pole in each corner with the tips in the grommets. Use 10 ft (3.0 m) of 0.25 in (6 mm) nylon rope to secure the poles in place by threading 1 end through each grommet and around the tip of each tent pole, then tying it in a tight knot.[3]
- Leave all the excess rope that is not tied around the grommets and tent poles. You will use it to secure the canopy to the ground by tying it to tent stakes.
- Stainless steel tent poles are the best poles to use for your canopy because they are sturdy and they don’t rust, but you can use bamboo or wooden poles instead.
- You can get the tent poles and nylon rope at outdoor and camping supply stores.
-
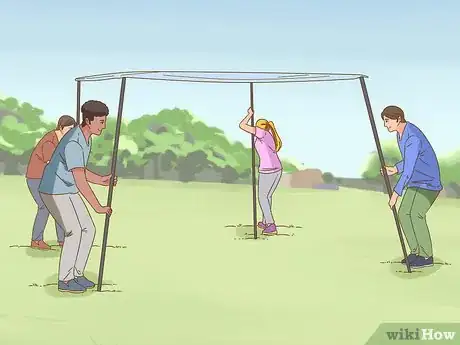
4Lift up the tarp with the help of 4 people and stick the poles into the ground. Enlist the help of 4 people and have each person stand in a corner and grab a tent pole. Have everyone slowly lift up the canopy and stretch it out so the tarp is taut, then stick the poles in the ground as securely as possible.[4]
- Keep everyone standing in the corners and holding onto the poles while you finish securing the canopy.
- If you don’t have anyone to help you, you can do it yourself 1 pole at a time. Just make sure to really push the poles firmly into the ground so they don’t fall over while you stretch out the canopy.
-
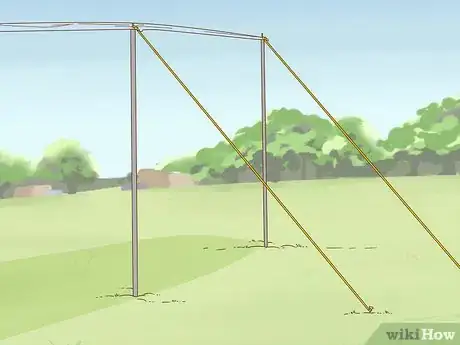
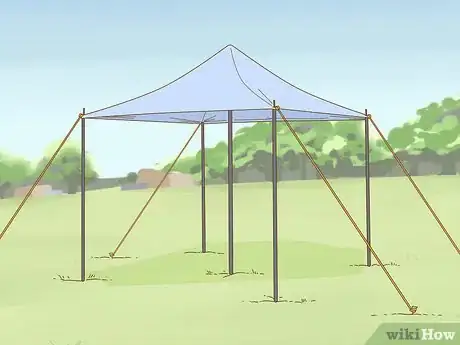
5Stretch out the ropes from each corner and secure them with tent stakes. Grab each rope 1 at a times and stretch them out straight away from the corners as far as you can. Hammer a tent stake into the ground in each place where the ends of the ropes reach and tie the ropes to them.[5]
- Once each corner is secured by the ropes, everyone can let go of the canopy and it should stand in place.
- If you are doing this by yourself, be careful not to pull the ropes so tight that you tip over the canopy.
-
6Put 1 longer tent pole in the middle of the canopy and stick it in the ground. Place 1 8 ft (2.4 m) tent pole underneath the middle of the canopy so that the tip lifts the middle up. Push the other end of the pole into the ground securely.[6]
- 1 end of the middle pole will be held in place by the tension of the canopy, and 1 end will be held in place by the ground.
- Lifting the middle of the canopy slightly with a longer pole is important so that rain water will drain off the sides of the canopy.
- You can decorate your canopy with some string lights to light it up at night.
Creating a Shade Canopy with a Wall
-
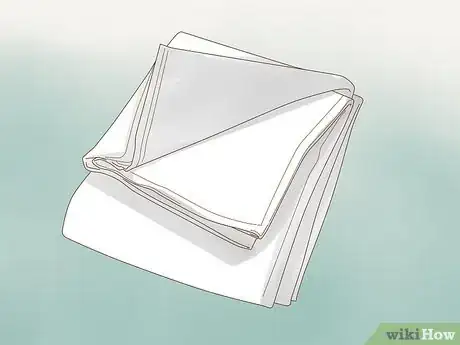
1Get a canvas drop cloth of the size you want with grommets in the corners. Make sure it is big enough to cover the area you want to shade. Take notes of the measurements of the tarp for when you drill holes in the wall.[7]
- You can use a tarp instead of a canvas drop cloth.
- You can get a canvas drop cloth for the canopy at a home center. If it doesn’t have grommets in it, ask the home center staff if they can put some in using a grommet tool.
-
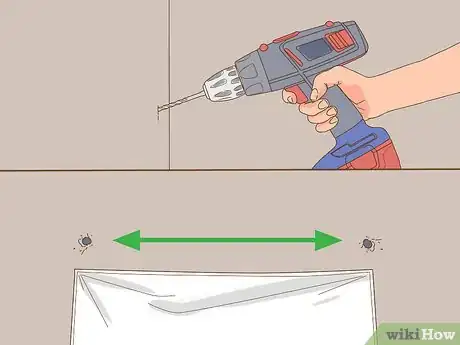
2Drill two holes in the wall closer than the length of 1 side of the drop cloth. Make the holes at least 1 ft (0.30 m) closer than the distance between 2 grommets on 1 side of the drop cloth, and 7 ft (2.1 m) high off the ground. This will allow you to create a peak in the canopy at the end.[8]
- Make sure to use a drill bit slightly smaller than the screw eyes or hooks that you will screw in.
-
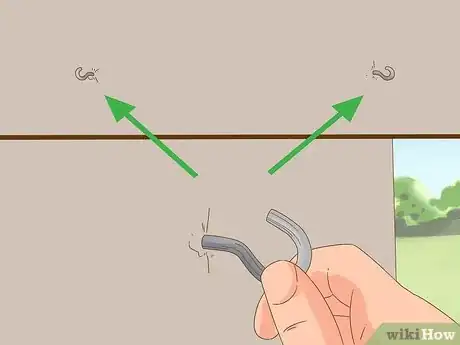
3Screw 2 screw eyes or hooks into the wall. Place metal screw eyes or hooks into the holes you drilled and screw them in tightly. These will be used to secure the drop cloth to the wall.[9]
- Screw eyes are metal loops that have a screw on one end. You can get metal screw eyes or hooks at a hardware store.
-
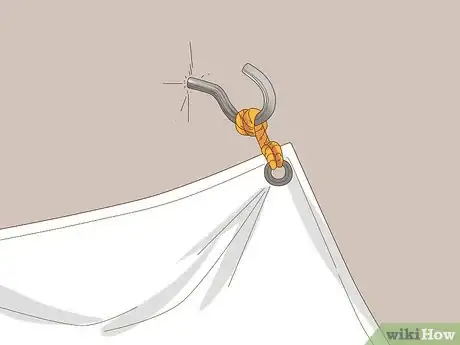
4Tie the drop cloth to the screw eyes or hooks with strong cord. Use a short length of cord to tie 2 corners of the canopy to the wall. Tie the cord around each grommet at 1 end and around the screw eyes or hooks at the other end.[10]
- Try to tie the drop cloth as close to the wall as possible.
-
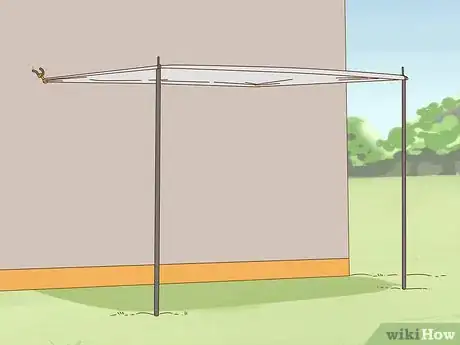
5Tie a pole to each front corner and stick the poles in the ground. Use 2 fresh 10 ft (3.0 m) pieces of strong cord to tie 1 tip of the poles to the grommets by tying 1 end of the cord through the grommet and around the tips of the tent poles. Stretch out the canopy so it is taut and push the other ends of the poles firmly into the ground.[11]
- You can use aluminum tent poles, bamboo poles, or wooden poles.
- Make sure to leave the excess cord attached to the poles because you will use it to secure the canopy with tent stakes.
-
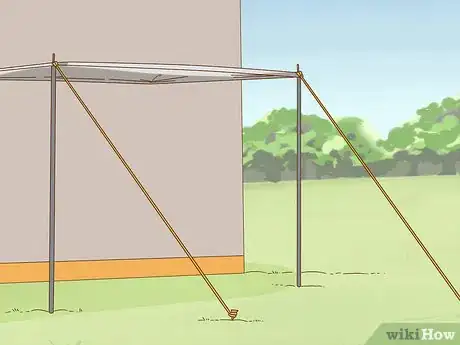
6Stretch out the 2 cords in the front and tie them to tent stakes in the ground. Pull the cords out from each corner as far as they will go, and place tent stakes in the ground where the ends reach. Tie the cord to the stakes to secure the canopy.[12]
- It is a good idea to have someone hold the tent poles firmly in place while you stretch out and secure the cords.
-
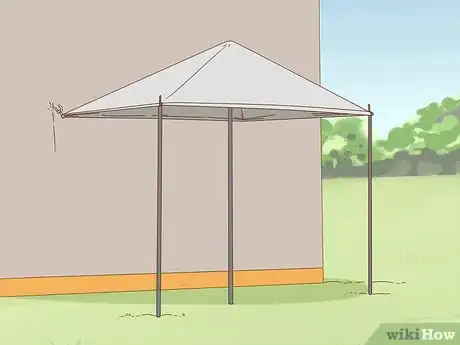
7Put 1 longer pole in the middle of the canopy to create a peak. Place 1 end of a 8 ft (2.4 m) pole underneath the canopy in the middle. Push the other end of the pole firmly into the ground.[13]
- The tension of the canopy and the 1 end of the pole pushed into the ground will hold the middle pole in place.
- If you don’t want to create a peak, you can drill the holes for the backside of the canopy slightly higher than the poles you are using for the front to create a slope. This will allow rainwater to drain off just as well.
Things You'll Need
Making a Shade Canopy with 4 Poles
- 1 high-quality tarp with grommets
- 4 7 ft (2.1 m) tent poles
- 1 8 ft (2.4 m) tent pole
- 40 ft (12 m) of 0.25 in (6 mm) nylon rope
- 4 tent stakes
Creating a Shade Canopy with a Wall
- 1 canvas drop cloth with grommets
- 2 7 ft (2.1 m) aluminum tent poles, bamboo poles, or wooden poles
- 1 8 ft (2.4 m) aluminum tent pole, bamboo pole, or wooden pole
- 25 ft (7.6 m) of strong cord
- 2 tent stakes
- 2 metal screw eyes or hooks
- Drill
- Tape measure
References
- ↑ https://lifehacker.com/5556566/create-your-own-outdoor-canopy-on-the-cheap
- ↑ https://www.marthastewart.com/265948/a-slice-of-shade-creating-canopies
- ↑ https://www.thisoldhouse.com/ideas/25-thrifty-ways-to-create-outdoor-dining
- ↑ https://www.marthastewart.com/265948/a-slice-of-shade-creating-canopies
- ↑ https://www.thisoldhouse.com/ideas/25-thrifty-ways-to-create-outdoor-dining
- ↑ https://www.marthastewart.com/265948/a-slice-of-shade-creating-canopies
- ↑ https://www.marthastewart.com/265948/a-slice-of-shade-creating-canopies
- ↑ https://www.marthastewart.com/265948/a-slice-of-shade-creating-canopies
- ↑ https://www.marthastewart.com/265948/a-slice-of-shade-creating-canopies
About This Article
To make an outdoor canopy, start by getting a tarp with grommets, or small metal rings, in each corner. Then, lay the tarp out on the ground, and tie the end of a tent pole to each grommet using nylon rope. Next, lift the tarp off of the ground, and stick the tent poles into the ground. Once you've done that, pull the nylon rope at each corner taut, and stake it into the ground. Finally, put a longer tent pole in the center of the canopy to raise it up higher. To learn how to build an outdoor canopy next to a wall, scroll down!
