This article was co-authored by wikiHow Staff. Our trained team of editors and researchers validate articles for accuracy and comprehensiveness. wikiHow's Content Management Team carefully monitors the work from our editorial staff to ensure that each article is backed by trusted research and meets our high quality standards.
This article has been viewed 130,954 times.
Learn more...
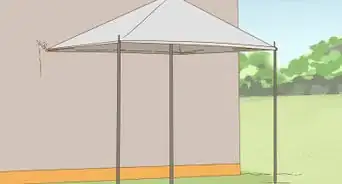
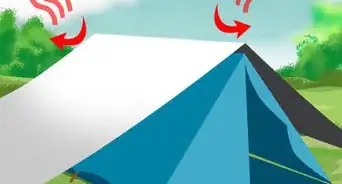
Staking your favorite canopy tent into the grass is an easy task. But if you need to assemble your tent on concrete, you’ll have to figure out how to weigh it down so the canopy doesn’t blow away. Fortunately, you have multiple options for making inexpensive, homemade weights for your tent. These include weights made with buckets of water or sand, store-bought tent weight bags, cinder blocks, or PVC pipe.
Things You Should Know
- Use a quick fix like tent weights, cinder blocks, or exercise weights.
- Fill up 5-gallon buckets with sand, gravel, water, or concrete and attach them to the tent with bungee cords.
- Create tent weights by filling PVC pipes with concrete, capping them, and attaching them to the tent with bungee cords.
Steps
Using Quick-Fix Tent Weights
-
1Buy tent weight bags for an easy option. There are tent weight bags manufactured and marketed specifically for canopy tents. Usually you have to fill them with sand and then attach them to the frame and legs of your tent. These can be more expensive than the homemade options, but they will save you time.[1]
- Be sure that the weight of the full tent weight bags meet your event’s weight requirement, if you are using your tent at a public event. Check the tent weight packaging to see how much the weights weigh when they’re full, and be sure to follow all directions.
-
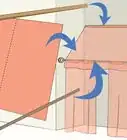
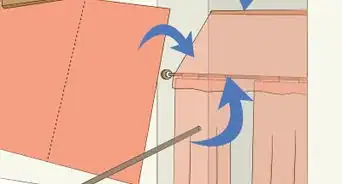
2Try cinder blocks as tent weights. A typical cinder block weighs about 28 pounds (13 kg), and can be useful as a tent weight. Tie a rope around the cinder block and knot the rope at the top corner of your tent frame. You can also tie the cinder block to the tent leg using rope or bungee cord, while still attaching rope to the top frame.[2]
- Some public events do not allow cinder blocks to be used as tent weights, as they can be a tripping hazard, so check with your event coordinator before using them.
- Cinder blocks can be a convenient method of weighing down your tents at home. Consider covering them with old towels or sheets so people don’t scrape themselves if they bump into them.
Advertisement -
3Use exercise weights to cut costs. If you have exercise weights lying around at home, you can also use these as weights for your tent. Stack a few of your choice by your tent leg, lining up the holes. Thread rope through the holes, tie a knot around the weights, then another knot at the top of your tent frame to attach the weights to it.[3]
- If you are using your tent at a public event, check with your event coordinator before using exercise weights as tent weights.


Filling Large Buckets with Sand, Gravel, or Water
-
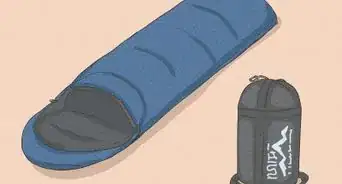
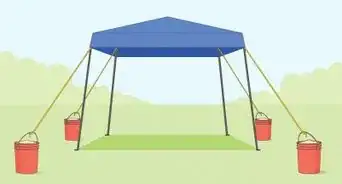
1Take 4-8 5 US gal (19 L) buckets to where you’re setting up your tent. The benefit of using bucket weights is that you can keep them empty until you need them. This is especially convenient if you know there will be water, sand, or gravel at your event location. Use buckets with handles for the convenience of having somewhere to easily tie rope for attaching the weights to your tent.[4]
-
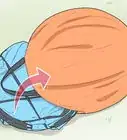
2Fill your buckets with the amount of filler needed. Public events with tents, such as arts festivals, often have a weight requirement for each tent leg. The highest requirement is usually around 40 pounds (18 kg) per leg. You’ll need a different amount of filler depending on which filler you’d like to use.
- To use water as your filler, fill your buckets all the way full to get 40 pounds (18 kg) in each one.
- For sand, you’ll need 3.2 gallons (12 L). Fill your buckets about 2/3 full of sand to get this.
- A full 5 US gal (19 L) bucket of gravel easily weighs 75 pounds (34 kg), so you’ll only need a little over half a bucket full of gravel to use that option.
-
3Fill buckets with concrete for permanent weights. Some people prefer to make bucket weights with concrete. Mix dry cement with water according to the cement bag’s package directions, and fill the buckets half full with concrete. These of course will not be able to be emptied when you’re finished with them, but they can serve as permanently available weights for whenever you need them.
-
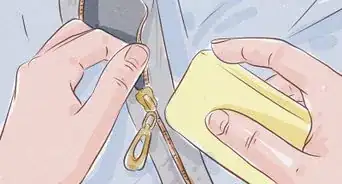
4Attach a bungee cord or rope to the handle of each bucket. Clip a bungee cord, or tie a sturdy knot with rope, to each of your bucket handles. If you’re using rope, it will need to be long enough to reach the top frame of your canopy with a knot tied there. A bungee cord will need to be able to stretch that far as well.
-
5Connect the other end of cord or rope to your tent frame. Connect your rope or cord to the corner of your tent frame near the leg so that the bucket hangs close to, or on, the ground. If the bucket is hanging at all, use another piece of rope or bungee cord to attach it to the tent leg. This will prevent it from swinging and spilling, or becoming a tripping hazard to people walking by.
- Try putting a lid on the bucket if you have one for it.
- If you used water as your filler, keep the bucket on the ground while attaching it, or fill it at the spot of your tent, to avoid spilling too much of the water.


Making PVC Pipe Tent Weights
-
1Buy PVC pipe and other supplies at a hardware store. For this option you’ll need 8 4 inches (10 cm) diameter PVC caps, a power drill, eye protection, gloves, 16 each of nuts, bolts and washers in 5⁄8 inch (1.6 cm) size, and 4 eyebolts that are 5⁄8 inch (1.6 cm) in size. You’ll also need 4 pieces of 36 inches (91 cm) PVC pipe, some PVC primer and glue, at least 50 pounds (23 kg) of fast-drying cement, water, a container for mixing cement, and rope or bungee cord.
- When finished, these weights will weigh about 40 pounds (18 kg) each. You also have the option of making smaller weights, using shorter 2 feet (61 cm) pieces of 3 inches (7.6 cm) diameter pipe.
- Some people like to make 8 smaller weights of about 20 pounds (9.1 kg) each to make them easier to transport.
-
2Drill holes into 4 of your PVC pipe caps. Make a mark using permanent marker in the center of your pipe caps. Using a 5⁄8 inch (1.6 cm) drill bit in your power drill, drill a hole into the center of 4 of the caps.[5]
- Always use eye protection and gloves when operating power tools.
-
3Attach 5⁄8 inch (1.6 cm) eyebolts to the caps with nuts and bolts. Insert 1 eyebolt into each hole that you drilled. Twist a 5⁄8 inch (1.6 cm) nut onto the eyebolt on either side of the cap to sandwich your eyebolt in, place a washer on the inside end, and then twist a bolt on that end to secure it.[6]
-
4Glue the caps with eyebolts onto the PVC pipes. Most PVC glues have a brush inside the cannister, and require you to use a purple primer liquid, sold near the glue itself, before brushing on the glue.[7]
- Follow all instructions on the PVC glue as you brush the glue on and attach caps to what will be the tops of each of your pipes. Allow your glue to dry for the length of time determined by the glue instructions.
-
5Mix some concrete and fill each pipe. Use a 5 US gal (19 L) bucket to mix your dry cement with water according to your cement package directions. Keep in mind that the cement starts to set quickly, so you’ll need to work quickly. When each pipe is full, stand it against a wall on the eyebolt to let the concrete dry.[8]
- This step can benefit from the help of a friend. When the concrete is mixed, 1 person can fill the pipes with a small trowel while the other person holds the pipe upright and occasionally taps it on the ground to make sure the concrete is moving toward the bottom.
- Consider mixing your cement in 2 separate batches, so that you aren’t as rushed to use up all the cement at once before it starts setting.
-
6Drill a small hole in each of the bottom caps. The caps for the bottoms of your pipes will need a small hole in them to allow air to escape when gluing the caps on. Wearing eye protection and gloves, use a small drill bit to drill a hole into these plain caps.[9]
-
7Allow the concrete to dry and glue a cap bottom on each end. Allow the concrete inside your pipes to dry completely for a few hours. Take the unattached cap bottoms and your PVC glue and primer, and glue these caps to the bottoms of your pipes. Allow them to dry according to the glue instructions.[10]
- Your weights are now complete. Hang onto them until you need them for your assembled tent.
-
8Connect each weight to your tent frame with bungee cord or rope. To attach your weights to your assembled tent, clip a bungee cord or tie a rope around the eyebolts. Take the other end and clip or tie it to the tent frame at the top corner near the leg of your tent, giving enough length to the cord or rope so that the weight hangs near or on the ground. Do this to all 4 corners of your tent.
- Some people also like to tie the weights to the legs down near the ground with rope or Velcro strips, so that they don’t swing around or become a tripping hazard.


Community Q&A
-
QuestionI don’t understand step 3. What do you do with the bolt?
 OakSocksCommunity AnswerMethod 3, step 3 says to, "Attach 5⁄8 inch (1.6 cm) eyebolts to the caps with nuts and bolts." In each hole you drilled (in the caps), put in an eyebolt using nuts and bolts. It's OK to attach them any other way as long as they are secure.
Things You’ll Need
Quick-Fix Weights
- Store bought tent weight bags
- Cinder blocks
- Exercise weights
- Rope or bungee cord
Bucket Weights
- 4-8 5 gallons (19 L) buckets
- Filler of your choice
- Rope or bungee cord
PVC Weights
- 8 4 inches (10 cm) diameter PVC caps
- Power drill, eye protection, gloves
- 5⁄8 inch (1.6 cm) nuts, bolts, and washers (16 of each)
- 4 5⁄8 inch (1.6 cm) eyebolts
- 4 pieces of 36 inches (91 cm) PVC pipe
- PVC primer and glue
- Fast-drying cement – at least 50 pounds (23 kg)
- Water
- Container for mixing cement
- Rope or bungee cord


References
- ↑ https://www.concordartsmarket.net/blog/tent-weights-101
- ↑ https://www.concordartsmarket.net/blog/tent-weights-101
- ↑ https://www.concordartsmarket.net/blog/tent-weights-101
- ↑ https://www.concordartsmarket.net/blog/tent-weights-101
- ↑ http://www.bettiesnbrimstone.com/2014/04/diy-canopy-tent-weights.html
- ↑ http://www.bettiesnbrimstone.com/2014/04/diy-canopy-tent-weights.html
- ↑ http://www.bettiesnbrimstone.com/2014/04/diy-canopy-tent-weights.html
- ↑ http://www.bettiesnbrimstone.com/2014/04/diy-canopy-tent-weights.html
- ↑ http://www.bettiesnbrimstone.com/2014/04/diy-canopy-tent-weights.html
About This Article

The easiest way to hold down a canopy tent on concrete is to purchase tent-weight bags, which can be filled with sand and attached to the legs of the tent. Consider using cinder blocks or exercise weights as a potentially cheaper alternative to weight bags. However, these can be a tripping hazard, so ask your event coordinator before using these to hold down your tent. When using household items, make sure they add up to your event’s weight requirement, or else your tent might not hold up. To make a bucket weight, purchase 4 to 8 buckets that hold 5 gallons and fill each ⅔ of the way with sand. If you want to use gravel, only fill the buckets halfway. For permanent bucket weights, mix dry cement with water and fill the buckets halfway with concrete. Let the mixture dry and you’ll have tent weight whenever you need them. To learn more, including how to make tent weights out of PVC pipe, read on.