This article was co-authored by Chai Saechao and by wikiHow staff writer, Dan Hickey. Chai Saechao is the Founder and Owner of Plant Therapy, an indoor-plant store founded in 2018 based in San Francisco, California. As a self-described plant doctor, he believes in the therapeutic power of plants, hoping to keep sharing his love of plants with anyone willing to listen and learn.
There are 7 references cited in this article, which can be found at the bottom of the page.
This article has been viewed 5,458 times.
You’re in love with your low-maintenance snake plant and think it’s ready to be propagated—but how do you do it? Thankfully, Sansevieria is hardy, and propagating from a healthy plant is a breeze! We’ve put together a detailed guide to propagating snake plant cuttings (in water and soil and by division). Read on if you’re ready to let your beautiful plants multiply!
Steps
Propagating Cuttings in Water
-
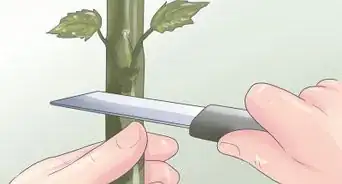
1Cut off a snake plant leaf with pruning shears, scissors, or a knife. Make your cut near the soil, close to the leaf’s base. Choose a leaf that’s about 6 inches (15 cm) or more tall and dark green. If the leaf is browning, that’s a sign it’s getting old and shouldn’t be used to propagate.[1]
- If the leaf is large enough, propagate multiple plants from it by cutting it into several smaller pieces (about 4 inches (10 cm) long).
-
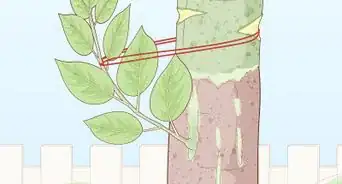
2Make an upside down V or slanted cut at the bottom of the leaf. Use your shears, scissors, or a sharp knife. The cut reminds you which end of the leaf is the bottom (it won’t root or grow if you plant it upside down!). It also adds more surface area for roots to grow from.[2]
- Make a cut at the bottom of each leaf or leaf cutlet you’re propagating.
Advertisement -
3Let the cut leaf dry for 1 to 2 days. Allowing the leaf to dry lets the cuts callous over and heal. This is an important step to take to prevent your cuttings from rotting. Lay your cutting somewhere safe and away from direct sunlight to dry.[3]
-
4Place the leaf in a clean jar filled with about 3 inches (7.6 cm) of water. The water level should be just slightly higher than the top of your V cut at the bottom of the leaf. Leave the jar in a spot that gets lots of indirect sunlight and replace the water about once a week.[4]
-
5Wait 3 to 5 weeks for roots to begin growing from the base of the cutting. Depending on the plant, it may take up to 2 months for the snake plant cutting to root. About 2 or 3 weeks after roots begin forming, you’ll see small pups (baby leaves or offshoots) forming.[5]
-
6Transplant the cutting in soil when the roots are 1 inch (2.5 cm) long. Pot the plant about 1.5 inches (3.8 cm) deep in moist, well-draining houseplant potting mix or succulent soil. Place your pot in a bright spot that receives lots of indirect sunlight.[6]
- Improve the drainage of your soil by mixing in some perlite or pumice.
- Young snake plants rot if the soil is too wet. Only water about every 2 weeks or whenever the top 2 inches (5.1 cm) of soil feel dry to the touch.
- Choose a porous pot, like one made of terracotta or clay, that allows some moisture to move through it.


Propagating Cuttings in Soil
-
1Select a healthy, dark green leaf to cut for propagating. Use pruning shears, scissors, or a knife to slice the leaf near the soil at its base. The leaf doesn’t have to be as long as you’d need to root in water—about 3 inches (7.6 cm) long is fine.[7]
- To propagate additional plants from the same leaf, cut it into segments about 2 inches (5.1 cm) long or so.
-
2Use scissors or a knife to make a notched cut at the bottom of the leaf. An upside down V shape or slanted edge will work great. The cut is to indicate which side of the leaf is the bottom (it also increases the available surface area for roots to grow from). Cut each leaf or leaf segment this way.[8]
- Let the cut leaf dry for at least a day to let the cuts heal.[9]
-
3Dip the bottom of each leaf in rooting hormone powder. Rooting hormone is a chemical compound you apply to cuttings to increase your chance of propagation success. It helps prevent rotting and speeds up the cutting’s rooting process. First, dip the leaf cutting in water. Then dip the bottom 0.25 inches (0.64 cm) of the cutting in the hormone powder.[10]
- Purchase root hormone powder or make your own mixture at home.
-
4Plant the cutting in potting mix or succulent soil immediately after the rooting hormone dip. The soil should be moist but well-draining (too much moisture can drown or rot a young snake plant). The bottom of the cutting should be about 1.5 inches (3.8 cm) deep in the soil.[11]
- Keep your fresh cutting somewhere that gets bright, indirect sunlight (too much direct light can damage the plant).
- If you’re concerned your soil isn’t draining well, mix in perlite or pumice. Choose a pot made from porous material, like terracotta or clay.
- Only water whenever the top 2 inches (5.1 cm) of soil feel dry to the touch (about every 2 weeks).
-
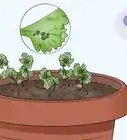
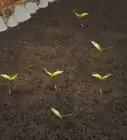
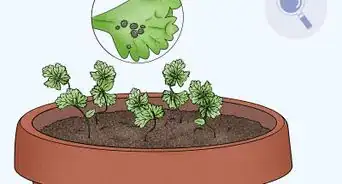
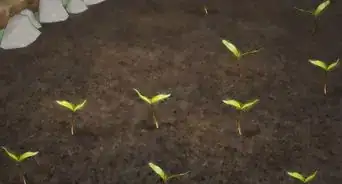
5Check for new leaves and shoots in about 2 months. If you see growth, this is a sign that the cutting is healthy and rooted! If desired, you can cut away the original leaf. If you suspect the cutting is rooted but you don’t see growth, adjust the temperature in the snake plant’s room—it will develop more quickly above 60 °F (16 °C).[12]
- Another quick rooting test is to lightly tug on the cutting. If you feel resistance, it’s rooted! If it slides right out, replant it and continue watering only when the soil has dried out.


Propagating by Division
-
1Lift the whole snake plant, including the roots, from its current pot. Gently shake or brush away dirt from the roots and base of the leaves. Don’t worry about damaging the plant during this process—it’s hardy![13]
-
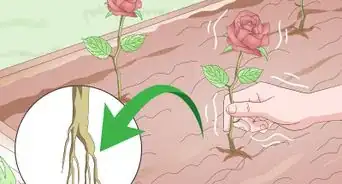
2Gently tug the clump of roots you want to separate from the main mass. The goal is to divide the tangled ball of roots into sections (with their leaves attached) that can be replanted independent of the mother plant and grow. If needed, use a sharp knife or scissors to divide the roots.[14]
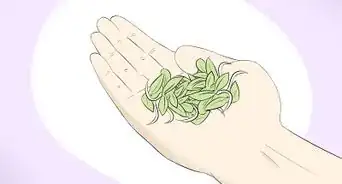
- Each division should have at least 3 leaves attached to their accompanying roots (or at least a little bit of a leafy top or pups attached).
- Create as many divisions as you like—each division will grow into a new plant identical to the original.
- If your snake plant has pups (small offshoots), remove those instead of rummaging through the root system. Rooting a pup will give you a smaller plant than a full division.
-
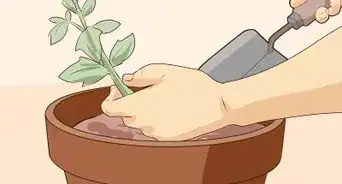
3Transport each division into a porous pot with houseplant potting mix. Add enough soil to completely cover the roots and support the plant so that it stands upright. If the plant starts leaning to one side, add more soil until it’s secure.[15]
- Keep each pot in a bright area of your home that gets plenty of indirect sunlight.
- Giving each division its own pot leaves plenty of room for new growth and root development.
- Hardy adult plants can even be planted outdoors in a garden if you live in an area that’s warm year round (above 50 °F (10 °C)).
-
4Water your divisions about every 2 weeks, or when the soil is dry. Snake plants are especially prone to rot from excess moisture while they’re establishing themselves in new soil, so take care not to over water. Make sure your soil is well-draining and you’re using a pot made from porous material like terracotta or clay.[16]


References
- ↑ https://houseplantcentral.com/how-to-propagate-a-snake-plant-in-water-or-soil/
- ↑ https://extension.umaine.edu/gardening/manual/propagation/plant-propagation/
- ↑ https://www.southernliving.com/garden/indoors/how-to-root-snake-plant
- ↑ https://houseplantcentral.com/how-to-propagate-a-snake-plant-in-water-or-soil/
- ↑ https://mrec.ifas.ufl.edu/foliage/folnotes/sansevie.htm
- ↑ https://mrec.ifas.ufl.edu/foliage/folnotes/sansevie.htm
- ↑ https://houseplantcentral.com/how-to-propagate-a-snake-plant-in-water-or-soil/
- ↑ https://extension.umaine.edu/gardening/manual/propagation/plant-propagation/
- ↑ https://www.southernliving.com/garden/indoors/how-to-root-snake-plant
- ↑ https://www.canr.msu.edu/news/rooting_hormones_improve_uniformity_among_vegetative_cuttings
- ↑ https://mrec.ifas.ufl.edu/foliage/folnotes/sansevie.htm
- ↑ https://mrec.ifas.ufl.edu/foliage/folnotes/sansevie.htm
- ↑ https://www.southernliving.com/garden/indoors/how-to-root-snake-plant
- ↑ https://extension.psu.edu/propagating-houseplants
- ↑ https://extension.psu.edu/propagating-houseplants
- ↑ https://plants.ces.ncsu.edu/plants/dracaena-trifasciata/
- ↑ https://www.southernliving.com/garden/indoors/how-to-root-snake-plant
About This Article