This article was co-authored by wikiHow Staff. Our trained team of editors and researchers validate articles for accuracy and comprehensiveness. wikiHow's Content Management Team carefully monitors the work from our editorial staff to ensure that each article is backed by trusted research and meets our high quality standards.
There are 8 references cited in this article, which can be found at the bottom of the page.
The wikiHow Video Team also followed the article's instructions and verified that they work.
This article has been viewed 29,622 times.
Learn more...
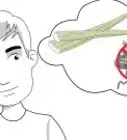
Spores are how mushrooms reproduce and grow, and they release spores from their gills when conditions are just right. Collecting mushroom spores is actually a really fun and easy art project because the spores leave cool designs on a piece of paper. You can also use the spores to grow your own mushrooms if you want to. If you want to try this out, you’re in luck, because it’s very easy! All you need is a fresh mushroom and a piece of paper to get started.
Steps
Exposing the Mushroom Spores
-
1Get a fresh mushroom from the store or ground. This trick works whether you use a store-bought mushroom or pick your own. Either get some mushrooms from the supermarket or look around your neighborhood for some mushrooms growing. You can use any mushroom, but generally, the larger the better.[1]
- You can also get more than 1 mushroom to extract more spores or make different designs.
- If you’re planning on growing the mushrooms to eat, make sure you get a type you know is safe and edible. It’s best to buy mushrooms from the store if you want to eat them, since eating wild mushrooms can be dangerous.
-
2Inspect the mushroom to make sure it's healthy. Unhealthy mushrooms won't produce many spores, or maybe none at all. Look for a fresh, healthy-looking mushroom with no mold or brown spots growing on it. Also feel the cap to make sure it’s firm, not wet and mushy. Then flip the mushroom over to make sure the gills aren’t dried out, because that's where the spores come from. If the mushroom passes these tests, then it’s perfect to collect spores from.[2]Advertisement
-
3Remove the stem from the mushroom so the gills can touch the paper. Use scissors or a knife and cut the stem at its base, as close to the gills as you can get.[3] You could also just pull the stem out, since it usually separates easily. This way, the gills can rest directly on the paper and you'll collect more spores.
- Don’t worry if you damage the gills a bit while you’re removing the stem. You can still get the spores out.
- If you want to keep the stem attached to the mushroom, you can still extract the spores. Cut a hole in an index card and place it over a bowl, then insert the stem into the hole so the cap rests on the paper.
-
4Slice around the border of the mushroom cap to expose the gills. On some mushrooms, the top of the cap grows down and over the gills a little bit. This can block the spores from releasing. Use a knife and trim around the bottom border of the cap to get rid of this excess covering. Keep trimming until the gills are entirely exposed.[4]
- Watch your fingers while you’re trimming! Wear gloves to protect your hands if you have to.
- Don’t slice too deep or you might pull out some of the gills.
- You don't have to trim the top of the cap. Only get rid of any parts that are covering the gills on the bottom.


Making a Spore Print
-
1Place a piece of paper on a flat surface. Any counter or tabletop will do. Try to pick a spot that you won’t need for about a day, since it takes several hours to harvest the spores. Lay the paper out flat to catch the spores from the mushroom.
- You could also use an index card or piece of aluminum foil. It all works.
- If you’re doing this project for a decoration, then try putting a few mushrooms on paper of all different colors. White and black are good choices, since these are the most common colors for mushroom spores.[5]
-
2Put the mushroom gill-side down onto the paper. Flip the mushroom so the gills are facing down. Then gently lay it onto the piece of paper.[6]
- Don’t press the mushroom down or you might crush it.
- You can put more than one mushroom on the same piece of paper, or just follow the same steps for a different piece.
-
3Add a drop of water to the top of the mushroom so the spores release. Use either a dropper or dip your finger in some water to place a drop on the mushroom cap. This helps keep the mushroom moist and encourages it to release spores.
- Don’t soak the mushroom or you might ruin the spores. Dry the cap off if you accidentally add too much water.
-
4Cover the mushroom with a cup or bowl to lock in moisture. Anything will work, as long as it covers the mushroom entirely. This helps lock in the moisture and also prevents the spores from blowing away when the cap releases them.
- Make sure the bowl or cup doesn’t press on the top of the mushroom. This might damage it.[7]
-
5Leave the mushroom alone for 2-24 hours while it releases spores. The mushroom will start releasing spores within a few hours, so now just leave it alone and let nature work. In general, the longer you leave the mushroom out, the more spores it will release.
- If you’re trying to do an art project, then try leaving multiple mushrooms out for different lengths of time. That way, you can create a cool mosaic of different designs.
-
6Lift the mushroom up to see your spore print. After a few hours, go back to see the result. Pick up the mushroom and check out the spore print on the paper.[8]
- Spores usually just look like dirt or dust on the paper. The main difference is that there are a range of colors. They could be brown, black, white, red, yellow, and a few other shades.
- If you want to collect more spores, you can always leave the mushroom out a little longer.


Preserving the Spores
-
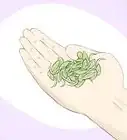
1Store the piece of paper in a plastic bag to keep the spores fresh. If you want to use the spores to grow your own mushrooms, then ideally you should plant them as soon as possible. In the meantime, you can keep them moist and protected in a plastic bag. Just slide the paper into the bag and seal it to keep the spores fresh.[9]
- Try not to scrape the paper on the opening of the bag when you're putting it in or you might rub off some of the spores.
- If you're saving spores on multiple pieces of paper, use a different bag for each piece.
-
2Keep the bag in a cool, damp spot out of direct sunlight. Mushrooms, like other fungi, generally prefer this environment. A damp, dark basement or garage will work well. Be sure to keep the bag out of direct sunlight so the sun doesn't kill the spores.[10]
- Kept in good conditions, the spores can last about a year. You can't really tell if they're still fresh with a visual check, though the color might start fading as they dry out.
-
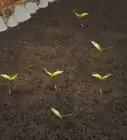
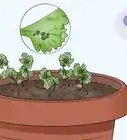
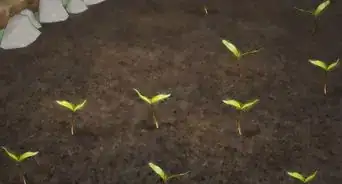
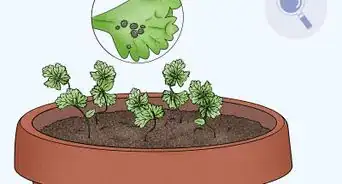
3Rub the paper onto compost to grow the mushrooms. When you're ready to use the spores and grow the mushrooms, the process is easy. Fill a pot with some soil and compost material. Then just rub the paper onto the soil to transfer the spores. Move the pot to a warm, dark, and damp spot and wait for the mushrooms to start emerging.[11]
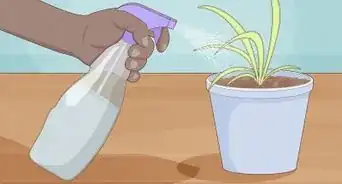
- Mushrooms don't need a lot of care, but keep the soil moist. Spritz it with some water if it's dry.
- The mushrooms should start sprouting in 3-4 weeks. If you don't see any by then, then the spores may have gone bad.[12]
-
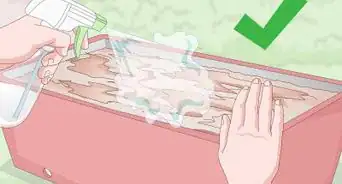
4Spray the spore print with hairspray to save it as an art project. Since mushroom spores look really cool, you might want to save yours. Luckily, you can! Simply spray the paper with some hairspray or clear spray paint to lock the print in place. Then you can hang it up to show off your work.
- Try experimenting with different mushroom types to get different spore designs. You can make all kinds of great posters with the prints.


Things You’ll Need
- Fresh mushrooms
- Sheets of paper
- Water
- Cup or bowl
- Plastic bag
- Knife or scissor
Warnings
- Always check the local drug laws before growing mushrooms. Mushrooms containing psilocybin and psilocin are psychedelics and you could be prosecuted for possessing or growing them.[13]⧼thumbs_response⧽

References
- ↑ https://www.chicagobotanic.org/blog/how_to/how_make_mushroom_spore_prints
- ↑ https://www.chicagobotanic.org/blog/how_to/how_make_mushroom_spore_prints
- ↑ https://www.chicagobotanic.org/blog/how_to/how_make_mushroom_spore_prints
- ↑ https://youtu.be/UFgg8ZBLruY?t=145
- ↑ https://youtu.be/KRtEllgivHs?t=35
- ↑ https://www.chicagobotanic.org/blog/how_to/how_make_mushroom_spore_prints
- ↑ https://youtu.be/KRtEllgivHs?t=152
- ↑ https://www.chicagobotanic.org/blog/how_to/how_make_mushroom_spore_prints
- ↑ https://youtu.be/UFgg8ZBLruY?t=120
- ↑ https://www.gardeningknowhow.com/edible/vegetables/mushrooms/grow-mushrooms.htm
- ↑ https://www.gardeningknowhow.com/edible/vegetables/mushrooms/harvest-mushroom-spores.htm
- ↑ https://www.gardeningknowhow.com/edible/vegetables/mushrooms/grow-mushrooms.htm
- ↑ https://www.drugpolicy.org/drug-facts/are-psilocybin-mushrooms-illegal
About This Article