This article was co-authored by Hovig Manouchekian. Hovig Manouchekian is an Auto Repair and Design Specialist and the Manager of Funk Brothers Auto, a family-owned business operated since 1925. With over 30 years of experience in the automotive industry, Hovig specializes in the process of auto repair and maintenance. He is also very knowledgeable in common automotive issues and needs including engine repair, battery replacement, and windshield accessory and maintenance. Hovig's knowledge and hard work have contributed to Funk Brothers Auto winning Angie's List Super Service Award for five consecutive years.
There are 13 references cited in this article, which can be found at the bottom of the page.
This article has been viewed 112,914 times.
If you've had your battery connected to a maintainer over the winter or had to remove it during other repairs, reinstalling it is a pretty simple process. All you need are some simple hand tools and a few other supplies you probably have around the house. It's important to not only connect the battery, but to make sure the connections are clean and the battery is secure.
Steps
Cleaning and Inspecting the Battery and Connections
-
1Put on eye protection and gloves. Protecting your eyes is especially important when reinstalling your battery. If you accidentally mix up the positive and negative cables, for instance, the battery could overheat and “burst,” spraying the water or chemicals stored in the battery.[1]
- Latex gloves will protect your hands if your battery leaks or bursts, but mechanic gloves will also offer protection from scratches and pinches.
- Goggles offer the most protection, but traditional safety glasses are also fine.
-
2Ensure the keys have been removed from the ignition. It's important that none of the vehicle's electronics are set to “on” when you reconnect the power from the battery, otherwise, the power surge could cause damage. If the keys are in the vehicle, turn the ignition to “off” and remove them for safety.[2]
- Just having the key inserted in the ignition will turn on the door chime in many vehicles.
Advertisement -
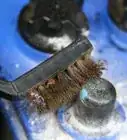
3Clean the battery terminal posts with baking soda and water. Use a wire brush to remove any corrosion or buildup on the battery terminals before you put it back in the car. Add 1 tablespoon (15 mL) of baking soda to 2 cups (470 mL) of water to create a cleaning solution to help you remove stuck on corrosion.[3]
- The baking soda and water mixture is abrasive enough to scrape away rust or old oil.
- If you don't have baking soda, you can use 100-grit sandpaper to get the same result.
- Use a damp rag to remove the baking soda mixture when you're done.
-
4Scrub any rust or debris away from the ends of the battery cables. Use the same mixture and wire brush to clean the connections at the end of the cables in your car as well. There has to be a good metal on metal connection for current to flow from the battery and into the car.[4]
- The outside of the wire connectors are often painted. It's fine to leave the paint intact, just ensure the inside of the connection is clean and clear of any debris.
- Use a damp rag to remove the baking soda mixture when you're done.
-
5Apply a corrosion protection material to the posts and the ends of the cables. You can find a variety of electrically conductive corrosion prevention creams or sprays at your local auto parts store. Choose one and apply it to the positive (+) and negative (-) terminals of the battery, as well as the inside of the wire connectors coming from the car.[5]
- These products are sometimes also called battery terminal protectors.
- Spray the wire connectors and terminals liberally, or apply a generous amount of cream or gel, then wipe off any excess.
-
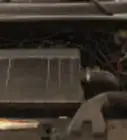
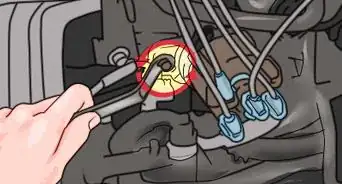
6Inspect the cables for cracks or damage. There are two cables that connect to your battery. The positive cable's end connector is often either painted red or has a red plastic clip attached to it. It runs to the engine's alternator. The second cable is a ground cable, which connects the negative terminal of the battery to the body of the car. Look both cables over closely for signs of damage or cracking.[6]
- If the covering on the cable is cracked, or the cable itself shows signs of wear or damage. It should be replaced.


Securing the Battery in Place
-
1Replace either cable if it appears to be cracked or damaged. To replace the positive cable, use the appropriately sized socket with a socket wrench to remove the nut that secures it to the top of the alternator. Slide the loop at the end of the cable off of the nut, then slide the replacement cable loop in its place and secure it with the nut. The negative cable can be replaced in the same fashion, but by removing the bolt holding the cable on to the body of the car, then swapping the new cable in its place and screwing the bolt back in.[7]
- You can purchase both cables at your local auto parts store.
- If neither cable is damaged, you can skip this step.
-
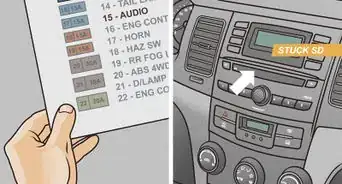
2Locate the tray for the battery.[8] In most vehicles, the battery's tray is located toward the front of the engine bay and off to one side (behind one of the headlights). However, many newer vehicles place the battery in the trunk, or even in the cabin of the vehicle, for better weight distribution.[9]
- If you have trouble locating where to install your battery, refer to the vehicle's owner's manual or manufacturer's website for guidance.
-
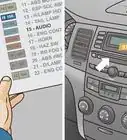
3Orient the battery correctly by matching the cables to to the terminals.[10] Most car batteries have their terminals close to one edge of the battery. The positive cable will be coming from one side of the engine bay, and the negative cable will come from the other. Orient the battery so that its positive (+) terminal is on the same side as the positive cable, and the negative (-) is on the same side as the negative cable.[11]
- The positive terminal on the battery will be labeled with a (+) sign.
- The negative terminal will be labeled with a (-) sign.
-
4Use both hands to lower the battery into position. Be careful, batteries often weigh 40 pounds (18 kg) or more. Grip the battery from the sides as you lower it into its tray, being careful not to pinch fingers as you do.[12]
- Make sure there's nothing in the tray before you lower the battery into it.
- If need be, tuck the battery cables off to the side as you place the battery in the car to prevent them from getting in the way.
-
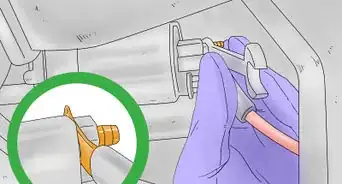
5Install the battery hold-down. Some car batteries use a metal hook you can loosen and tighten by hand, while others may use a metal or rubber strap. Look for the strap or hook in your vehicle and then use it to secure the battery in place.[13]
- Straps should be pulled over the battery and then secured on the other side, often using a bolt you can tighten with a ratchet.
- Hooks can sometimes be rotated by hand or with pliers, but some vehicles have a bolt you tighten to move the hook.
- If you are unsure how to secure your battery, refer to a vehicle specific repair manual or the manufacturer's website for further guidance.


Connecting the Battery Terminals
-
1Slide the positive battery cable onto the positive terminal. The positive cable will come from the alternator. Press the connector onto the terminal with your hand until it lies flat against the battery.[14]
- If that connector won't slip over the terminal post, use a wrench or socket and ratchet to loosen the bolt on the connector, then try again.
-
2Use a wrench to tighten the cable onto the post. Once the positive cable is on the terminal, it needs to be tightened to ensure it can't vibrate off while you're driving. Use a wrench or socket to turn the bolt on the connector clockwise until it's snug.[15]
- On many batteries, it's easier to use an open-ended wrench than a socket, but either will work.
- Wiggle the wire on the terminal a bit with your hand to make sure it's secure. If it moves at all, tighten the connector further.
-
3Connect the negative cable to the negative post and tighten it as well. The negative cable should be installed just like the positive one was. Press it onto the terminal post with your hand, then tighten it with a wrench.[16]
- If either cable can't reach the appropriate terminal, it means the battery wasn't oriented properly when you lowered it in.
- Wiggle the connection on the negative terminal with your hand and tighten it some more if there's any movement.
-
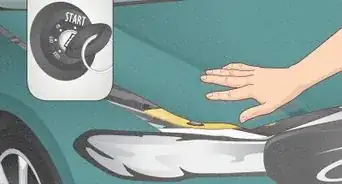
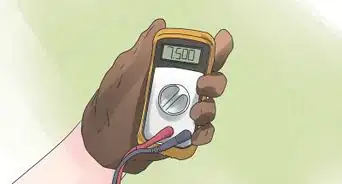
4Insert the key into the ignition and start the car. With the battery connected, the dome light should come on when you open the driver's side door. Insert the key into the ignition and turn it to start the vehicle and ensure the battery is properly connected.[17]
- If the vehicle does not start, check the connections at the battery as well as at the alternator and where the negative cable touches the body. If they are all good, try again.
- If it still doesn't start, the battery itself may be dead. If so, try jump starting it.


Community Q&A
-
QuestionCan I get cups to put over battery connections if I can't get a tight fit?
 Community AnswerYou can't use cups over battery connections because you will cut the connection for the power supply. If you aren't getting a tight fit, you need to get smaller connections.
Warnings
- Always wear eye protection when working with your car battery, in case it ruptures.⧼thumbs_response⧽
- Be very careful not to mix up the positive and negative wiring for the battery, or it may overheat, burst, or catch on fire.⧼thumbs_response⧽


References
- ↑ https://repairpal.com/advice/how-to/how-to-clean-battery-terminals
- ↑ https://www.aa1car.com/library/repair_safety_tips.htm
- ↑ https://repairpal.com/advice/how-to/how-to-clean-battery-terminals
- ↑ https://www.consumerreports.org/cro/2010/10/car-battery-installation-and-maintenance/index.htm
- ↑ https://www.digitaltrends.com/cars/instructions-and-photos-on-how-to-change-a-car-battery/
- ↑ https://www.consumerreports.org/cro/2010/10/car-battery-installation-and-maintenance/index.htm
- ↑ https://www.consumerreports.org/cro/2010/10/car-battery-installation-and-maintenance/index.htm
- ↑ Hovig Manouchekian. Auto Repair & Design Specialist. Expert Interview. 23 February 2021.
- ↑ https://youtu.be/WrAEooB3p6s?t=22
- ↑ Hovig Manouchekian. Auto Repair & Design Specialist. Expert Interview. 23 February 2021.
- ↑ https://youtu.be/WrAEooB3p6s?t=23
- ↑ https://youtu.be/WrAEooB3p6s?t=58
- ↑ https://www.digitaltrends.com/cars/instructions-and-photos-on-how-to-change-a-car-battery/
- ↑ https://youtu.be/WrAEooB3p6s?t=145
- ↑ https://youtu.be/WrAEooB3p6s?t=167
- ↑ https://www.familyhandyman.com/automotive/how-to-replace-a-car-battery/
- ↑ https://www.digitaltrends.com/cars/instructions-and-photos-on-how-to-change-a-car-battery/