This article was co-authored by Varga Gulshani. Varga Gulshani is a Residential Painting Specialist and the Owner of Elegant Painting based in Washington. With more than 16 years of experience, Varga and his team specialize in residential interior painting, exterior painting, and cabinet painting. Varga and the Elegant Painting team have all received background and verification checks.
There are 10 references cited in this article, which can be found at the bottom of the page.
This article has been viewed 62,360 times.
A wooden deck is a beautiful and rustic addition to any yard, and these outdoor areas usually see a lot of traffic, especially during the warmer months. Decks are great for relaxing evenings, summer meals outdoor, and even patio parties with friends and family. But to keep your deck looking impressive and keeping bare feet safe, it’s important to maintain your deck properly, which means refinishing it every couple years. Refinishing a deck will protect it from the elements and bring the wood back to life. It can be done with a few dedicated hours over a couple days, and the right supplies. The refinishing process involves cleaning the deck, preparing it for the new finish, finishing the deck with a new coat of stain, and making sure the finish provides the deck with a waterproof coating.
Steps
Gathering Your Supplies
-
1Get your equipment. There are a few things you’re going to need for this project, including supplies to clean the deck, fix problems, and refinish the deck.[1] Many of the tools and supplies you’ll need include:
- A broom and a hose or power washer[2]
- Cleaning agent, such as trisodium phosphate[3]
- A bucket and water
- A stiff-bristle brush with synthetic bristles
- Soap and water to remove mildew
- A paint brush, tray, and roller
- Sandpaper
- Painter’s tape
- A waterproof deck finish
- Rubber gloves and protective clothing
-
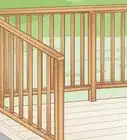
2Choose the right finish. Unless your deck is less than a year old, a clear or fully transparent stain or sealer is not recommended.[4] For a natural wood look that still hides knots and grain pattern, choose a semi-transparent stain. To cover the wood completely and hide its natural color and grain patterns, choose a solid stain instead.[5] An oil-based stain or sealer will penetrate the wood deeper and last longer, but a water-based product will be easier to clean.[6] It’s also best to choose a stain that provides:Advertisement
-
3Find plastic to cover your plants. Although most deck sealants are safe for plants, it’s better to protect nearby foliage from cleaner and paint run-off.[9] You can either buy large sheets of plastic or cut open plastic garbage bags, but make sure you cover up nearby plants before you move on to the next stages.


Cleaning and Repairing Your Deck
-
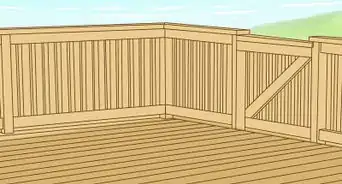
1Remove furniture. Move tables, chairs, umbrellas, carpets, barbecues, and anything else you might have on the deck. Clear the surface of the deck completely, as well as the railings and steps. This may include removing lights, plants, and other items as well.
- Before emptying your deck, you might want to clear a space below, in the garage, or in the basement where you can store your deck furniture for a few days while your refinishing project is underway.
-
2Sweep and inspect the deck. Sweep to remove dust, dirt, and other debris completely. As you sweep, do a visual check of the deck, looking for problem areas such as popped nails, loose screws, warped, rotted, or split boards, chips, or areas that require sanding.[10]
- Sand down any areas where splintered wood way cause slivers.
- Tighten down loose screws and hammer down popped nails.[11]
- Replace single boards that have split or broken.
-
3Tape areas you want to protect. Apply painter’s tape to any areas of the deck that adjoin the house, concrete, or other non-deck surfaces to protect them from splashing cleaner and paint.
-
4Choose your day and time. Spring is a good time for a refinishing project, but if you attempt this in the summer, you are better off applying sealer or stain in the early morning or late afternoon. You don’t want to be refinishing your deck if the temperature is going to drop below 50 F (10 C) or soar above 95 F (35 C).[12]
- Don’t try to refinish the deck on a sunny day, as applying your refinishing product in direct sunlight will make it dry too quickly, which will cause lap marks, and prevent the stain from absorbing into the wood properly.
- You should also have a look at the long-range forecast to help choose a day when it won’t be raining.


Refinishing the Deck
-
1Clean and scrub the deck. In a large bucket, dilute one cup (8 ounces) of trisodium phosphate in one gallon (3.8 liters) of water. Use the brush to scrub the railings and stairs with the water and trisodium phosphate solution. Attach your stiff-bristle brush to the long handle and continue scrubbing the entire surface of the deck.
- Scrubbing will clean off dirt, mold and mildew, old paint or stain, and grime. It will also help open the pores in the wood so that your finish will penetrate more deeply.
- Be sure to wear rubber gloves and safety equipment when working with heavy-duty cleaners.
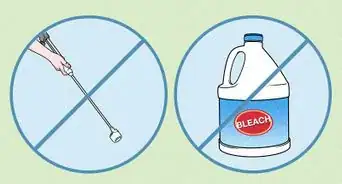
- It is generally not necessary to actively strip old stain or sealer from a deck.[13]
- You can also clean your deck with a two-part cleaner and brightener. This is designed to balance pH, and it also removes mildew, algae, and previous transparent finishes.[14]
-
2Rinse with water. Once you’ve scrubbed the entire deck, use your garden hose to rinse it off well. A power washer isn’t necessary at this stage, but if you do want to use one, avoid areas that have sustained damage from the elements,[15] keep the nozzle 12 inches or farther from the surface, and don’t linger on a single spot for too long.[16]
- Concentrate your pressure washer use in the corners and areas where it was difficult to reach when you were scrubbing.[17]
-
3
-
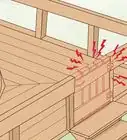
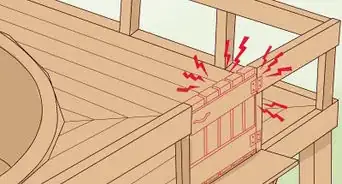
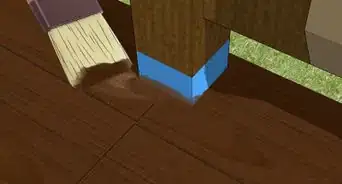
4Apply the new finish to the railings. Pour your refinishing product into the paint tray. Dip in your paint brush a few times to saturate it, gently brush off the excess, and begin refinishing your deck, starting with the railings.[20] Don’t apply an overly thick coat, and brush away any pools immediately.
-
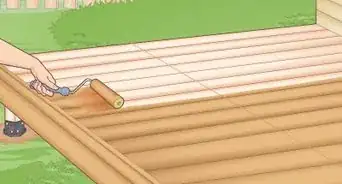
5Refinish the deck surface and stairs. When you’re ready to start painting the deck surface, attach the roller to your roller frame, and attach the roller frame to your long handle. Soak your roller in an even coating of stain and roll off the excess. Dip the roller back in the tray as needed.
- Start in an inside corner closest to the house if possible, and apply the stain parallel to the boards (in the direction of the wood grain).[21]
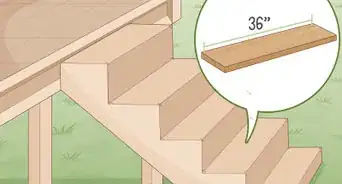
- Work your way toward the stairs, and then refinish the stairs starting at the top and working your way down.
- Use a brush for delicate areas along the house or near other edges where you don’t want to paint the adjoining surface.
-
6Avoid lap marks. To prevent some areas from getting more stain and being darker than others, only work on a few boards at a time, and cover the entire length of those boards before moving over.[22] Also make sure that when you stop to get more paint on the roller, you don’t take so long that your edge has time to dry.
-
7Apply multiple coats if necessary. Check the can and follow the manufacturer’s instructions regarding wait time between applying coats.[23] Once you’ve waited the allotted time, apply your next coat according to the same process.
- Note that some products have to be applied while the first coat is still slightly wet in order to absorb into the wood properly.[24]
-
8Allow the deck to dry fully. Check the manufacturer’s instructions for exact time, but most will recommend waiting two or more days before replacing furniture and walking on the deck again.


Expert Q&A
-
QuestionDo you need to sand a deck before staining?
 Varga GulshaniVarga Gulshani is a Residential Painting Specialist and the Owner of Elegant Painting based in Washington. With more than 16 years of experience, Varga and his team specialize in residential interior painting, exterior painting, and cabinet painting. Varga and the Elegant Painting team have all received background and verification checks.
Residential Painting SpecialistYes! After cleaning it, power sand all surfaces using a power disk sander to restore most of the deck boards to a 90% like-new condition. Hand sand spindles to prevent damage and remove any splinters that may have been raised by the pressure washer. -
QuestionHow do I cover up the cracks between boards?
 Community AnswerYou shouldn't need to. If a board itself is cracked, you may just want to replace that board.
 -
QuestionWhat is the easiest and most efficient way to get pine needles from between the cracks?
 Community AnswerA pressure washer usually works quite well.


References
- ↑ Varga Gulshani. Residential Painting Specialist. Expert Interview. 12 January 2021.
- ↑ Varga Gulshani. Residential Painting Specialist. Expert Interview. 12 January 2021.
- ↑ Varga Gulshani. Residential Painting Specialist. Expert Interview. 12 January 2021.
- ↑ http://www.improvenet.com/a/diy-how-to-refinish-a-deck
- ↑ http://www.bobvila.com/articles/how-to-refinish-a-deck/#.Vl9WiOLU0g4
- ↑ http://www.thisoldhouse.com/toh/article/0,,219491-3,00.html
- ↑ http://www.thisoldhouse.com/toh/article/0,,219491-3,00.html
- ↑ http://www.hometips.com/repair-fix/deck-maintenance-wood.html
- ↑ http://www.familyhandyman.com/decks/how-to-revive-a-deck/view-all
- ↑ http://www.bhg.com/home-improvement/deck/building/how-to-refinish-your-deck/#page=2
- ↑ http://www.thisoldhouse.com/toh/article/0,,213692-3,00.html
- ↑ http://www.bobvila.com/articles/how-to-refinish-a-deck/#.Vl9WiOLU0g4
- ↑ http://www.bhg.com/home-improvement/deck/building/how-to-refinish-your-deck/#page=2
- ↑ Varga Gulshani. Residential Painting Specialist. Expert Interview. 12 January 2021.
- ↑ http://www.bobvila.com/articles/how-to-refinish-a-deck/#.Vl9WiOLU0g4
- ↑ http://www.houzz.com/ideabooks/26802643/list/how-to-refinish-a-wood-deck
- ↑ http://www.bhg.com/home-improvement/deck/building/how-to-refinish-your-deck/#page=2
- ↑ http://www.improvenet.com/a/diy-how-to-refinish-a-deck
- ↑ http://www.thisoldhouse.com/toh/article/0,,219491-3,00.html
- ↑ http://www.familyhandyman.com/decks/how-to-revive-a-deck/view-all
- ↑ http://www.thisoldhouse.com/toh/article/0,,213692-4,00.html
- ↑ http://www.bhg.com/home-improvement/deck/building/how-to-refinish-your-deck/#page=2
- ↑ Varga Gulshani. Residential Painting Specialist. Expert Interview. 12 January 2021.
- ↑ http://www.thisoldhouse.com/toh/article/0,,213692-4,00.html
About This Article

Before you refinish a deck, put on a pair of rubber gloves and protective clothing, since you'll be working with strong chemicals. Then, scrub your deck with a solution of water and trisodium phosphate to get rid of dirt or mold. Next, wait for your deck to dry, and apply a waterproof deck finish to the railings with a paint brush. Once you're done with the railings, use a roller brush to coat the deck and stairs, working with the grain of the wood, parallel to the boards. After that, follow the instructions on your refinishing product to apply multiple coats, if necessary. For tips on how to fix popped nails, split boards, or rotted wood before you refinish your deck, read on!