This article was co-authored by Ryaan Tuttle. Ryaan Tuttle is a Home Improvement Specialist and the CEO of Best Handyman, Inc. in Boston, Massachusetts. With over 17 years of experience, he specializes in building home service businesses, focusing on creating scalable and efficient brands. With the help of his global team, the companies have achieved over 10+ million in sales and received recognition through magazine features, and enjoy partnerships with wikiHow and Jobber field service software. Boston Magazine and LocalBest.com have named Best Handyman Boston the Best Handyman in Boston. Ryaan holds Construction Supervisor and Home Improvement Contractor Licenses.
This article has been viewed 37,746 times.
You can refinish a garage or basement floor with a fresh coat of epoxy paint. Concrete epoxy finish comes in many shades, and you can add color flakes to give it even more dimension. Anti-skid granules can keep your floor slip-resistant when wet.
Steps
Prepare the Area
-
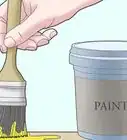
1Sweep out all dirt and debris. Make sure to get all the corners of the garage or basement floor clean, as well. Use a small paint brush to sweep dirt from corners.
-
2Prepare a previously painted floor. If the floor already has a coat of old paint, you will need to rough up the surface. Sand the floor to scuff up the glossy surface, and sweep away all dust and debris.Advertisement
-
3Degrease the floor. Use a floor degreaser to remove all old stains from oil, antifreeze or any other substances on the floor. Rinse the cleaner with water, and let the surface dry thoroughly.
-
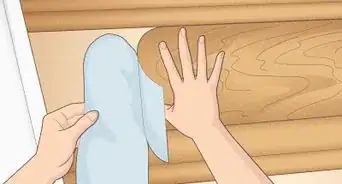
4Protect the walls. Put up plastic protective sheet on the walls around the entire floor to protect them from the epoxy coating you will paint on the floor.
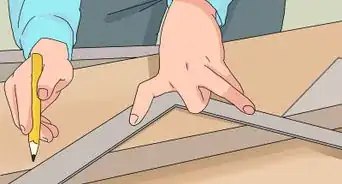
- Use the duct tape test to make sure the floor is completely clean before painting it. Stick a piece of duct tape to the floor. If there is any dirt on the bottom when you pull it off, sweep and clean it again.


Etch Bare Concrete Floors
-
1Mix a concrete etching solution with water in a plastic container. A plastic watering works well for pouring the solution on the concrete. Wear rubber gloves to protect your hands while etching the floors.
- All newly poured concrete or bare concrete floors must be etched for the garage or basement epoxy coating to stick properly.
-
2Wet the floor with water.
-
3Pour the etching mixture over a 10-by-10-foot (3-by-3 m) section. Start in a corner away from the door to avoid working yourself into a corner.
-
4Work in the etching solution. Work a bristly utility broom back and forth in one direction. Then scrub the same area a second time, working the etching solution across the same area perpendicular to the first direction. Etch the entire garage in small sections.
-
5Rinse the etching solution off the floor. Start in the farthest corner, rinsing the floor until it is completely clear of etching solution. Let the floor dry for at least 4 hours.


Paint the Surface
-
1Gather all the paint brushes, rollers and trays you need to paint. You must use epoxy within 2 hours for it to work, so make sure everything you need is ready to go and work quickly.
- If you don't feel comfortable doing this on your own, hire a specialty a company to epoxy and finish the concrete.[1]
-
2Mix the concrete epoxy paint. Concrete epoxy coating will come in 2 cans: an epoxy paint and a hardener. Stir the paint until it is completely mixed and let it sit for the amount of time the manufacturer recommends -- usually 30 minutes. As it sits, the chemicals in the mixture will warm up, making the can feel warm.
-
3Paint the edges. Use a paint brush to paint the trim area around the entire garage or basement surface.
-
4Paint the floor using a roller brush. Use extension handle so you can easily stand.
- Start at the farthest corner and work in the same 10-by-10 foot (3-by-3 m) sections you used to apply the etching solution. Roll the paint on one direction, then go back and paint the same area in a perpendicular direction before moving on to the next section. Let the floor dry completely.
- If you are adding any color flakes to the paint, do this in the sections as you paint. Sprinkle the flakes on sparingly at first, then add more layers until you get to the consistency you desire. Color flakes cover up flaws in the concrete.


Paint the Top Coat
-
1Mix the top coat paint with the hardener and let the mixture sit for 30 minutes. Stir the mixture for 1 more minute before beginning.
- If you want an anti-skid surface, add the anti-skid granules during the last 1 minute mixing time. Anti-skid additives are a good idea for floors that may get wet from foot traffic and snow-covered tires.
-
2Apply the top coat using the same technique you used with the epoxy coating. Paint all the edges, then work in sections until you have the entire surface covered. The top coating is a milky color when applied, but it dries clear.
-
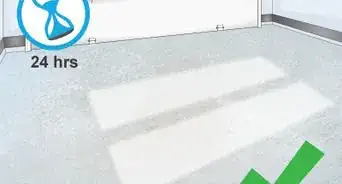
3Let the top coat dry 24 hours before walking on it, and 72 hours before parking a vehicle on it.


Things You'll Need
- Broom
- Sander
- Degreasing cleaner
- Epoxy paint and top coat
- Paint brush
- Paint roller with extension


-Step-19.webp)
References
- ↑ Ryaan Tuttle. Home Improvement Specialist. Expert Interview. 30 July 2021.
- http://www.thisoldhouse.com/toh/how-to/intro/0,,20174654,00.html
About This Article