This article was co-authored by Mark Spelman. Mark Spelman is a General Contractor based in Austin, Texas. With over 30 years of construction experience, Mark specializes in constructing interiors, project management, and project estimation. He has been a construction professional since 1987.
wikiHow marks an article as reader-approved once it receives enough positive feedback. In this case, 99% of readers who voted found the article helpful, earning it our reader-approved status.
This article has been viewed 414,804 times.
Popcorn (acoustical) ceilings are a quick and cheap way to finish sheetrock ceilings and were all the rage in the '60s and '70s. Now, they have fallen out of favor somewhat, consigned to the fate of mullets, feathered hair and Angel's Flight jackets. Getting rid of popcorn ceilings is pretty easy, although working on the ceiling is a good workout for your shoulders.
Steps
Get Started
-
1Clear out the room entirely. Imagine your floor looking like what your ceiling looks like now. Now imagine tiny little pellets of paint in every crack and cranny of your sofas, chairs, and rugs. It's not a pretty sight. To avoid having to do more work later on, remove any and all furniture or household items from the room completely. It should look completely bare before moving on to the next step.[1]
- If some furniture is going to remain in the room because it is large or heavy, ensure you cover it completely in plastic to avoid getting it dirty.
-
2Completely cover the floor with plastic covering or a drop cloth. Although a canvas drop cloth is the professional gold standard, several pieces of overlapped plastic covering will also do the trick. Take care because plastic can be slippery underfoot.[2]
- Remember that any plastic covering that isn't taped together has a chance of leaking. If you want to be absolutely sure that your clean-up job will only require throwing away the plastic covering, tape it together for added protection.
Advertisement -
3Put a fan in the room and turn it on for added ventilation. Don't turn it up toward the ceiling; just have it on and blowing in an inconspicuous place near the ground. It’s probably best to put this on low, so you don’t blow debris around the room.
-
4If your popcorn ceiling is pre-1979, get it tested for asbestos. Seek professional help for a diagnosis. Asbestos was widely used in construction, for its insulation and fire resistance, before 1979.[3]


Remove the Popcorn Ceiling
-
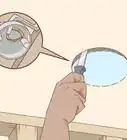
1Using a gardener's portable hand sprayer (also called a Hudson sprayer) to spray down portions of the wall. Spray a 3' x 3' area of the ceiling. Let it soak in for a minute, and then spray it again. The popcorn material is very dry and porous, so it will easily soak in the water you spray on it. Don’t be afraid to soak it well.[4]
-
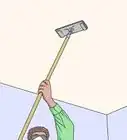
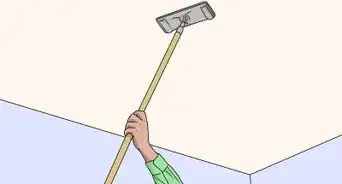
2After a few more minutes, get up on a stepladder and scrape the popcorn off with a ceiling texture scraper. If you don't have a ceiling texture scraper, a large putty knife or drywall knife (4" or 6" is good).[5]
- It should come off very easily. If not, soak it some more, but be careful not to soak the ceiling too much. Too much water can cause damage to the drywall tape and underlying drywall that you will find behind the popcorn stubble.
- If using a ceiling texture scraper, attach the refuse bag to the scraper. (Most scrapers will come with this functionality.) This way, you can throw the popcorn stubble from the catch right into the garbage instead of having to wipe it all up again on your floor.[6]
- If your room is tall, use a scrapers with an extension pole so you can reach better.
-
3Move onto the next 3' x 3' squares of ceiling area while repeating steps 1 and 2.
-
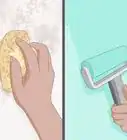
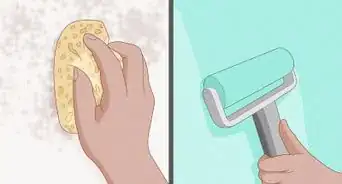
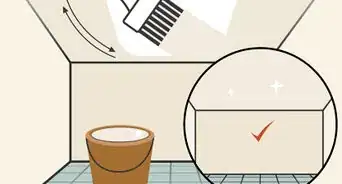
4When all the popcorn is scraped off, sand the entire ceiling with a sanding pole & screen. Gather any of the scraped-off popcorn that's on the drop cloth and put it in heavy duty garbage bags. Vacuum up any remaining dirt or debris.[7]


Complete the Process
-
1Apply any needed joint compound, if necessary. At this point, you will probably see that your ceiling has only been "fired taped," meaning that the drywall installer only did a very crude job with the drywall tape, putting up only one coat of mud. So be prepared to have to put on a couple of coats of drywall mud.[8]
-
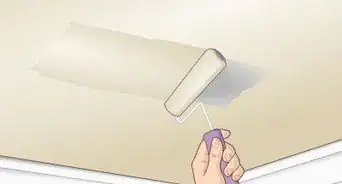
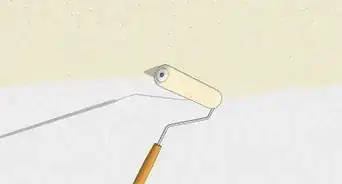
2For the best finish of all, do a "skim coat." A skim coat involves topping compound applied to the entire ceiling with a 12" or 14" drywall knife. Sand this skim coat for a flawless finish before you apply the primer and paint. It may be helpful to have a professional do this step.[9]
-
3Add more texture to your ceiling, if desired. So the popcorn finish didn't work out for you in the end. So what? There are plenty of other texture finishes that you can try out on your ceiling to make it pop and better stand out.
-
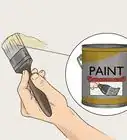
4Prime and paint your ceiling. Once you've mudded, sanded, and textured, you prime and paint. This is the fun part, giving you a beautiful new ceiling. The amount of work involved was definitely worth it.


Expert Q&A
-
QuestionIf the popcorn ceiling has asbestos, what are your options? Leave it? Take it down yourself?
 Mark SpelmanMark Spelman is a General Contractor based in Austin, Texas. With over 30 years of construction experience, Mark specializes in constructing interiors, project management, and project estimation. He has been a construction professional since 1987.
Construction ProfessionalAlways hire a professional to remove any asbestos in your home. No exceptions. -
QuestionI read that you should put hot water and vinegar in the sprayer. If so, what's the right ratio?Mark SpelmanMark Spelman is a General Contractor based in Austin, Texas. With over 30 years of construction experience, Mark specializes in constructing interiors, project management, and project estimation. He has been a construction professional since 1987.
Construction ProfessionalUsing hot water and vinegar are not necessary. I recommend just using lukewarm water. -
QuestionIf some of the popcorn ceiling lands on the carpet, can it be swept up?Mark SpelmanMark Spelman is a General Contractor based in Austin, Texas. With over 30 years of construction experience, Mark specializes in constructing interiors, project management, and project estimation. He has been a construction professional since 1987.
Construction ProfessionalFirstly, ensure your carpet is properly covered with a drop cloth or plastic sheet. If some dust or debris still lands on the carpet, I recommend using a vacuum cleaner to remove it.
Warnings
- Asbestos is the known carcinogen that causes asbestos mesothelioma cancer. Unfortunately, the symptoms only appear between 5 and 50 years after inhaling asbestos. This is a terrible and painful disease with extremely poor prognosis. If you suspect asbestos, study the possible risk and consequences before proceeding.⧼thumbs_response⧽
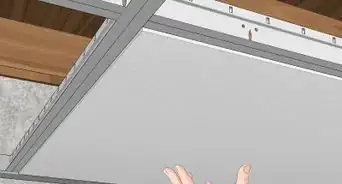
- If your house or apartment was built before the mid-70s, it is possible that your popcorn ceiling contains asbestos. So get the ceiling checked for asbestos before you start. If the ceiling does have asbestos in it, the best course of action would be to install 1/4" drywall over the existing ceiling, since getting the asbestos popcorn removed would probably be way out of your budget.⧼thumbs_response⧽
- Always wear a hat and goggles to protect yourself while working.⧼thumbs_response⧽
Things You'll Need
- Canvas or plastic drop cloths, enough to completely cover the floor area
- Portable garden sprayer (can be rented, but you probably know somebody who will let you borrow theirs), filled with water
- stepladder
- Goggles
- Hat
- 4" or 6" putty/drywall knife
- Sandpaper, sanding screen & pole, or drywall sanding sponges
- Broom & shop vac
- After you are done: drywall mud and drywall finishing tools, latex primer & paint, painting tools


References
- ↑ https://www.familyhandyman.com/drywall/ceiling-texture/how-to-remove-a-popcorn-ceiling/
- ↑ https://www.familyhandyman.com/drywall/ceiling-texture/how-to-remove-a-popcorn-ceiling/
- ↑ http://www.vcapcd.org/asbestos.htm
- ↑ https://www.todayshomeowner.com/removing-textured-popcorn-ceilings/2/
- ↑ https://www.thisoldhouse.com/ideas/3-ways-to-deal-popcorn-ceiling
- ↑ https://www.familyhandyman.com/drywall/ceiling-texture/how-to-remove-a-popcorn-ceiling/
- ↑ https://www.homeadvisor.com/r/textured-popcorn-ceiling-removal/
- ↑ https://www.familyhandyman.com/drywall/ceiling-texture/how-to-remove-a-popcorn-ceiling/
- ↑ https://www.familyhandyman.com/drywall/how-to-skim-coat-walls/
About This Article

If your ceiling was built before 1979, seek professional help as it may contain asbestos. If it was built after 1979, clear everything out of the room, lay down a dust sheet, then spray a 3 by 3 foot area of the ceiling with a gardener’s portable hand sprayer. After a few minutes, scrape off the ceiling with a putty knife. Repeat this process until you’ve cleared the entire ceiling, then sand the ceiling down. To finish, put the debris in heavy duty garbage bags and vacuum the room. For tips from our General Contractor reviewer on how to do a skim coat to finish your ceiling, read on!