wikiHow is a “wiki,” similar to Wikipedia, which means that many of our articles are co-written by multiple authors. To create this article, volunteer authors worked to edit and improve it over time.
This article has been viewed 33,544 times.
Learn more...
While wandering around in the city, you might notice electric Bird scooters sitting on the sidewalks or being ridden in the bike lanes. The concept is simple: Through an app that can be downloaded onto a smartphone, you can locate an available scooter nearby and activate it. You can then drive the scooter to your destination, park it, and pay through the app. Prices depend on how long the Bird is used. These instructions will show the step by step process of how to rent a Bird scooter.
Steps
Setting Up the Bird App
-
1Download the Bird app. Save time by downloading and setting up the Bird app before you set out to find and ride a Bird. The application is free on Apple Store and Google Play under the name “Bird - Enjoy The Ride.” The application’s icon has a black background with a white wings symbol.
-
2Grant the Bird app permissions. When launching the app for the first time, it will ask for permission to access your location and send notifications. You will need to allow the app to do this so it can locate and find available scooters near you.
- You can choose the “Only While Using the App” option so the app cannot access your location without your permission. It is up to you whether you want the app to send you notifications or not.
Advertisement -
3Enter your email address and click “Ride.”
-
4Verify your email address. Click the 2 parallel lines in the top left corner of the home screen in the app. Click “Settings," then press the “Verify Email” button. The app will send a message to your email address. This may take several minutes.
- Open your email and click on the “Verify” button. Clicking the button will take you back to the Settings menu in the Bird app. There will be a checkmark next to your email address indicating it is verified. Click the back arrow in the top left corner of the app to return to the main screen.
-
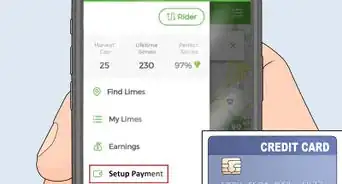
5Enter your payment method. Click on the 2 parallel lines symbol in the top left corner. Select “Payment.” Select one of the options to add a payment method and follow the onscreen instructions. The app will verify your selected method. Note: Not all credit cards can be snapped.


Renting a Bird Scooter
-
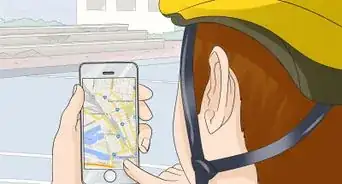
1Find a Bird. You can find an available Bird scooter using the map on the home screen of the app, which also displays information about the scooter (battery, miles, etc.). Click on the icon of the Bird that you would like to rent.
-
2Walk to your Bird. The Bird scooter you select may be a distance away from your current location. If so, walk to the location of your Bird. If you are already standing near your Bird, you can skip this step. Look for Bird scooters that appear on the sidewalks or in an open area. Don’t try to find scooters that appear inside a building. These might be charging scooters.
-
3Check to make sure you are at the right scooter. When you are near the scooter you want to rent, tap on the “?” next to the battery symbol. Tap “Chirp Alarm” to make your scooter play a sound. This will help you identify your scooter if there are multiple scooters in the same location.
-
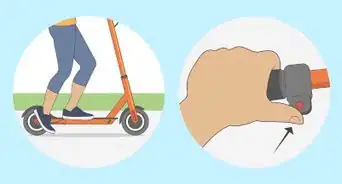
4Select a ride. To start using the scooter, you will need to unlock it. Tap the “RIDE” button which is at the bottom center of the home screen. The app will change to camera mode to let you scan the QR code on the scooter. The code is on the panel which is in between the scooter’s handlebars.
-
5Scan the code. Center the QR code in the camera window on your phone. The app automatically scans the code. It will then prompt you to enter your driver’s license and agree to the user agreement (required only for the first time you rent a Bird). The “Unlock” button will be available at the bottom right of your app. Tap the “Unlock” button. You are now renting your bird!
-
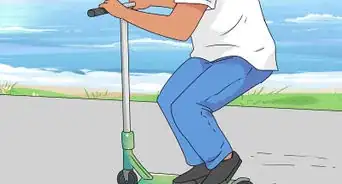
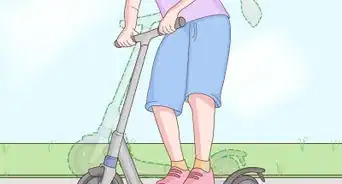
6Start riding your scooter. Push down on the throttle in the thumb position of the right handle. The brake is on the left handle, and there is also a bell to let people know you are coming through!
- You may need to push off the ground with your foot once or twice to get the scooter going. You can refer to the app on how to properly start and ride the Bird scooter.
- Don't ride on sidewalks unless permitted by local law; ride in bike lanes or close to the right curb.
-
7Lock your Bird scooter while you're not using it. If you stop somewhere and have to leave your Bird scooter, lock it using the app. This will prevent others from riding your Bird and allow you to return to it when you are ready. To lock your Bird and return to it later, click “Lock.” Then click “Continue Ride” when you come back.
- Keeping a Bird scooter locked will increase the cost of the ride. Be mindful of how long you leave a scooter locked before returning to it! Birds cost an initial rental fee of $1 and then charge per each minute of use. Typical rates are $0.15 - $0.20 per minute, depending on the city.
-
8End your ride. When you are finished using the Bird, park it near a bike rack if there is one nearby. Avoid blocking public pathways. Click “End Ride” to end your ride and make your Bird available for the next user.
- The app will switch back to camera mode so you can verify you have parked the Bird properly. Position the scooter in your camera window and click "End Ride" to finish.
-
9Rate your ride experience. Click a star to rate your riding experience and provide feedback to Bird!


Warnings
- Only one rider per Bird.⧼thumbs_response⧽
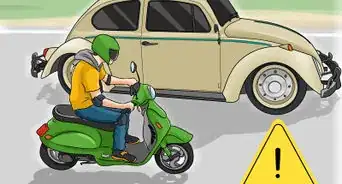
- Do not ride on sidewalks unless permitted by local law; ride in bike lanes or close to the right curb.⧼thumbs_response⧽
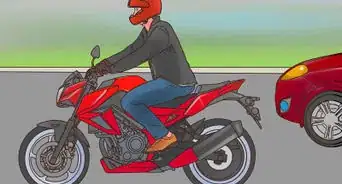
- Wear a helmet and protection if you have it!⧼thumbs_response⧽
- No drinking and riding.⧼thumbs_response⧽
- Must be 18+ years old with a valid driver’s license to ride.⧼thumbs_response⧽
- Always be aware of your surroundings.⧼thumbs_response⧽
Things You'll Need
- Smartphone
- Bird - Enjoy The Ride app
- Payment Method (credit card or Apple Pay)
- Driver’s License
- Helmet (recommended)