This article was co-authored by wikiHow Staff. Our trained team of editors and researchers validate articles for accuracy and comprehensiveness. wikiHow's Content Management Team carefully monitors the work from our editorial staff to ensure that each article is backed by trusted research and meets our high quality standards.
There are 11 references cited in this article, which can be found at the bottom of the page.
This article has been viewed 35,783 times.
Learn more...
Lime scooters are a recent addition to the commuting scene in many cities around the US. They can provide a feeling of freedom for city-dwellers without cars, allowing them to get around without walking, taking public transit, or using a rideshare app. If you want to ride one of the bright green Lime-S electric assist scooters that dot the sidewalks and curbs of your town, you may wonder how to get started. By downloading the app and learning what rules you are required to follow in your city, you will be able to get around on a Lime scooter in no time.
Steps
Finding a Lime Scooter to Ride
-
1Download the Lime app onto your mobile device for free. You can find the Lime app by searching for it by name on the Google Play Store or Apple’s App Store on an iPhone. The app may take a moment to download, and will ask you a few questions about you before being able to continue.[1]
- Without a mobile phone or other mobile device with data and location access, you won’t be able to ride a Lime scooter.
-
2Enter your credit card information. Lime scooters have both a small unlocking fee and a per-minute charge. In order to pay for a Lime scooter, you will have to enter your credit card’s information on the app. This will give the app the ability to charge your account.[2]
- The cost per-minute is typically $0.15, on top of the $1 unlocking fee.
- You will have to have a credit card to be able to use Lime, as the app does not currently accept other forms of payment, like PayPal or CashApp.
Advertisement -
3Find a scooter near you on the Lime app’s map. Look around on the map that appears when you open the app to check if there is a scooter, marked by a green lime icon, in your area. If you don’t see any on the screen, try zooming out to check for scooters that are slightly further away.[3]
- If no scooters appear around you, you may be having an issue with your mobile data, or there may simply be no Lime scooters near you.
- Check the scooter’s battery on the app by clicking on the scooter before heading towards it. A nearby scooter with low battery won’t do you much good.[4]
-
4Walk to the most convenient scooter. Once you have found a scooter nearby on the app, walk toward it. Use the map to guide you if you don't know your way to the scooter.[5]
- If you are at the location listed on the app and can’t find a scooter, use the option on the app to make the scooter ring. This will reveal the Lime scooter’s location.
-
5Unlock the scooter by scanning the QR code or entering the code. Use the app to scan the QR code, which has the appearance of a square barcode, on top of the scooter. If you prefer, you can enter the 6-digit code on the scooter into the 6 square fields on the app, below the QR code scanner.[6]
-
6Pay the unlock fee. In most cities, the fee to unlock a Lime scooter is $1. This is an attractive cost to get going, but remember that you will be charged around $0.15 per minute, or $9 per hour, in most US cities to ride the scooter. The app will charge the money to your credit card immediately.[7]


Riding a Lime Scooter Safely
-
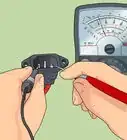
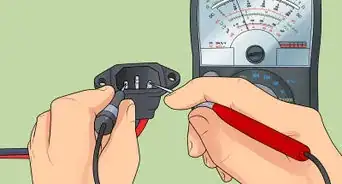
1Check your state transit law to see if you need a license. In a few states, a driver’s license is necessary before you can begin riding an e-scooter. Most places do not require a driver’s license, but doing a quick search online will help make sure you don’t get a ticket for riding illegally.[8]
-
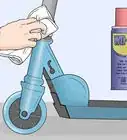
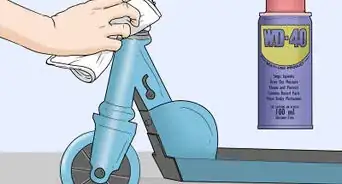
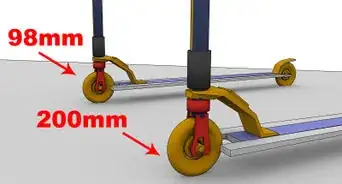
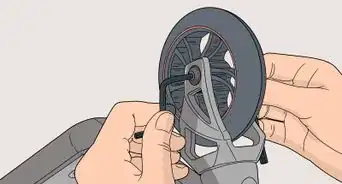
2Examine the scooter for damage or wear. You should take a look at the tires to see if they are damaged or flat, as well as test the hand brake to make sure it pumps and creates pressure when squeezed. Look over the scooter’s body for damage or wear that could put you in danger, like cracks or missing parts.[9]
- Since you can’t test ride a scooter before spending the unlocking fee, this visual check will be enough.
- If you experience any difficulty with the scooter, or feel like it is damaged in any way, park it and find a new scooter.
-
3Put on a helmet to protect yourself from injuries. Most cities require the use of a helmet, and even in the ones that don’t, the safety provided by a helmet is well worth it. E-scooters like Lime-S are vulnerable on streets, and since riding on the sidewalk is not an option in most cities, a helmet is your best line of defense in the event of a collision.[10]
- You will have to use your own helmet, as Lime scooters do not come with one.
- If you live in a city that does require a helmet for e-scooter use by law, you may ride without a helmet, at your own risk. Be sure to take extra precaution if you ride without one.
-
4Step on the scooter deck with one foot and kick off with the other. Put both hands on the scooter handles and place one foot on the deck. Then, use a kicking motion with the other foot against the ground to start moving. Once you start moving, bring both feet onto the deck in parallel with each other. The wheels are large enough that you should be able to balance easily.[11]
- If it is more comfortable for you, you may also stand on the deck with one foot in front of the other.
-
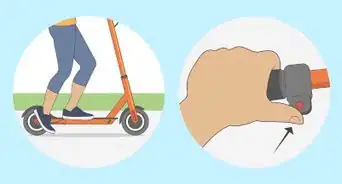
5Press down on the e-scooter’s throttle to accelerate. The throttle is a small tab located to the left of the right handle of the scooter. You simply press down on the tab to accelerate the scooter as you ride. The further you press on the tab, the faster you will go.[12]
- Use caution to avoid accelerating so fast that you lose control.
- Be aware that the scooter cannot accelerate to a speed higher than 14.8mph (23.8kph), though going downhill may increase your speed above that.
- Most US cities have a speed limit of 15mph (24.1kph) for scooters, including Lime.
-
6Use the hand brakes when needed by grabbing the metal handles. Just like a bike, the brakes are located just in front of the handles, allowing you to apply them with ease while you ride. Anytime you need to slow down or stop, pull on the brakes as early as possible to give yourself time.[13]
- When you are going downhill, be careful and always use your brakes to slow down.
-
7Stop once in a while to keep an eye on your battery level. If you picked up a scooter with low battery, or if you have been riding around for a few hours, your battery may be getting low. Stop the scooter in a safe location and pull out the app to check in on the battery level.
- If it is getting low, you should consider swapping for one with a full battery.
-
8Watch out for bumps and cracks in the road. For a device with small wheels, tiny potholes and rocks can cause falls or crashes. Keep an eye out for imperfections in the surface of the road that may pose a risk to you or the scooter.[14]
-
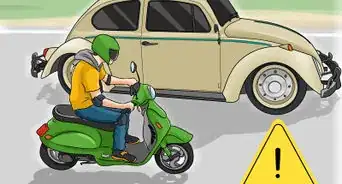
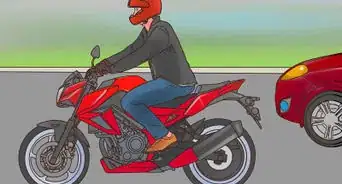
9Pay attention to cars to prevent accidents and injuries. Whether they are parked or moving, cars are a risk to e-scooter users. Always assume that a car does not see you until you have made eye contact with the driver, just as you would on a bike.
- Watch out for car doors opening and closing as you ride.
-
10Obey the traffic laws of the city you are riding in. As an e-scooter user, you are subject to the same rules of the road as any other electric scooter user. For the most part, these mirror the rules for cars and bikes, like always stopping at red lights and stop signs, using hand signals to turn left, right, or stop, and yielding to other road users.[15]
- Check online for your city’s scooter laws to see how they differ from motorist and cyclist laws.


Parking the Scooter
-
1Find a suitable location off the road to park scooter. You should avoid blocking driveways, bus stops, pedestrian and service ramps, and crosswalks. The scooter should be set out of the way on the edge of the sidewalk or curb. If you cannot find an appropriate place to park the scooter, try another block or street corner so that you do not abandon the scooter in an unsafe place.[16]
- Don’t put the scooter too close to private property, like homes and businesses.
-
2Use the kickstand to stand the scooter up. The kickstand is located off the side of the deck. You can use your foot to lock it down so that the scooter will stand upright. If the kickstand is broken or missing, lean the scooter against a wall or street sign pole to keep it from falling over.[17]
- Lime scooters must be parked upright to avoid blocking the sidewalk or causing damage to the scooter.
-
3Lock the scooter in the app by pressing the “End Ride” button. Simply tap the button to stop the per-minute charges and lock the scooter. Only press this if you are certain you are done riding the scooter for the time being and have parked it upright in a suitable location.[18]
-
4Pay the per-minute riding fee. Your credit card will be charged for this fee after the scooter has been locked. You should be prepared for the charge to come in, which may be big or small depending on how long you rode the scooter for.[19]


References
- ↑ https://www.li.me/how-to-lime
- ↑ https://www.ridester.com/lime-scooters/#How_Do_Lime_Scooters_Work
- ↑ https://www.li.me/electric-scooter#faqs
- ↑ https://www.ridester.com/lime-scooter/#How_Do_Lime_Scooters_Work
- ↑ https://www.ridester.com/lime-scooters/#How_Do_Lime_Scooters_Work
- ↑ https://www.li.me/electric-scooter#faqs
- ↑ https://www.ridester.com/lime-scooters/#How_Much_Do_Lime_Scooters_Cost
- ↑ https://www.li.me/electric-scooter#faqs
- ↑ https://www.ridester.com/lime-scooters/#How_Do_Lime_Scooters_Work
- ↑ https://www.li.me/second-street/electric-scooter-safety-5-proven-tips-to-safe-spring-riding
- ↑ https://youtu.be/zOMYOBBRtM8?t=12
- ↑ https://youtu.be/zOMYOBBRtM8?t=22
- ↑ https://youtu.be/zOMYOBBRtM8?t=30
- ↑ https://youtu.be/zOMYOBBRtM8?t=40
- ↑ https://www.li.me/second-street/electric-scooter-safety-5-proven-tips-to-safe-spring-riding
- ↑ https://youtu.be/Qb2s8A1KnRQ?t=46
- ↑ https://youtu.be/Qb2s8A1KnRQ?t=46
- ↑ https://www.ridester.com/lime-scooters/#How_Do_Lime_Scooters_Work
- ↑ https://www.ridester.com/lime-scooters/#How_Much_Do_Lime_Scooters_Cost
About This Article