X
wikiHow is a “wiki,” similar to Wikipedia, which means that many of our articles are co-written by multiple authors. To create this article, 15 people, some anonymous, worked to edit and improve it over time.
This article has been viewed 214,882 times.
Learn more...
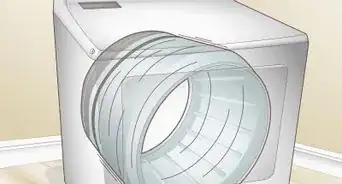
Here is a step by step tutorial on how to replace a dryer belt on a Whirlpool dryer. This is a relatively simple repair that can save you time and money since you won't have to call in an expensive repairman for a common problem.
Steps
-
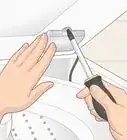
1Start by removing the lint filter. Using your 5/16th screwdriver, remove the two screws under the lint filter.[1]
-
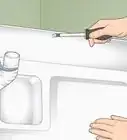
2Next, take the putty knife and place it in the opening between the top of the dryer and the front of the dryer. Pop up the top of the dryer and repeat on the other side.[2]Advertisement
-
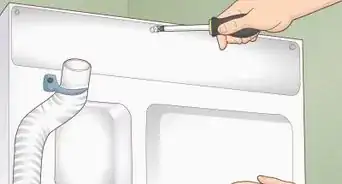
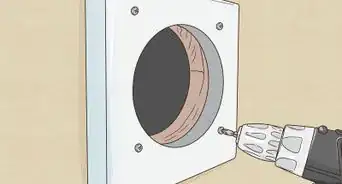
3Flip the top out of the way. There will be two screws in each upper corner of the inside of the dryer. Remove both of these and put screws in container for later.
-
4The front of the dryer will now be released. Pull the top away from the cabinet and then lift it up. Swing the front to the side and place it out of the way. You may need to disconnect the lid switch wires if they are not long enough to allow this.[3]
-
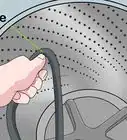
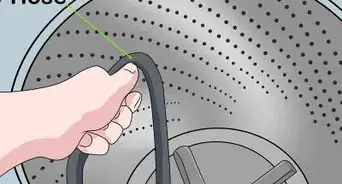
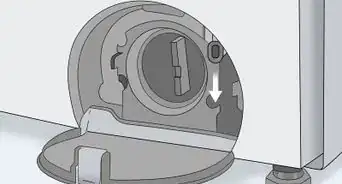
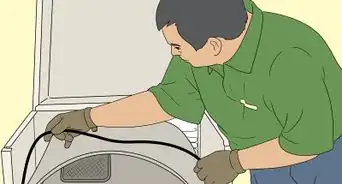
5Release the belt from around the drum.[4] To do this, the belt will be looped under the idler pulley and then attached to the motor. Reach under the drum and unhook the belt from around the motor.
- The pulley may be just a spring part with a half circle the the belt runs around, with no moving part.
-
6To attach the new belt, begin by placing the belt, with the groove side down and lined up with the markings around the drum. Then loop the belt under the idler pulley (that has a moving wheel) and attach it back to the motor. The idler pulley should apply tension to the belt. You may need an extra hand for this step since the dryer drum can sag down and make it difficult to reach the motor.[5]
-
7Make sure the rear felt on the back end of the drum isn't folded under. If it has, use a screwdriver to pop the felt out while spinning the drum with your hand.
-
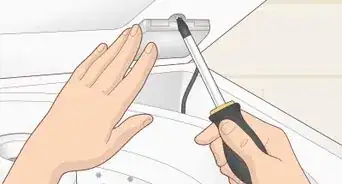
8Reassemble the dryer. Make sure the small tabs on the bottom of the dryer match up with the small holes on the dryer front. Replace screws and lint trap.


Advertisement
Community Q&A
-
QuestionWhat happens if the wheel is missing from the idler pulley?
 Community AnswerMany models did not have idler wheels, but instead just a semi-circle made of metal.
 -
QuestionMy "small tabs" on the bottom of the front casing broke. Is there a substitute or another way to hold it in place? It's all fixed but the front casing is lopsided and I'm unsure if this will hurt it. What can I do?
 Community AnswerThe same thing happened to me. I drilled one hole on each side of that, below where the tabs were, and used a couple of drywall screws to hold it in place. That was several years ago and it has been working fine ever since.
 -
QuestionWhere can I get a new dryer belt?Community AnswerAppliance stores and larger hardware stores will carry replacement belts. Take your old belt with you and they can help get you the same size. If you don't have any luck locally, you can find a replacement belt for your model on Whirlpool's website, eBay or Amazon.
Advertisement
Warnings
- Secure the top so it does not fall while working on the belt/drum assembly.⧼thumbs_response⧽
- Make sure your dryer is unplugged and completely powered down before beginning any repair.⧼thumbs_response⧽
Advertisement
Things You'll Need
- 5/16th nut driver or socket
- Putty knife
- Container for screws
- Phillips screwdriver
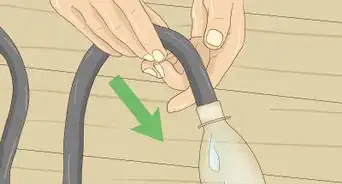
- lightweight gloves to protect fingers when placing belt (under tension)onto motor shaft.


References
- ↑ https://www.youtube.com/watch?v=SyLkMKr1YPg&app=desktop
- ↑ https://www.youtube.com/watch?v=SyLkMKr1YPg&app=desktop
- ↑ https://www.partselect.com/JustForFun/How-To-Replace-A-Dryer-Belt-On-Whirlpool-Models.aspx
- ↑ https://www.partselect.com/JustForFun/How-To-Replace-A-Dryer-Belt-On-Whirlpool-Models.aspx
- ↑ https://www.youtube.com/watch?v=GzYmoS9brMY
About This Article
Advertisement