This article was co-authored by William & Shannon Latil. William & Shannon Latil are Furniture Refinishing & Home Remodeling Specialists and the Founders of Furniture Refinishing Services based in Houston, Texas. With over 30 years of experience, William and Shannon specialize in repairing and restoring wood furniture, refinishing kitchen cabinets, remodeling kitchens, and building live-edge wooden tables. William and Shannon have won Awards for Excellence from the Better Business Bureau and the Houston Chronicle Best Small Business Award. Their work has also been featured in Houston Press Magazine - Kitchen Design. Additionally, the Furniture Refinishing Services team has conducted major refinishing work on venues such as NRG Stadium and Minute Maid Park.
There are 9 references cited in this article, which can be found at the bottom of the page.
This article has been viewed 12,665 times.
With a few easy-to-find, affordable DIY supplies, it’s possible to turn a shabby old chair into a lovely new seat that you’ll get some great everyday use out of. Whether you have an old chair you’re considering tossing out or you just picked up a second-hand chair that’s seen better days, this is the project for you! Depending on the type of chair and its materials, reupholster it, refinish the wood, or do both to give it a new look and a new lease on life.
Steps
Upholstery
-
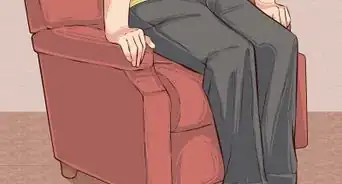
1Unscrew the seat cushion from the chair frame with a screwdriver. Flip the chair over to see the bottom of the cushion. Examine the screws to determine what type of screwdriver you need, then loosen and remove all the screws and set them aside in a safe place. Carefully pull the seat cushion off the chair frame.[1]
- Be careful not to tear any existing fabric while you remove the seat cushion.
- If you’re going to refinish the wood of the chair too, remove the upholstered seat first but wait until you finish the wood to reupholster and attach the seat again.
- If the seat is not screwed on, look for other hardware holding it in place and remove it with the appropriate tool. For example, if it is bolted on, use a wrench to loosen the bolts.
-
2Pry out the staples holding the existing fabric to the seat cushion. Use a flat-head screwdriver or a pair of needle-nose pliers to pry and pull out the staples. Remove the black piece of cloth from the bottom of the seat cushion if there is one, then pull off the fabric that covers the cushion.[2]
- Mark the orientation of the fabric on the cushion with a pen or marker after you remove it to help you remember which way it sat on the chair. It might come in handy when you’re cutting your new fabric.
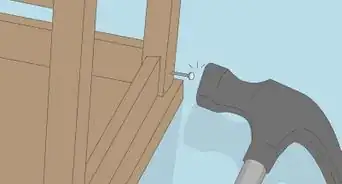
- If the fabric is not stapled in place, look at what’s holding it in place and use a different tool to remove the hardware. For example, if it’s tacked down with nails, use the back of a claw hammer to pry the nails out.
Advertisement -
3Replace worn or stained cushion batting. Pull off the old batting and throw it out. Use scissors or a utility knife to cut a piece of new 1⁄2 in (1.3 cm) thick batting to cover the seat, then position it on the seat and staple it down using a staple gun.[3]
- If the existing batting is still nice and firm and not dirty, skip this step.
-
4Use the old cushion fabric as a pattern for your new fabric. Turn the fabric you want to use for the new upholstery wrong-side-up and place the old fabric wrong-side-up on top of it and pin it in place. Use fabric scissors to cut 2–3 in (5.1–7.6 cm) all the way around the old piece of fabric on the new piece of fabric to give yourself plenty to work with.[4]
- Alternatively, measure the seat cushion and add 3 in (7.6 cm) to each side. Draw this pattern on the back side of your new fabric and cut it out.
- Make sure to take the print or pattern of the new fabric into account when you’re orienting the old fabric on it, so the new cushion will look just how you want it to.
-
5Wrap the seat cushion in the new fabric and staple it in place on the bottom. Place the fabric on top of the seat cushion and fold 1 edge about 1–2 in (2.5–5.1 cm) onto the underside of the chair, then staple it in place with a staple gun. Stretch the fabric tightly against the top of the cushion and staple the opposite edge in place underneath. Keep the fabric taut and staple the 2 side edges under the seat.[5]
- If any of the fabric is crooked when you’re finished, just pry out the staples with a flat-head screwdriver, pull the fabric to adjust it, and staple it again.
- Trim away any excess fabric with fabric scissors when you finish stapling if it bothers you, but leave about 1–2 in (2.5–5.1 cm) of fabric past each staple.
- For the corners, fold the extra fabric into neat triangles and staple them down.
-
6Attach the seat cushion to the chair frame. Position the reupholstered seat on the seat rails of the chair and line up the screw holes. Put the old screws back in if they’re in good shape or use new ones of the same size and tighten them all the way with a screwdriver.[6]
- If you’re going to refinish the wood on your old chair, make sure you’re completely done and that the new finish is completely dry before you attach the cushion.


Structural Repair
-
1Scrape out as much old glue from any loose joints as possible. Inspect your chair for loose and wobbly joints. Separate the pieces of the chair at the loose joints as much as possible by pulling the connected pieces in opposite directions to expose the old glue. Use a sharp chisel to scrape the old glue out of the joints.[7]
- If you’re having a hard time scraping out the old glue, use spreading clamps to hold pieces apart or tap them further apart with a wooden mallet to make it easier to scrape out the glue.
- If all the joints seem secure and you don’t find any other damage, skip the structural repair steps.
-
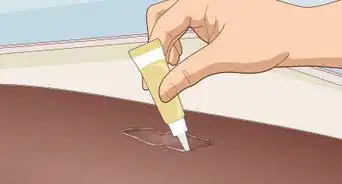
2Inject new glue into the loose joints using a syringe. Fill a plastic syringe with wood glue. Carefully and slowly inject it into each loose joint to rebond the pieces of the chair.[8]
- Very old antique chairs are often assembled with hide glue rather than modern woodworking glues. If you want to keep your restoration as authentic as possible, use hide glue to rebond the joints on antique chairs.
-
3Clamp the re-glued joints overnight to allow the glue to harden. Use C clamps, pipe clamps, or another type of woodworking clamp to hold the loose joints together. Put the clamps over the newly glued pieces so the jaws are pushing the pieces together at the joints. Tighten the clamps all the way and leave the chair alone overnight.[9]
- Though most types of wood glue dry to the touch within an hour or so, clamping the joints overnight ensures that there is no stress on them while the glue cures all the way and that the new bonds will be very strong.
-
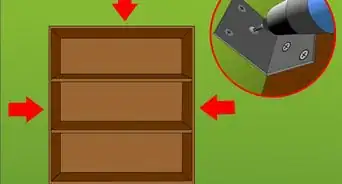
4Screw triangular blocks of wood into the seat corners if the seat rails are weak. Choose a piece of wood that is a little bit thinner than the thickness of the chair’s seat rails. Use a power saw to cut triangular pieces out of the wood to fit in each corner where the seat rails meet. Drill 2 pilot holes in the long side of each triangle at 90-degree angle to one another using a power drill. Screw the blocks into the inside corners of the seat rails using wood screws.[10]
- Seat rails are the 4 pieces of the chair frame that hold the seat in place.
- For example, if the seat rails have been eaten up by woodworm, are cracked, or are otherwise weakened, these reinforcing blocks will make it more sound and sturdy to sit on. Triangular blocks also help reinforce loose corner joints even more.


Wood Finish
-
1Put on personal protective equipment and work in a well-ventilated area. Wear chemical-resistant gloves, a respirator with a new filter, goggles, and an apron. This PPE protects you from the chemical solvents you use to strip off the old wood finish. Choose a workspace with good airflow, such as a garage with the door open or somewhere outside.[11]
- Finish stripping solvents are very corrosive, so they’ll damage anything they come into contact with. You definitely don’t want to get them on your skin or in your eyes, nose, or lungs!
- Avoid enclosed areas like basements with poor ventilation because the fumes from the solvents linger.
- If you’re working in close proximity to other pieces of furniture or on floors that you don’t want to damage, cover them with plastic sheets to protect them.
- Use a fan and aim it towards a door or window to blow air out of your workspace for better ventilation if you’re working inside.
-
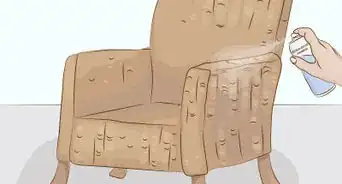
2Apply finish stripper to all the wood using a natural bristle paint brush. Pour out some finish stripper into a container. Dip the paint brush into the paste and spread it all over the wood surfaces of the chair, applying more to your brush as needed to coat everything in an even layer.[12]
- Don’t use a paint brush with synthetic bristles because some types of finish stripper melt them.
- Remove any non-wood components, such as an upholstered seat, before you apply the finish stripper.
- Always pour stripper into a metal container—it'll eat through plastic.
-
3Let the stripper sit for 15-20 minutes. Give the stripper up to 20 minutes to dissolve the old finish on the chair or refer to the manufacturer’s instructions for the recommended amount of time. When the old finish bubbles and turns into a sludge, move on.[13]
- The exact amount of time it takes for the finish stripper to dissolve the old finish depends on how much finish is left on the chair, how many layers thick it is, and the specific type of finish.
-
4Scrape off all the old finish using a putty knife and steel wool. Hold the blade of a putty knife at about a 45-degree angle to the surface of the wood and scrape off the thick, sludgy mix of dissolved finish and stripper. Scrub all the wood surfaces with coarse steel wool to finish removing all the old finish.[14]
- You can also use a scrub pad to wipe off the excess finish.
- If there are any areas where you still see old finish, just brush on a second coat of finish stripper and repeat the process to remove it all.
-
5Rinse off the chair with denatured alcohol or mineral spirits. Pour denatured alcohol or mineral spirits over all the wood surfaces to neutralize the finish stripper. Wipe off all the remaining residue with a soft rag.[15]
- Make sure you rinse off the whole chair very thoroughly. Any remaining stripper residue may interfere with refinishing the chair.
-
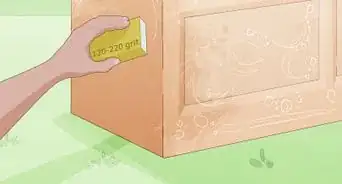
6Sand all wood surfaces of the chair evenly by hand with 100-grit sandpaper. Put a piece of 100-grit sandpaper on a padded sanding block. Rub the sandpaper back and forth, going with the grain, over all the wood to smooth it out before you apply the new finish.[16]
- To get into any cracks and crevices, just fold up a piece of sandpaper into a small square and push it into the awkward spaces by hand without using a sanding block.
- Avoid using a power sander because they leave swirl marks that are visible when you apply the new finish.
-
7Wipe off all the wood surfaces with a tack cloth. Grab a clean tack cloth and thoroughly wipe down the whole chair. This gets rid of the dust generated by sanding.[17]
- If you don’t have a tack cloth, just use any lint-free cloth like a cotton rag or a microfiber cloth.
-
8Brush 1-2 coats of a wood stain of your choice all over the chair. Pick a light-colored stain if you want to enhance the natural color of the wood or dark-colored stain if you want to more drastically change its appearance. Use a clean, dry paint brush and even back-and-forth strokes to brush it evenly onto all the wood surfaces. Stop after 1 coat if you want a lighter finish or apply a second coat if you want a darker finish.[18]
- If you don’t want to change the natural color of the wood by staining it, skip this step.
- Wipe away drips and excess stain with a lint-free rag as you work to achieve a smooth, even finish.
-
9Apply a protective topcoat to the chair after the stain dries. Wait 24-48 hours for the wood stain to dry, then brush or spray on a clear protective finish, such as a polyurethane topcoat. This protects the refinished wood to make the finish last longer with everyday use.[19]
- If you didn’t stain the wood and you want to keep the chair as close to its natural wood color as possible, choose a clear coat with a matte finish.
- If you disassembled the chair at all, wait at least another 24 hours for the topcoat to dry before you put any pieces like an upholstered seat back on.


Expert Q&A
-
QuestionHow do you restore the finish on antique furniture?
 William & Shannon LatilWilliam & Shannon Latil are Furniture Refinishing & Home Remodeling Specialists and the Founders of Furniture Refinishing Services based in Houston, Texas. With over 30 years of experience, William and Shannon specialize in repairing and restoring wood furniture, refinishing kitchen cabinets, remodeling kitchens, and building live-edge wooden tables. William and Shannon have won Awards for Excellence from the Better Business Bureau and the Houston Chronicle Best Small Business Award. Their work has also been featured in Houston Press Magazine - Kitchen Design. Additionally, the Furniture Refinishing Services team has conducted major refinishing work on venues such as NRG Stadium and Minute Maid Park.
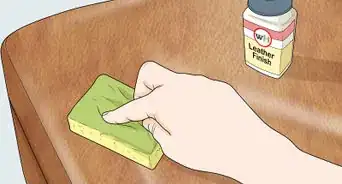
Furniture Refinishing & Home Remodeling SpecialistsSand the wood with steel wool and then apply an antique glorifying oil or wax on top—this can be found at most antique shops.
Warnings
- Always wear personal protective equipment including goggles, chemical-resistant gloves, a respirator, and an apron when you’re working with finish stripping solvents.⧼thumbs_response⧽
Things You’ll Need
Upholstery
- Fabric marker (optional)
- New fabric
- Fabric scissors
- Staple gun
- Fabric pins
- New batting (optional)
- Screwdriver
- New screws (optional)
- Needle-nose pliers (optional)
Structural Repair
- Chisel
- Separating clamps (optional)
- Wooden mallet (optional)
- Wood glue
- Plastic syringe
- Clamps
- Wood blocks
- Power drill
- Wood screws
- Power saw
Wood Finish
- Finish stripper
- Natural bristle paint brush
- Gloves
- Goggles
- Apron
- Respirator
- Putty knife
- Steel wool
- Denatured alcohol or mineral spirits
- Rags
- Wood stain
- Paint brush
- Clear topcoat
- 100-grit sandpaper
- Padded sanding block
- Tack cloth
- Lint-free rag


References
- ↑ https://www.bobvila.com/articles/how-to-recover-a-chair/
- ↑ https://www.bhg.com/decorating/do-it-yourself/fabric-paper-projects/diy-chair-upholstery-guide/
- ↑ https://www.bhg.com/decorating/do-it-yourself/fabric-paper-projects/diy-chair-upholstery-guide/
- ↑ https://www.bhg.com/decorating/do-it-yourself/fabric-paper-projects/diy-chair-upholstery-guide/
- ↑ https://www.bobvila.com/articles/how-to-recover-a-chair/
- ↑ https://www.bobvila.com/articles/how-to-recover-a-chair/
- ↑ https://www.youtube.com/watch?v=rHyYXST3jMQ&feature=youtu.be&t=105
- ↑ https://www.youtube.com/watch?v=rHyYXST3jMQ&feature=youtu.be&t=130
- ↑ https://www.youtube.com/watch?v=rHyYXST3jMQ&feature=youtu.be&t=135
- ↑ https://www.youtube.com/watch?v=rHyYXST3jMQ&feature=youtu.be&t=195
- ↑ https://www.thisoldhouse.com/painting/21015504/stripping-painted-furniture
- ↑ https://www.thisoldhouse.com/painting/21015504/stripping-painted-furniture
- ↑ https://www.homedit.com/how-to-refinish-wooden-dining-chairs/
- ↑ https://www.thisoldhouse.com/painting/21015504/stripping-painted-furniture
- ↑ https://www.thisoldhouse.com/painting/21015504/stripping-painted-furniture
- ↑ https://www.thisoldhouse.com/painting/21015504/stripping-painted-furniture
- ↑ https://www.architecturaldigest.com/story/how-to-refinish-a-table
- ↑ https://www.thisoldhouse.com/painting/21015504/stripping-painted-furniture
- ↑ https://www.thisoldhouse.com/painting/21015504/stripping-painted-furniture
About This Article