X
wikiHow is a “wiki,” similar to Wikipedia, which means that many of our articles are co-written by multiple authors. To create this article, volunteer authors worked to edit and improve it over time.
This article has been viewed 26,616 times.
Learn more...
This wikiHow will teach you how to root your Nexus 7 Android tablet. You can root your Nexus 7 on any Windows-based PC. You'll just need to use a third-party tool, like the Nexus Root Toolkit by WugFresh or CF-Auto-Root. We'll walk you through exactly what you need to do. Check out the steps below to get started!
Steps
Method 1
Method 1 of 2:
WugFresh
-
1Back up all information on your Nexus 7 tablet. All personal data will be erased from your tablet during the rooting process.
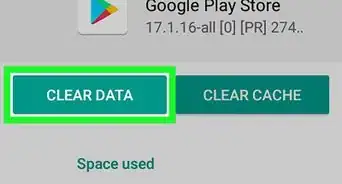
- Sync your personal information with Google’s servers, copy your data over to your computer, or download a third-party cloud storage service app from Google Play Store.
-
2Navigate to the WugFresh website at http://www.wugfresh.com/nrt/.Advertisement
-
3Select the option to download the Nexus Root Toolkit .exe file to your computer.
-
4Select the option to save the .exe file to your desktop, then double-click on the .exe file. The toolkit installer wizard will display on-screen.
-
5Click on “Install,” then follow any on-screen prompts to complete installation.
-
6Verify that “Nexus 7” is displayed next to “model type.”
- If another device model is displayed, click on “Change,” and select “Nexus 7” from the dropdown menu.
-
7Tap on Menu, then tap on “Settings” on your Nexus 7.
-
8Tap on “About tablet,” then tap on “Build number” repeatedly until a message displays on-screen that says, “You are now a developer!”
-
9Tap on the back button, then tap on “Developer options.”
-
10Place a checkmark next to “USB debugging.”
-
11Connect the Nexus 7 to your Windows computer using a USB cable.
-
12Click on “Unlock” in the Nexus Root Toolkit window. This will reboot your tablet and unlock the bootloader, which makes it possible for rooting to take place.
-
13Press the Volume Up key, followed by the Power key when “Unlock bootloader?” displays on your tablet. Your Nexus 7 will reboot once again and display the welcome screen.
-
14Follow the on-screen prompts to set up your device until you reach the Home screen.
-
15Repeat steps 7 through 10, leaving your tablet connected to your PC.
-
16Place a checkmark next to “Custom Recovery” in the Nexus Root Toolkit window.
-
17Click on “Root.” Your Nexus 7 will begin the rooting process and reboot when complete.
-
18Tap on Menu after your tablet reboots to verify that “SuperSU” is listed in the App drawer. Your tablet will now be rooted.[1]


Advertisement
Method 2
Method 2 of 2:
CF-Auto-Root
-
1Back up all information on your Nexus 7 tablet. All personal data will be erased from your tablet during the rooting process.
- Sync your personal information with Google’s servers, copy data over to your computer, or download a third-party cloud storage service app from Google Play Store.
-
2Navigate to the Chainfire website at https://download.chainfire.eu/295/CF-Root/CF-Auto-Root/CF-Auto-Root-grouper-nakasi-nexus7.zip.
-
3Scroll to the bottom of the landing page and click on the “CF-Auto-Root” .zip file.
-
4Select the option to save the file to your desktop. This file contains the rooting software needed to root your Nexus 7.
-
5Double-click on the .zip file to extract the files.
-
6Navigate to Android’s developer website and click on “Download Google USB Driver.” This software is required to complete the debugging portion of the rooting process on all Nexus devices.
-
7Select the option to save the file to your desktop, then double-click on the .zip folder to extract the files.
-
8Double-click on the .exe file and follow the on-screen prompts to install the necessary Nexus drivers to your computer.
-
9Tap on Menu and select “Settings” on your Nexus 7 tablet.
-
10Tap on “Developer options,” then place a checkmark next to “USB debugging.”
-
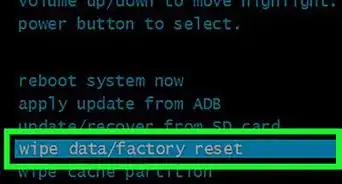
11Power off your tablet, then press and hold the Volume Down and Power keys until your device boots up. This will place your Nexus 7 in recovery mode.
-
12Connect the tablet to your computer using a USB cable.
-
13Open the CF-Auto-Root folder you extracted earlier and run the “root-windows.bat” file.
-
14Follow the on-screen instructions to complete the rooting process. When complete, your tablet will reboot and display the SuperSU app in the App drawer.


Advertisement
Warnings
- Root your Nexus 7 at your own risk. Rooting your Android tablet will void the manufacturer’s warranty, and could result in potential bricking of your device. If your tablet malfunctions or stops working after the rooting process, follow these steps to unroot your Android and reinstate the manufacturer’s warranty.⧼thumbs_response⧽
Advertisement


About This Article
Advertisement