This article was co-authored by Lauren Kurtz. Lauren Kurtz is a Naturalist and Horticultural Specialist. Lauren has worked for Aurora, Colorado managing the Water-Wise Garden at Aurora Municipal Center for the Water Conservation Department. She earned a BA in Environmental and Sustainability Studies from Western Michigan University in 2014.
This article has been viewed 30,476 times.
A lovely and flowering garden is one of the many highlights of the year between March and September for many people. Whether you’re an enthusiastic gardener or just getting started with plants, you can save your seeds from your garden to enjoy from year-to-year. Collecting and storing the seeds of your plants for later use is not only a very rewarding activity but it also ensures the life and vitality of your garden while saving money.
Steps
Collecting and Harvesting Seeds
-
1Know the different reasons to collect seeds. There are many different reasons to collect and save seeds from saving on the cost to having backups if your favorite plants die. Knowing the advantages of seed collecting will help you decide if you want to start your own seed bank.
- The cost of seeds has increased, while the number of seeds in pre-packaged envelopes has decreased.
- Collecting and storing seeds from your own garden ensures that you always have backups if any of your favorite plants die.
- Collecting and storing your own seeds allows you to control their quality. Many pre-packaged seeds aren’t harvested at the most optimal time and are also not necessarily stored in the proper way.
-
2Know when to harvest seeds. One of the most difficult parts of collecting seeds is knowing when to harvest them. You’ll get better at identifying which seeds are ready for collecting with practice, but having a few basic facts at your fingertips will help guide you through the process.
- Seeds need the living plant to give them nourishment while they swell into full size in the seed coat.[1]
- Collect seeds from plants before frost or it rains. Seeds may absorb moisture, swell and crack, which damages the ability to properly germinate.[2]
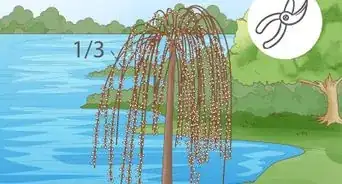
- Depending on what seeds you’re collecting, the growing and seed harvesting season begins in March and ends in fall. Late summer is the peak season.[3]
- Check plants regularly for fading flowers and forming seeds. If plant heads are turning brown, this is also a good time to collect your seeds.[4]
- You can collect seeds while they’re still green, but let them continue to ripen in the pod or seed head. Harvest seeds when the seeds are a good size and then let them finish maturing in a bag or on some newspaper in a cool place.[5]
- Don’t necessarily pick seed heads as soon as petals fade. For plants like sunflowers, for example, wait until the visible seeds have plumped up, a sign that they’re mature.[6]
Advertisement -
3Collect only healthy seeds. If you want to make sure that the seeds you harvest will yield the best plants, make sure that they are healthy and ripe. This will ensure that they not only bloom beautifully, but also that you can store them for a longer period of time.
- Only save garden seeds from healthy plants that sprout during good growing seasons.[7]
- Seeds that have been exposed to significant swings in the weather are likely not going to be healthy because the extreme changes in temperature can crack the seed’s hull.
- Seeds are healthy if they plump up on the plant, which is also a sign that they’re mature.[8]
-
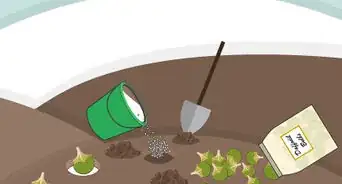
4Get your seed collecting kit ready. If you plan to collect seeds throughout the growing season, it’s a good idea to keep a seed collecting kit ready so that you can nip plants as soon as you notice that the seeds have matured. You can put together a kit with a few simple items from your home.
- A good seed collecting kit will have a small pair of scissors or pocketknife to nip the plants; paper envelopes, paper bags, or small plastic bags in which to put the plant or seeds; and a pen or marker to label the seeds as you gather them.[9]
- You can also use small tins and prescription bottles to save seeds.[10]
- Bamboo skewers will help you remove and collect sticky seeds.[11]
-
5Find seeds in plants. Plants come in innumerable forms and identifying where their seeds are can often be difficult, especially for beginning collectors. Learning a few basic facts about plant shapes can help you more easily identify where the seeds are.
- The largest family of flowering plants are called Compositae (Asteraceae) and include flowers such as sunflowers, black-eyed Susans, daisies, and zinnias. Many of these flowers have a green, yellow, brown or black "eye" in the center which produce both the flowers and the seeds.[12]
- The seeds will develop in that "eye" forming a seed head. Oftentimes the "eye" looks like a button and sometimes it can look a bit like a cone like in purple coneflowers and Rudbeckias. Some Compositae flowers, like those of marigolds, have tight bunches of petals, with no “eye,” but the seeds develop right in the center. When sowing these seeds the easiest method is to break apart the cone or button and sow the seeds directly in the ground.
- Plants in the mint family, such as basil, grow tiny flowers along a stem. These tiny flowers produce very small seeds that are best harvesting by snipping the entire stalk.[13]
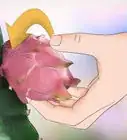
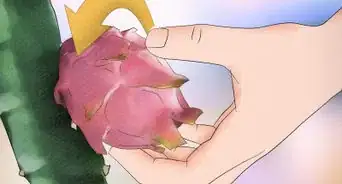
- The seeds of vegetables and fruits, including tomatoes, peppers, cucumbers are inside the flesh of the plant.[14] Strawberries are an example of a fruit that have seeds on the surface.[15]
-
6Snip the mature seeds or plants. Every day or couple of days, check to see if plants or seeds have matured and are ready to harvest. If they are, either remove the seeds or snip the flowers for smaller plants so that you can prepare them for storage.
- Use the scissors, knife or bamboo sticks from your collecting kit to harvest the ripe seeds.
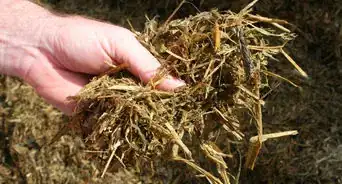
- If you’re dealing with plants that have tiny seed-producing flowers such as basil, snip the entire stalk to let the seeds fall naturally into an envelope or container.[16]
- Shake seeds into the envelopes or bags from your collecting kit. You can also cut off stalks of plants and hang them upside down, which will helps release the seeds.[17] This will help you keep plants separate before you dry and place them in final storage containers.
- Make sure to not put too many plant stems or seed heads into your envelope or container so that they have room to dry properly.[18]
- Make sure to keep each different kind of plant or seed separate so that your collection stays organized.


Saving and Storing Seeds
-
1Prepare your seeds for saving and storage. It’s important to properly prepare your seeds for storage after you’ve harvested them. This will ensure not only that your seeds don’t mold but also that you can save them for longer periods of time.
- Just as when you collect seeds, it’s important keep each different seed separate as you dry them for storage.
- It’s very important to have good air circulation when drying seeds so that you can store them. Spreading out the seeds on sheets of paper or paper plates for a few days is the best way to dry them for storage.[19] days.
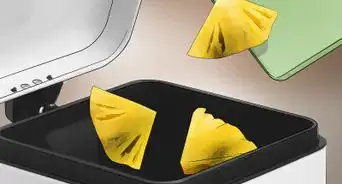
- Don’t dry seeds in or on plastic because it can promote the growth of mold or fungus.[20]
-
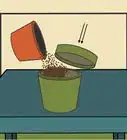
2Pour out the small seeds that develop inside of a pod. For plants from the Compositae and mint families, it’s best to remove as much of the stems and leaves as possible and then place them upside down in large paper bags and envelopes so that their pods and seeds dry out. Shaking the bag so that the seeds don't clump together ensures that they will dry out evenly.[21]
-
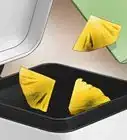
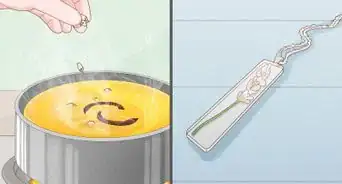
3Wash and dry “wet” vegetable seeds. There are many plants, such as tomato and cucumber, that have their seeds embedded within a moist flesh. Before you can dry these for storage, you’ll need to remove and wash them.
- Remove the seeds from vegetables such as cucumber and tomato with a tool or your fingers. Wash them to remove any plant flesh and then dry them on paper.
-
4Transfer seeds and label seed packets. As each of the types of seeds you harvested dries, transfer them to small envelopes or containers for storage. Make sure to label each packet with both the type of plant and date of seed harvest so that you can easily find seeds for planting in subsequent growing seasons.
- Once your seeds have dried, transfer them to small envelopes, for example coin envelopes, or containers such as a clean Altoids tin.[22] This will ensure that they stay dry and last as long as possible.
- Make sure to transfer one type of plant at a time in order to not mix seeds from different plants.
- Label each of the envelopes or contains with a pen or marker so that you can easily find seeds for swapping with friends or using in your own garden.
-
5Consider creating a “seed bank” in a jar. Once you’ve transferred the seeds to envelopes or containers, you can create a seed bank in a jar or another container. This will help you keep your seeds orderly and in one place so that you can use them whenever you like.[23]
- Desiccants such as silica gel can help maintain as little moisture as possible in your seed bank.[24]
-
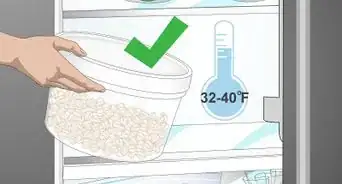
6Store seeds in a cool, dry place. In order to use your seeds in subsequent growing seasons, you need to store them in a cool and dry place, such as a kitchen pantry. This will help extend their shelf life and ensures that when you finally plant them, they yield the best plants.
- All seeds have a limited shelf-life that ranges from a few months to a few years.
- Seeds from annual, perennial and biannual plants, as well as herbs and vegetables are excellent for storage. Less optimal are seeds from fruiting trees, shrubs, houseplants and tropical plants.[25]
- You can extend the life of your seeds by keeping them in a cool and dry place. You may also want to check your seeds regularly to make sure they haven’t molded or germinated in their packages.[26]


Expert Q&A
-
QuestionWe are thinking of starting a seed bank. Is there something that would store seeds on a large scale?
 Lauren KurtzLauren Kurtz is a Naturalist and Horticultural Specialist. Lauren has worked for Aurora, Colorado managing the Water-Wise Garden at Aurora Municipal Center for the Water Conservation Department. She earned a BA in Environmental and Sustainability Studies from Western Michigan University in 2014.
Professional GardenerA large file cabinet or dresser can work to store large amounts of seeds. As long as you can control the humidity and temperature in the room it is stored in. -
QuestionCan you freeze leftover seedsLauren KurtzLauren Kurtz is a Naturalist and Horticultural Specialist. Lauren has worked for Aurora, Colorado managing the Water-Wise Garden at Aurora Municipal Center for the Water Conservation Department. She earned a BA in Environmental and Sustainability Studies from Western Michigan University in 2014.
Professional GardenerSome seeds can be frozen for short periods but most are best stored at room temperature. -
QuestionCan I use a zipper bag for saving seeds?
 DonaganTop AnswererYes, once they're fully dried.
Things You'll Need
- Pen or permanent marker for labeling seed packages.
- Paper envelopes, paper bags or cardboard boxes


References
- ↑ http://www.finegardening.com/collecting-and-storing-seeds
- ↑ http://mrbrownthumb.blogspot.de/2010/10/how-to-save-seeds.html
- ↑ http://www.finegardening.com/collecting-and-storing-seeds
- ↑ http://www.finegardening.com/collecting-and-storing-seeds
- ↑ http://www.finegardening.com/collecting-and-storing-seeds
- ↑ http://www.finegardening.com/collecting-and-storing-seeds
- ↑ http://mrbrownthumb.blogspot.de/2010/10/how-to-save-seeds.html
- ↑ http://www.finegardening.com/collecting-and-storing-seeds
- ↑ http://mrbrownthumb.blogspot.de/2010/10/how-to-save-seeds.html
- ↑ http://mrbrownthumb.blogspot.de/2010/10/how-to-save-seeds.html
- ↑ http://mrbrownthumb.blogspot.de/2010/10/how-to-save-seeds.html
- ↑ http://mrbrownthumb.blogspot.de/2010/10/how-to-save-seeds.html
- ↑ http://mrbrownthumb.blogspot.de/2010/10/how-to-save-seeds.html
- ↑ http://mrbrownthumb.blogspot.de/2010/10/how-to-save-seeds.html
- ↑ http://mrbrownthumb.blogspot.de/2010/10/how-to-save-seeds.html
- ↑ http://mrbrownthumb.blogspot.de/2010/10/how-to-save-seeds.html
- ↑ http://mrbrownthumb.blogspot.de/2010/10/how-to-save-seeds.html
- ↑ http://mrbrownthumb.blogspot.de/2010/10/how-to-save-seeds.html
- ↑ http://mrbrownthumb.blogspot.de/2010/10/how-to-save-seeds.html
- ↑ http://mrbrownthumb.blogspot.de/2010/10/how-to-save-seeds.html
- ↑ http://mrbrownthumb.blogspot.de/2010/10/how-to-save-seeds.html
- ↑ http://mrbrownthumb.blogspot.de/2010/11/how-to-store-seeds-you-saved-from-your.html
- ↑ http://mrbrownthumb.blogspot.de/2010/11/how-to-store-seeds-you-saved-from-your.html
- ↑ http://mrbrownthumb.blogspot.de/2010/11/how-to-store-seeds-you-saved-from-your.html
- ↑ http://mrbrownthumb.blogspot.de/2010/11/how-to-store-seeds-you-saved-from-your.html
- ↑ http://mrbrownthumb.blogspot.de/2010/11/how-to-store-seeds-you-saved-from-your.html
About This Article

To save seeds, start by harvesting them in the late summer, when the flowers start to fade and the seeds look plump and mature. If the seeds are small, cut the plant off with scissors and shake the seeds into a container to collect them. Additionally, rinse off any wet seeds, like those from a cucumber or tomato, after removing them from the plant. Then, spread the seeds on a paper plate for a few days so they are completely dried out. Finally, transfer the seeds into small envelopes or containers and keep them in a cool, dry place. For tips from our Horticultural reviewer on how to create your own seed bank, read on!