This article was co-authored by wikiHow Staff. Our trained team of editors and researchers validate articles for accuracy and comprehensiveness. wikiHow's Content Management Team carefully monitors the work from our editorial staff to ensure that each article is backed by trusted research and meets our high quality standards.
This article has been viewed 45,786 times.
Learn more...
Grains contain protein, carbohydrates, minerals, and vitamins A and B. Sprouting grain, the process of germinating the seeds before eating them, increases their nutritional value by adding vitamin C, an important nutrient that helps the body absorb iron and keeps blood vessels strong. In addition to improving your diet, sprouting grains is also economical since they double in bulk when sprouted. No special tools or equipment are needed to sprout grains at home, making it an easy task you can complete at any time!
Steps
Preparing and Soaking the Grains
-
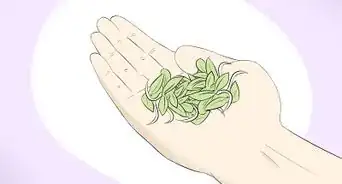
1Choose raw grains that haven’t been processed or roasted. You can find many different types of raw grains at health food stores, and you may even be able to find some at your local grocery store. It’s important to use only raw grains, as the sprouting process depends on the grain still having its germ, endosperm, and bran intact. Some of the more popular grains to sprout are:[1]
- Corn
- Spelt
- Rye
- Buckwheat
- Barley
- Rice
Did You Know: Legumes, seeds, and nuts can also be sprouted for similar health benefits.
-
2Rinse 1 cup (200 grams) of raw grains with lukewarm water. Grains will double in volume when they’re sprouted, so you could make a smaller amount or larger amount, just depending on how much you eat or use in any given week. Use a colander to hold the grains while you rinse them under running water.[2]
- Rinsing is an important step because it’ll clear away any dust, dirt, or small rocks that may be present.
Advertisement -
3Put the grains into a large glass jar. Keep in mind that the grains will double in size, so make sure you use a jar that is large enough to hold them. If the jar hasn’t been washed in a while, take a moment to rinse it out with dish soap and warm water so you can be sure it is clean.[3]
- It’s okay if you don’t have a fitted lid for the glass jar—you won’t need one for the sprouting process.
-
4Cover the grains with 2 to 3 inches (5.1 to 7.6 cm) of water. It doesn’t matter what kind of water you use, but do use cool water rather than hot. Add enough water so the grains are completely submerged, and then add another 1 to 2 inches (2.5 to 5.1 cm) of water above that.[4]
- The water will help activate the grains so they start to open up and sprout.
-
5Secure a cheesecloth over top of the jar’s opening with a rubber band. This helps keep out any bugs that might be attracted to the scent of the sprouting grains while still allowing air to move through the container. Make sure to wrap the rubber band around the top several times so that the cheesecloth is securely in place.[5]
- You could also use a special sprouting lid. They cost about $5 and eliminate the need for the cheesecloth and rubber band.
-
6Set the jar in a dark spot and leave it alone for 24 hours. The back corner of a pantry or cupboard is a perfect place for your grains to begin to sprout. Avoid leaving them on the counter, in the sunlight, or near any heat sources.[6]
- While heat is essential to sprouting grain, too much heat could also introduce unwanted bacteria to the jar. The warmth from the temperature in a room will be enough for your grains to sprout.


Rinsing and Sprouting the Grains
-
1Drain your sprouts after the first 24 hours have passed. Depending on what kind of grain you’re sprouting, there may be a goopy layer over top of the grains. This is totally okay—just make sure to rinse the grains really well so none of it is left behind. Use the colander and mix the grains around with your hands to make sure they’re thoroughly rinsed.[7]
- To help yourself remember to drain the sprouts, set a reminder on your phone.
-
2Place the grains back inside the glass jar without replacing the water. The grains should be damp at this stage but no longer soaking wet. The 24-hour soaking they just went through was enough for them to start to open up and sprout.[8]
- If there is a ring of goop inside the jar, rinse it out before replacing the grains.
-
3Replace the cheesecloth and put the jar on its side in a dark place. If you’re worried that some excess water might drip out of the jar, set it on a baking sheet or pan. Use a can or something heavy to keep the jar in place so it doesn’t accidentally roll around.[9]
- Try giving the grains a little shake once the jar is on its side so that they are evenly spread out.
-
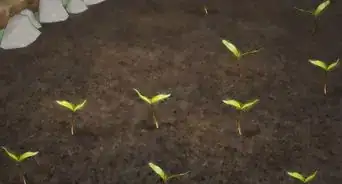
4Rinse the grains twice a day until they begin to sprout. Add fresh water to the jar, swirl it around, and then pour off the excess water. It generally takes about 3 days for grains to sprout, though that time could be different depending on how hot or cold your home is. The warmer your house is, the less time the grains will need to sprout. You’ll know they’re sprouting when you see long tails poking out of the majority of the grains.[10]
- At the most, it shouldn’t take more than 5 days for your grains to sprout. If you’re not seeing any change after that amount of time, it’s possible the grain you used was no longer good.


Storing and Enjoying Sprouted Grains
-
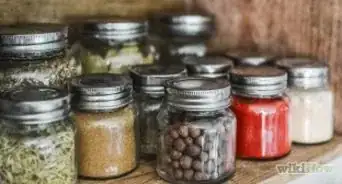
1Store sprouted grains in the fridge in a resealable container. If you leave the sprouts out in room temperature, they’ll continue to grow. The cold from the fridge will stop the fermentation process. They should last for 5 to 7 days in the fridge.[11]
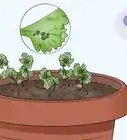
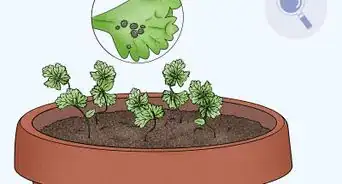
- If at any point you notice your sprouts look slimy or smell bad, throw them away.
-
2Rinse your grains before you use them in a recipe. Once your grains have sprouted, they are ready to be used! Put whatever amount you want to use into a colander and gently rinse them off. After they’re rinsed, lay them out on a paper towel to soak up some of the excess water while you work on preparing the rest of your recipe.[12]
- Remember to keep any unused sprouts in the fridge until you’re ready to use them.
Warning: The FDA encourages people to always cook sprouts before eating them in addition to rinsing them. They believe this can reduce the risk of coming into contact with salmonella, listeria, and e. coli. Many people who sprout grains at home feel comfortable eating sprouts raw.
-
3Add your sprouted grains to a salad for extra texture and nutrition. Lettuce, nuts, dried fruits, avocado, peppers, beans—you can add whatever you would like to your salad! Toss the entire dish in a delicious dressing and enjoy your meal.[13]
- Sprouted grains are becoming more and more popular, and you can find lots of delicious and creative recipes for various salads that incorporate them into the mix.
-
4Mill them into flour to use in your baked goods. Before milling them, dry them in a dehydrator or by leaving them out in the sun. Use a grain mill or something similar to grind them into flour, and then substitute them for regular baking flour.[14]
- Breads, muffins, tortillas, and most other dishes made with flour can be made with sprouted grain flour instead.
-
5Sauté your sprouts along with other veggies to make a delicious stir-fry. There’s no need to only enjoy sprouts raw or in flour-form! Simply add them to the pan when you’re cooking up a dish and enjoy the added nutrition.[15]
- Sprouted grains can add a lot of bulk to a meal without adding a ton of calories.


Community Q&A
-
QuestionWhat kind of grains can be sprouted?
 NinoxTop AnswererThere are many grains that can be sprouted. Aromatics, which includes fenugreek, horseradish, parsley, fennel, nigella, cumin, coriander and caraway seed. Cereals, including rye, buckwheat, rice, quinoa, barley, millet, corn, kamut, spelt, wheat, oats and amaranth. Legumes, such as daikon, alfalfa, chickpea, mungo bean, spinach, hemp, clover, radish, black radish, Chinese radish, purslane, pea, turnip, lentil, green cabbage, red cabbage, Chinese cabbage, endive, celery, carrot, broccoli, red beetroot and azuki bean. Liliaceae includes leek, onion and garlic, and muscilaginous plants are mustard, garden cress, watercress, rocket, flax, chia and basil. There are also oleaginous seeds: sunflower, sesame, gourd and almond.
Warnings
- Women who are pregnant or nursing, people with weak immune systems, and the elderly should only eat cooked sprouted grains because of the risk of listeria, and salmonella.⧼thumbs_response⧽
Things You’ll Need
- Colander
- Measuring cup
- Large glass jar
- Cheesecloth
- Rubber band
- Resealable container


References
- ↑ https://www.thekitchn.com/how-to-make-sprouted-grains-cooking-lessons-from-the-kitchn-204466
- ↑ https://ohmyveggies.com/how-to-sprout-grains/
- ↑ https://ohmyveggies.com/how-to-sprout-grains/
- ↑ https://ohmyveggies.com/how-to-sprout-grains/
- ↑ https://ohmyveggies.com/how-to-sprout-grains/
- ↑ https://ohmyveggies.com/how-to-sprout-grains/
- ↑ https://ohmyveggies.com/how-to-sprout-grains/
- ↑ https://ohmyveggies.com/how-to-sprout-grains/
- ↑ https://ohmyveggies.com/how-to-sprout-grains/
- ↑ https://www.thekitchn.com/how-to-make-sprouted-grains-cooking-lessons-from-the-kitchn-204466
- ↑ https://www.thekitchn.com/how-to-make-sprouted-grains-cooking-lessons-from-the-kitchn-204466
- ↑ https://ohmyveggies.com/how-to-sprout-grains/
- ↑ https://wholegrainscouncil.org/whole-grains-101/whats-whole-grain-refined-grain/sprouted-whole-grains
- ↑ https://www.thekitchn.com/how-to-make-sprouted-grains-cooking-lessons-from-the-kitchn-204466
- ↑ https://wholegrainscouncil.org/whole-grains-101/whats-whole-grain-refined-grain/sprouted-whole-grains
About This Article