This article was co-authored by wikiHow Staff. Our trained team of editors and researchers validate articles for accuracy and comprehensiveness. wikiHow's Content Management Team carefully monitors the work from our editorial staff to ensure that each article is backed by trusted research and meets our high quality standards.
This article has been viewed 180,050 times.
Learn more...
Stacking your washer and dryer is a convenient way to save floor space in any home. As long as your washer and dryer models are compatible, you can purchase a stacking kit and make this happen! The kits distribute the weight and absorb some of the vibrations that occur when the machines are running. You’ll need a few tools and some help lifting the dryer up, but installation itself isn’t very complicated.
Steps
Choosing Your Appliances
-
1Choose compatible appliances. Theoretically, you could stack any dryer on top of a washer, as long as it fits. However, you could void the warranties on both appliances by doing this. Instead, look for washers and dryers that are designed to be stacked together.[1]
- Usually, this means having a washer and dryer of the same brand.
- Not all washers and dryers, even those made by the same manufacturer, can be stacked. Read the manuals, ask a salesperson, or check the manufacturer’s website to see if your models are compatible.
- Many manufacturers sell paired washers and dryers that are conveniently designed to be stacked.
- Stackable options are available for both front-loading and top-loading washers.
- You can find stackable washer-dryer combos for about the same price as regular washer-dryer sets. Plan to spend around $1000 at least.
-
2Measure the site where you want to stack the appliances. Take the heights of the washer, dryer, and stacking kit (these should be mentioned on the packages or in the instructions) and add them together. Make sure the room where you want to stack the appliances is tall enough to accommodate this. You should also leave 2 inches (51 mm) to 3 inches (76 mm) on all sides to allow space for cords, vents, and heat dispersal.[2]
- Also make sure that you can comfortably reach the controls and door on the dryer.
- Use a carpenter's level to make sure that the floor in the area is even. If not, you may need to prop up one or more of the washer's legs with shims to keep things level.
- You can adjust the legs on some washer models to correct balance problems. Twisting the legs to the left or right will praise or lower them as needed.
- If the site is not big enough, you will need to ask a contractor if it can be enlarged, or else choose different appliances.
- Enlarging the space can become very expensive, and may not be allowed if you are renting.
Advertisement -
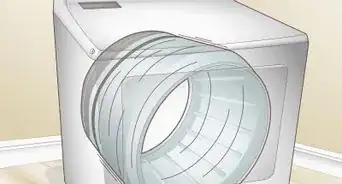
3Plan to stack the dryer on top. Washers are heavier, especially when full of water and clothes. It can be dangerous to have this much weight raised up, so you should only stack a dryer on top of a washer, not the other way around.[3]
- The length and width of the dryer must be no larger than the washer’s. Stacking a dryer on top of a smaller washer can cause it to fall.
-
4Purchased an approved stacking kit. It’s best to buy a stacking kit made by the same manufacturer as the washer and dryer. You can buy aftermarket stacking kits, but these may void your washer/dryer warranty unless they specifically have the manufacturer’s approval.[4]
- Stacking kits should be available wherever you can buy washers and dryers.
- They will contain a support system to raise the dryer up, as well as brackets to attach the washer and dryer to each other.
- Stacking kits start at about $40 and go up to $100 or more.


Installing the Machines
-
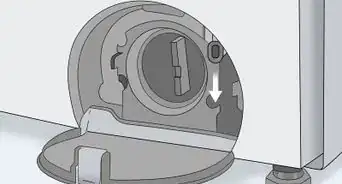
1Follow the manufacturer's instructions for prepping the appliances. Most likely, you will need to unscrew the legs from the dryer so it can be safely stacked. The manufacturer may also ask you to place adhesive foam backing on top of the washer to cushion the dryer and reduce vibrations. If so, this should be included with the stacking kit. [5]
- Keep the legs in a safe place in case you decide to unstack your appliances later.
- Position the washer at least a few inches away from the wall. You'll need enough space to be able to attach everything, but you don't want the appliances so far away from the wall that it's hard to slide them back into place when you're done.
-
2Carefully lift the dryer up, with help. At least two people will need to work together to lift the dryer up. Squat bent at the knees, and place your hands underneath the dryer. Lift carefully, using your legs rather than your back to pull the weight. Place the dryer on top of the washer.[6]
- Dryers are heavy. Lifting one improperly can cause injury.
- Lift carefully and ask for more help if you need it.
-
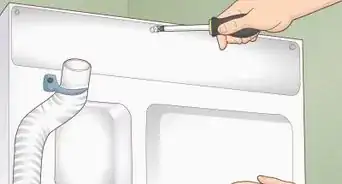
3Secure the appliances to each other. Your stacking kit should include an attachment or bracket that will join the washer and dryer together. Most of the time, this is placed on the back of the appliances. Attach it according to the manufacturer’s instructions.[7]
- Most likely, the attachment or bracket will be held in place with bolts, so you’ll probably need an adjustable wrench for this.
-
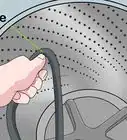
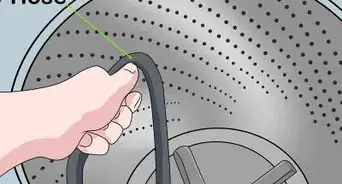
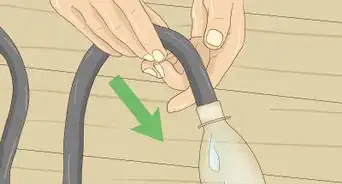
4Attach any water, gas, and vent lines. Once your stacked washer and dryer are bolted together, attach the water hoses to the washer and the gas line (if applicable) and air vent to the dryer, according to the manufacturer’s instructions. Make sure they are secured properly to prevent leaks.[8]
- Do this just after you attach the washer and dryer with the bracket. Since the appliances will be pushed away from the wall to attach the bracket, you can easily reach the connections.
- Washers will have a water supply hose and a drain hose. Attach both of these.
- Dryers will have a vent duct that needs to be attached to a vent going outside. If you have a gas dryer, you will also need to attach the gas line.
-
5Plug in the appliances and slide them into place. After connecting the hoses, vent duct, and gas lines, plug in the electrical cords for both the washer and dryer.
- Now that everything is connected, you can carefully push the washer and dryer into position near the wall. Remember to leave 2 inches (51 mm) to 3 inches (76 mm) of clearance!
-
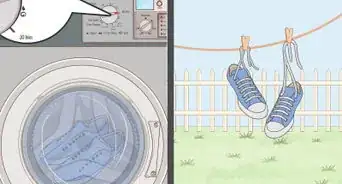
6Try a test load. Run an empty washer through a regular cycle. Then, turn the empty dryer on and let it run for a while. Pay attention while the appliances are running. Some vibration is expected, but you want to make sure that neither rocks or sways. If they do, it may be a sign that your washer is not level.[9]


References
- ↑ https://www.appliancesonline.com.au/academy/laundry/stacking-kits-how-to-organise-your-washer-and-dryer/
- ↑ http://www.sears.com/articles/appliances/washers-dryers/how-to-stack-your-washer-and-dryer.html
- ↑ https://www.appliancesonline.com.au/academy/laundry/stacking-kits-how-to-organise-your-washer-and-dryer/
- ↑ https://www.hunker.com/13410687/how-to-stack-a-washer-and-dryer
- ↑ https://www.hunker.com/13410687/how-to-stack-a-washer-and-dryer
- ↑ http://www.sears.com/articles/appliances/washers-dryers/how-to-stack-your-washer-and-dryer.html
- ↑ https://www.hunker.com/13410687/how-to-stack-a-washer-and-dryer
- ↑ http://www.sears.com/articles/appliances/washers-dryers/how-to-stack-your-washer-and-dryer.html
- ↑ https://www.hunker.com/13410687/how-to-stack-a-washer-and-dryer
About This Article

Before stacking your washer and dryer, measure the height and width of the area where you want them to go. Then, compare the measurements to the combined height of the washer, dryer, and stacking kit, and the width of the appliances to make sure everything will fit. When your ready to stack the appliances, remove the legs from the dryer and apply adhesive foam to the top of the washer to cushion vibrations. Next, lift the dryer into position with help from another person and attach it to the washer using a bracket. Finally, hook up the water supply and plug in your appliances. For tips on how to choose a stacking kit and how to connect the water supply, read on!