This article was co-authored by Andrew Carberry, MPH. Andrew Carberry is a Food Systems Expert and the Senior Program Associate at the Wallace Centere at Winrock International in Little Rock, Arkansas. He has worked in food systems since 2008 and has experience working on farm-to-school projects, food safety programs, and working with local and state coalitions in Arkansas. He is a graduate of the College of William and Mary and holds a Masters degree in public health and nutrition from the University of Tennessee.
There are 9 references cited in this article, which can be found at the bottom of the page.
This article has been viewed 53,406 times.
Hydroponic gardening means growing plants in a water-based system. There are many types of hydroponic gardening systems, and some systems are more complex than others. This type of gardening can be a seemingly overwhelming science to get into, but it doesn't have to be. There are systems that just about anyone can put together and maintain with some time and effort. To start a homemade hydroponic garden, you can choose a simple ebb and flow system or a wick system. Then, put together the system, plant the seeds, and maintain the garden.
Steps
Putting Together a Simple Ebb and Flow System
-
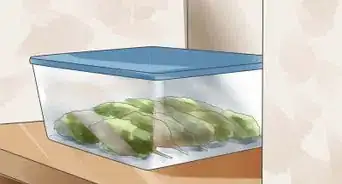
1Set out a leak-proof pan. To begin a simple ebb and flow hydroponics system, start by finding a leak-proof pan. The size of the pan you use depends on how many plants you think you will grow, but should be at least 6 to 8 inches deep to offer a growing medium for your plants. You can always use more than one pan if you run out of room in the first pan.[1]
- You can find a leak-proof pan at a supermarket, pet store, or gardening store. Kitty litter pans are perfect for this.
-
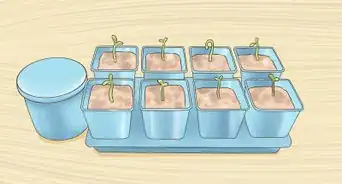
2Line small pots up inside of the pan. Locate or purchase several small pots to be placed inside of the pan. The seeds will be planted into these pots. Empty K-cups are good to use for their size and because they already have holes at the bottom of the cups. Any type of small pot will do as long as you are able to poke a few holes at the bottom and sides of it.[2]
- Depending on the pot’s material, you can use a nail, thumbtack, or drill to poke holes in it.
Advertisement -
3Fill the pots with growing medium. Once you have lined the pots inside of the pan, fill them with a growing medium. Growing media include dozens of choices such as gravel, clay pellets, vermiculite, rockwool/stonewool, sand, or cotton and are used to support the plant's root system as it grows. Ebb and flow systems need substrates with good drainage.
- You can try gravel or cotton batting as the medium. If you choose cotton batting, make sure to use an organic brand because cotton is often heavily sprayed with chemicals.[3]
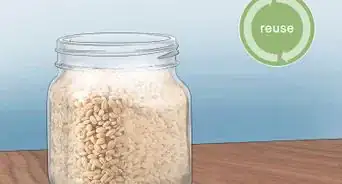
- Expanded clay pellets also work well in ebb and flow systems. They have good drainage and, while a bit expensive, can be reused.[4]
-
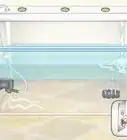
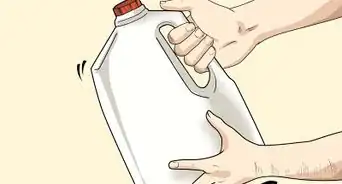
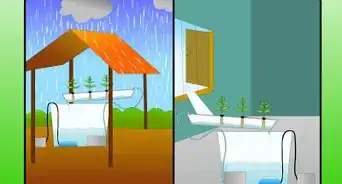
4Flood the pan. Ebb and flow systems work on a simple flood and drain model. The plants are flooded regularly each day for twenty to thirty minutes a time – the flood cycle. Then, the tray is drained. Usually, people with ebb and flood systems use a submersible pump to do this, working from a nutrient reservoir.[5] [6]
- If you're using a pump, set up your flood and drain system. Most people place the growing pan above the nutrient reservoir in a larger container.
- You'll then need to connect the pan and reservoir with the submersible pump and tubing, so the pump can deliver nutrient solution into the tray.
- You'll also need to install an overflow pipe to drain the solution back into the reservoir.
- For manual flooding, pour enough water to give each pot at least one cup. Drain the excess water into the pan by draining it into a bucket.
-
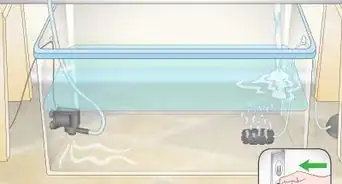
5Drain the pan. The flood cycle is followed by the drain cycle. With a pump, this is done more or less automatically. You can even program the pump to work on a timer. If you're doing things manually, just remove the pots from the pan after the seeds have soaked for fifteen minutes. Drain whatever water is left in the pain into a bucket and repeat the process several times a day.[7]


Building a Wick System
-
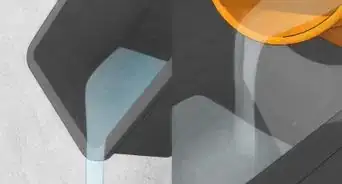
1Find a tray and reservoir. Wick systems are probably the easiest kind of hydroponic system to build, as it usually doesn't have any moving parts, pumps, or electricity. The wick system “wicks” up nutrient solution from a reservoir to plants in a tray above through capillary action – in other words, it sort of sucks up the liquid to the plants like a sponge. Your basic components will be the reservoir and growing tray.[8]
- Find a leak-proof container to hold the plants as they grow. This can be bucket, tray, or other type of container.
- For your reservoir, you'll need another leak-proof container (like a bucket). This container will hold your nutrient solution.
- The reservoir should be large enough to also support the growing tray, which sits above it usually.
-
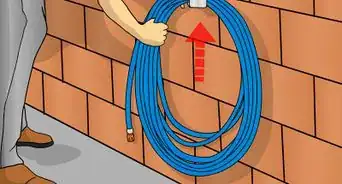
2Select a wick. The wick is the delivery mechanism in a wick system – it's what moves the nutrients from the reservoir below to the plants above, rather than a pump or your own hands as in an ebb and flow system. So, the wick is probably the most important part. Without a good absorbent wick, your plants won't get the nutrients they need.[9]
- Common materials that work as wicks include fibrous rope, wool, cotton, or rayon rope, tiki torch wicks, wool felt, and strips from old clothing or blankets.
- You'll want to test materials to see what works best. Be sure that your wick is absorbent but resists rotting.
- You can improve the wicking ability by washing the wick before you use it.
- Have enough wicking material on hand, too. You'll probably need at least two to four wicks, unless your system is extremely small.
-
3Connect the parts. Since there are no pumps or moving parts, it's fairly easy to set up a wick system. Most often, people place the growing tray directly above the reservoir and connect the two with the wicks. In fact, it's best to have these parts as close as you can – the shorter the wick, the more water it can transport to your plants' growing medium.[10]
- You'll next need to punch holes in the top of your reservoir and the bottom of your tray. Then, thread in your wicks and put the containers in place.
- Try to spread out the wicks evenly on the bottom of the growing tray.
- Add your growing medium to the bottom of the tray so that it covers the wicks. Wick systems need an absorbent medium like vermiculite, coco coir, or perlite.
- Flush out the medium with fresh water about every two weeks. This will reduce the risk of nutrients and salts building up to toxic levels.


Planting the Seeds
-
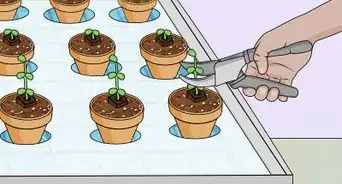
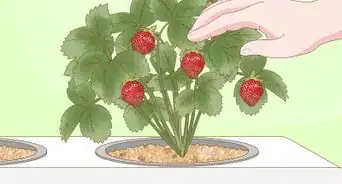
1Put a seed into each pot. Once the system is set up, you are ready to plant the seeds. The type of seeds you choose to plant is your choice. You can grow a large number of flowers, herbs (like basil and thyme), and vegetables (like spinach, lettuce, and kale). Put one seed into each pot. Allow the seeds to soak in the water that you poured into the pots for about fifteen minutes.[11]
- Beans also grow well in a hydroponic system. The seeds typically germinate within eight to ten days.
-
2Choose a nutrient for your plants. Plants need a full spectrum of nutrients to grow and thrive. Once the seeds start to produce plants, you'll need to choose a nutrient to make sure that yours are getting everything they need. This is crucial to a thriving hydroponic garden.
- Having too much or too little of any one nutrient can cause poor crop performance. It’s best to look for a commercial hydroponic solution that offers a full nutrient profile.[12]
- Hydroponic nutrient solutions come in powdered and liquid forms. As a beginner, you may want to start with a liquid solution. It’s more expensive, but it’s easier to use.[13]
-
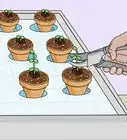
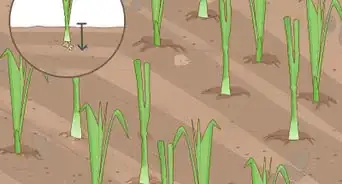
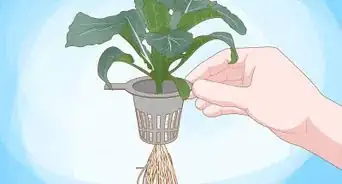
3Pull or transplant the plant. You can wait until the plants are fully grown to remove them. The time for the plants to grow depends on what you have planted. Plants growing in gravel or other hydroponic media aren't easy to transplant, so many growers wait until they are fully mature and harvest them all at once.[14]
- Wait until the bed is dry to remove the plant and shake off any particles that may still be attached.


Maintaining Your Garden
-
1Get a grow light. You may need a grow light during the winter, or if your plants are not placed outside in a garden or greenhouse. A grow light mimics natural daylight. They can be purchased at gardening stores or online. Some plants require more light than others, so research the amount of light required for growth for each plant you're planting.[15]
- You can control light levels with an automatic timer that controls the on/off setting of your grow light.
-
2Test the pH level. You should test the pH level of your garden regularly. You can do this easily by picking up Nitrazine paper, which is available at many drugstores. To use, simply dip one of the strips into the nutrient solution you're using and compare it to the chart that comes with the paper.[16]
- You can maintain a pH level of between six and seven by adding soluble potash or phosphoric acid to the nutrient solution, depending on the result of the test.
-
3Use insecticidal soap for pests. Even hydroponic gardens are susceptible to pests. To get rid of pests, you can use an insecticidal soap or pyrethrin based spray. You can purchase both of these pesticides from most gardening stores or online.[17]
- Make sure to follow the directions on the label of the type of pesticide you choose to use.
-
4Sterilize the bed if you notice a disease. Some symptoms of diseases in plants are spotting, blighting, rotting, and tumors. If you notice any of these symptoms, sterilize your garden, or use a diluted copper spray. To sterilize your garden, remove the pots, temporarily move them to another container, and flood the original container with diluted bleach solution. Allow the bleach to sit for twenty-four hours and drain the container. Then, wash thoroughly with water multiple times.[18]


Community Q&A
-
QuestionWhen the article says that beans grow well in a hydroponic system, do the authors mean beans in general, American bean plants, or a specific type of beans?
 DonaganTop AnswererThe reference is to beans in general. Actually, any plant that would do well outdoors in your area is likely to do well in a hydroponic system if you follow the above suggestions.
Things You'll Need
- Leak-proof pan (kitty litter pan)
- Small pots
- Expanded clay pellets, cotton batting, or other medium
- Nutrient solution
- Another tray
- Seeds
- Rope, felt, or other wicking material
- Pump (optional)
- Grow light (optional)
Warnings
- If you use an insecticidal soap or pyrethrin based spray on your garden, do not reuse the water for a fish tank.⧼thumbs_response⧽
References
- ↑ https://www.diynatural.com/diy-hydroponics-homemade-system/
- ↑ https://www.diynatural.com/diy-hydroponics-homemade-system/
- ↑ https://www.diynatural.com/diy-hydroponics-homemade-system/
- ↑ http://www.gpnmag.com/article/alternative-hydroponic-substrates/
- ↑ https://www.hydroponics.net/learn/hydroponic_gardening_for_beginners.php#Hydroponic-Systems
- ↑ https://www.diynatural.com/diy-hydroponics-homemade-system/
- ↑ https://www.diynatural.com/diy-hydroponics-homemade-system/
- ↑ http://www.homehydrosystems.com/hydroponic-systems/wick-system_systems.html
- ↑ http://www.homehydrosystems.com/hydroponic-systems/wick-system_systems.html
- ↑ http://www.homehydrosystems.com/hydroponic-systems/wick-system_systems.html
- ↑ http://modularhydro.com/ArticleLibrary/WhatCanYouGrowHydroponically.html
- ↑ http://edis.ifas.ufl.edu/cv216
- ↑ https://university.upstartfarmers.com/blog/the-best-hydroponic-nutrients-for-your-system
- ↑ http://www.motherearthnews.com/organic-gardening/hydroponic-systems-zmaz77zbon
- ↑ http://www.homehydrosystems.com/
- ↑ http://www.motherearthnews.com/organic-gardening/hydroponic-systems-zmaz77zbon
- ↑ http://www.motherearthnews.com/organic-gardening/hydroponic-systems-zmaz77zbon
- ↑ http://www.motherearthnews.com/organic-gardening/hydroponic-systems-zmaz77zbon
About This Article