This article was co-authored by wikiHow staff writer, Eric McClure. Eric McClure is an editing fellow at wikiHow where he has been editing, researching, and creating content since 2019. A former educator and poet, his work has appeared in Carcinogenic Poetry, Shot Glass Journal, Prairie Margins, and The Rusty Nail. His digital chapbook, The Internet, was also published in TL;DR Magazine. He was the winner of the Paul Carroll award for outstanding achievement in creative writing in 2014, and he was a featured reader at the Poetry Foundation’s Open Door Reading Series in 2015. Eric holds a BA in English from the University of Illinois at Chicago, and an MEd in secondary education from DePaul University.
This article has been viewed 33,277 times.
Learn more...
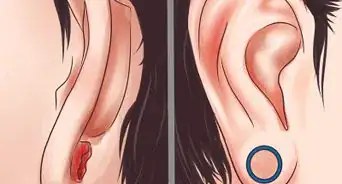
While tapers are typically used to stretch ear gauges, there are a few ways to safely stretch your ears without them. You can use heavier plugs to stretch your ears down a little bit and make your ears appear bigger. Heavier plugs will also get your ear used to the current size of your gauges—especially if you’ve been using rubber jewelry. You can also use bigger plugs to stretch your ears without tapers, but you cannot move up more than 1 size at a time. If you have PTFE, Teflon, or bondage tape, you can add layers of the tape to the rim of your current plugs to expand your gauges. If you ever experience swelling or bleeding, contact a medical professional immediately.
Steps
Wearing Heavier Plugs to Make Ears Bigger
-
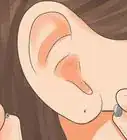
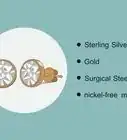
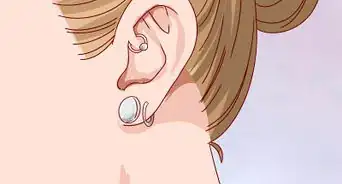
1Find plugs that weigh more than your current plugs. Go to a jewelry store and get a set of plugs that weigh 2-3 grams more than your current plugs. Stay under 5 grams heavier than your current plugs. Adding more weight to your gauges will ensure that the tissue in your ears stays stretched and gets used to their current shape before you move to a bigger size. [1]
- They will also weigh your ears down a little and make them look bigger if you leave them in long enough.
- Do not use double-flared jewelry to stretch your ears.
-
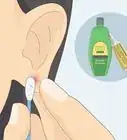
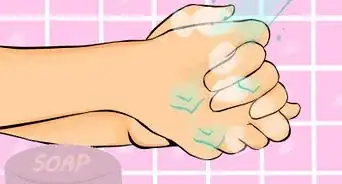
2Lubricate your ear with an ear plug lubricant. There are antiseptic lubricants designed for inserting and removing ear plugs. Buy some online or from your local jewelry store. Remove some lubricant with the tip of your index finger and rub it around your gauged ears on both sides to prepare the plugs for removal.[2]
- If you ever need to remove a plug and absolutely cannot access some ear plug lubricant, you can use petroleum jelly.
- You can use jojoba oil or vitamin E oil instead if you prefer.
Advertisement -
3Remove your current plug carefully by pushing it out slowly. Brace the edge of your ear cartilage by pinching it with your nondominant hand. Put your dominant index finger on the front of your plug and apply a little pressure behind the plug with your thumb. Your plug should slowly slide out.[3]
- It may help to start on the bottom half of your plug and pop that out first.
- If you cannot remove a plug, consult an ear-piercing professional.
-
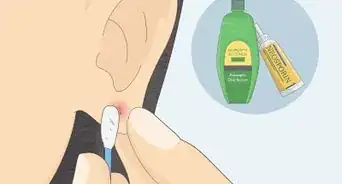
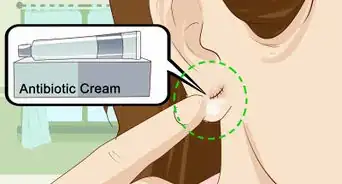
4Clean your gauge out with an antiseptic spray. Set your ear plug aside. Wipe the lubricant off of your ear with a clean paper towel. Spray your ear with an antiseptic spray on both sides. Massage the inside and outside of your gauge to apply the antiseptic spray. Dry your ears after 1 minute by rubbing them dry with a clean paper towel.[4]
- Antiseptic sprays, like Bactine or Medi-First, are topical sprays that contains hydrogen peroxide, alcohol, and cleaning agents. They are designed specifically to clean skin and prevent infections.
- You can use rubbing alcohol and a cotton swab instead if you prefer.
- Massaging your ears also relaxes the ear tissue and prepares them for the heavier plugs.
-
5Lubricate your new plug with the ear plug lubricant. Cover your plug with a light layer of ear plug lubricant to make it easier to insert. Wipe away any large chunks of lubricant with your finger.
- You may not need to do this if your ear is used to having new plugs inserted.
-
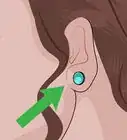
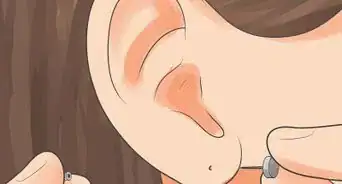
6Insert your heavier plugs by applying light pressure to the back of the plug. Brace your ear with your nondominant hand. Hold your new plug between your thumb and index finger. Lift the plug up to your opening with your thumb in the back. Press the plug against the opening and remove your index finger to wrap it between your plug and the ear. Apply light pressure to the back of the plug to pop it in.[5]
- Repeat this process with your other ear if it is also gauged.
- Wipe your ear with a paper towel to dry it.
-
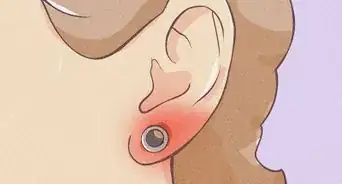
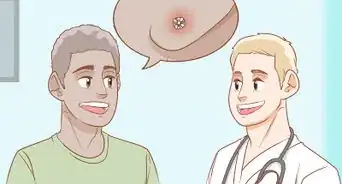
7Wait 2-3 weeks before using larger or heavier jewelry. Leave your heavier jewelry in your ear for at least a few weeks before repeating this process with heavier or larger jewelry. If your ear begins to hurt or swell up, contact a doctor immediately.[6]
Warning: This process should not cause your ear to bleed or swell up. If you experience either of these problems, consult a doctor as soon as possible.


Adding Larger Jewelry to Stretch Your Gauge
-
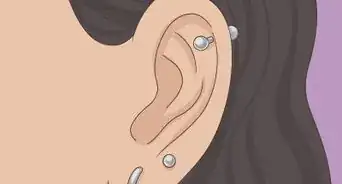
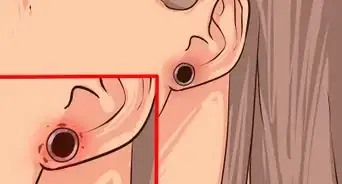
1Select an ear plug that is no more than 1 size larger than your current jewelry. Select new plugs that are no bigger than 1 level above your current gauge. Ear gauges are sized with 20 as the smallest size and 00 as the largest. These gauges go up or down by increments of 2. Anything larger than 00 is measured in sixteenths of an inch. [7]
- For example, if you have a size 8 gauge, don’t go higher than a 6. If your gauges are 11⁄16 in (17 mm), don’t go higher than 3⁄4 in (19 mm).
- Avoid using double-flared plugs to stretch your ears.
- Using a slightly larger plug will expand the size of your gauge as your ears get used to the new jewelry.
Warning: If you use a size more than 1 size bigger to stretch your ears, you run the risk of permanently damaging the tissue in your ears.
-
2Lubricate your current plug with an ear lubricant. Use specialized ear plug lubricant to moisturize your ears before taking your current plugs out. Wipe each side of your ear to cover the entire ear with lubricant.[8]
- If you cannot use any special ear lubricant, use jojoba oil or vitamin E oil.
- If it is impossible for you got get your hands on a specialized lubricant, you can use petroleum jelly/
-
3Remove your plug by pushing it out slowly. Pinch your ear between your nondominant thumb and index finger to brace it. Put your dominant index finger on the front of your plug to keep it still and apply pressure from behind the plug with your dominant thumb. Push lightly at first before applying more pressure to fully remove your plug.[9]
- You may find it easier to start by applying pressure to the bottom of your plug first and then working your way up.
-
4Clean your ear with an antiseptic spray. Wipe the lubricant off of your ear with a clean paper towel. Spray your ear with an antiseptic spray to kill bacteria and clean your ear. Massage the opening with your fingers to push the spray into your skin. Wait a few seconds to give your spray time to clear bacteria.[10]
- Antiseptic spray contains hydrogen peroxide, alcohol, and cleaning agents. It is used to clean skin and prevent infections.
- You can use rubbing alcohol and a cotton swab if you don’t have any antiseptic spray.
- Massaging your ear will relax the cartilage. This will make it easier to insert your new plugs as well.
-
5Cover your new plug in lubricant to make it easier to insert. Use your jojoba oil, vitamin E oil, or specialized ear lubricant to cover your new plug. Wipe each edge of your plug to ensure that the edges are fully lubricated.
-
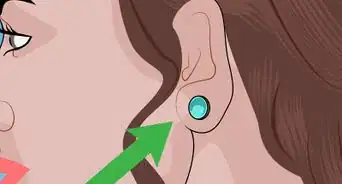
6Pull lightly on the edge of your ear and slowly insert the larger plug. Use your nondominant hand to pull the lobe of your ear out a little bit. Lift your plug up with your dominant hand and hold it against your ear. Apply pressure from the back to slide the bigger plug into your gauge. Because your new plug is bigger, you may need to insert the bottom of the plug first and pull down a little bit to insert the top.[11]
- Don’t pull so hard on your ear that it begins to hurt.
- You may feel some tingling in your ear. This is normal. There shouldn’t be any blood or swelling though. If you experience either of these things, contact a doctor immediately.
- Wipe the lubricant off of your ear after you insert your new plug.
-
7Leave your new plug in for at least a month before moving up another size. Monitor your ears daily for swelling or excess redness and consult a doctor if you feel any persistent pain. Give your ear time to adjust to your new size. Wait at least 1 month for your tissue to adjust before going up an additional size.[12]


Adding PTFE Tape to Your Current Plugs
-
1Buy some PTFE, Teflon, or bondage tape online or at a store. To stretch ears over time by adding layers of tape, you need to ensure that you’re putting the right kind of tape in your ears. PTFE tape, also known as plumber’s tape, is the most readily available form of body-safe tape. You can also use Teflon or bondage tape, but Teflon may slide out of your gauge. Bondage tape tends to be harder to find.
- Do not tape your ears if you have a freshly-stretched or new piercing.
- You cannot use duct, household, or electrical tape. The chemical adhesive of these tapes can cause infections in your ear.
- You cannot perform the taping method with flared jewelry.
- Use the taping method with steel, glass, or titanium plugs. Other materials will not work as well with the tape.
-
2Apply an ear plug lubricant to your piercing before popping it out. You can use jojoba oil or vitamin E oil instead if you don’t any specialized ear plug lubricant. Rub the lubricant around the edges of your plugs on both sides to make them easier to remove.
-
3Remove your current plugs by applying pressure from the back. Brace your ear cartilage with your nondominant thumb and index. Brace the front of your jewelry index finger as you use your thumb to apply pressure to the back of your current plug. Push slowly and carefully to pop your current plug out.
- It may be easier for you to apply pressure to the bottom of your piercing at first and then work your way up.
-
4Spray your ear with antiseptic spray and wipe it dry. Wipe the lubricant off of your ear by wiping them with a paper towel. Spray both sides of your ear with an antiseptic spray. Massage your ear with your dominant hand to rub the antiseptic spray into your skin. Wait 1-2 minutes before cleaning your ear with a paper towel.
- Antiseptic spray is used to clean skin and prevent infections. It contains alcohol and hydrogen peroxide.
- You can use rubbing alcohol and a cotton swab if you don’t have any antiseptic spray.
-
5Clean your current plugs with water and dry them off. Wipe the lubricant off of your plugs with a paper towel. Take your plugs to a sink and run them under warm water. Rub every surface of your plug by hand. Rotate the plug as you’re cleaning it so that you rinse off every side of the jewelry. Set the plug down on a dry paper towel and rub them dry with it to clean them.[13]
- You can clean the plugs with rubbing alcohol before you rinse them if they’re smelling especially funky after sitting in your ears for a long time.
-
6Sterilize your scissors by cleaning them with rubbing alcohol. Take a pair of scissors and rinse them under warm water. Wipe them off on a clean towel. Take some rubbing alcohol and pour a few drops on to some gauss. Run the gauss over each side of your scissor blades to disinfect them.
- Don’t heat your scissors to sterilize them. Hot scissor blades may melt your tape a little and cause bumps when you wrap it.
-
7Wrap 2 layers of tape around your plugs. Hold your plug so that you’re looking at the rim that will fit in your ear. Pull out a small piece of tape. Fit the edge so that it covers the rim of the plug. Press the tape into the rim and rotate the plug. Keep feeding tape to the rim as you rotate it. Cover the rim of the plug twice to add 2 layers of tape to the plug. Cut the tape with your scissors when you’ve completed 2 loops.
- If you don’t get it right the first time, go ahead and remove your tape. Try it again! There’s no shame in trying more than once.
- Do not use a different number of layers of tape with your other ear if you’re doing this for both of them. That will cause your ears to stretch at different sizes.
Warning: Do not rip the tape by hand. You will stretch the tape out at the very end of your second layer and the tape will scrunch up where you pulled it apart. This will cause a small bump to form on your tape.
-
8Use your ear lubricant to re-oil your plug and ear. Use the same lubricant that you used to remove your plug originally. Carefully rub the oil around the taped rim and cover each edge in oil. This will make it easier to reinsert your plugs.
-
9Reinsert the plugs by applying pressure to the back. Pull the bottom of your ear out a little bit with your nondominant hand. Lift up your taped plug to the front or back of your ear. Use your thumb and forefinger to reinsert the plug into your ear. You may feel a little pressure and tingling when you reinsert the plug.
- If your ear bleeds or begins to swell, contact a doctor immediately.
- Repeat this process for your other ear if it is also gauged.
-
10Add 2 more layers of tape after a week to repeat this process. After at least 1 week, you can repeat this process to add 2 more layers of tape. The PTFE, Teflon, or bondage tape will slowly stretch your ears. You can always use 1 layer of additional tape it 2 layers seems like too much. Over time, your ears will slowly become used to their new sizes.


Things You’ll Need
Wearing Heavier Plugs to Make Ears Bigger
- Ear plug lubricant
- Antiseptic spray
- Heavier plugs
Adding Larger Jewelry to Stretch Your Gauge
- Ear plug lubricant
- Antiseptic spray
- Larger plugs
Adding PTFE Tape to Your Current Plugs
- Ear plug lubricant
- Antiseptic spray
- Rubbing alcohol
- Gauss
- Paper towel
- PTFE or bondage tape


References
- ↑ https://www.bbc.com/news/magazine-15771237
- ↑ https://youtu.be/z51Ss_dR1iw?t=146
- ↑ https://www.safepiercing.org/docs/APP_2017_Stretching_Brochure_final.pdf
- ↑ https://youtu.be/z51Ss_dR1iw?t=128
- ↑ https://www.safepiercing.org/docs/APP_2017_Stretching_Brochure_final.pdf
- ↑ https://www.safepiercing.org/docs/APP_2017_Stretching_Brochure_final.pdf
- ↑ https://www.safepiercing.org/docs/APP_2017_Stretching_Brochure_final.pdf
- ↑ https://youtu.be/z51Ss_dR1iw?t=146
- ↑ https://www.safepiercing.org/docs/APP_2017_Stretching_Brochure_final.pdf
About This Article