This article was co-authored by Renée Plevy. Renée Plevy is an Internationally Acclaimed Portrait Artist from New York/Palm Beach who has painted The Grand Dames of Palm Beach and various celebrities and community leaders. With over 50 years of experience, Renée specializes in painting realistically in oil and capturing the soul of the person. She has studied under internationally renowned portrait artists John Howard Sanden, David Leffel, Robert Beverly Hale, Clyde Smith, and Leonid Gervits. Renée is featured in over 68 shows and galleries including a one-woman museum show at the Paterson Museum. She has garnered numerous awards including “Artist of the Year” from The Bloomfield Art League and First Prize from the Boca Raton Museum Artist’s Guild. Renée has even painted a portrait of celebrity, Vanilla Ice. She also teaches at the Boca Raton Museum Art School - formerly at SVA in Manhattan.
There are 11 references cited in this article, which can be found at the bottom of the page.
wikiHow marks an article as reader-approved once it receives enough positive feedback. In this case, 97% of readers who voted found the article helpful, earning it our reader-approved status.
This article has been viewed 612,914 times.
Before you paint a masterpiece, a canvas needs to be stretched just right for it to work and hold paint properly. If you're a painter, learning to stretch your own canvases is a great way of saving money and keeping your overhead low and keeping yourself productive. This article will show you how to get the materials necessary, stretch the canvas properly, and prime it for painting.
Steps
How to Get Started
-
1Purchase a stretcher or build a frame. Canvas frames are also sometimes referred to as stretcher bars, which feature pre-cut slats that you can slip together to create the frame. This is the easiest way to customize the frame to fit your purposes and put it together quickly.[1] Most professionals use stretcher bars.[2]
- DIY frame kits like EasyWrappe are prefabricated in a variety of different sizes that will allow you to quickly fix a canvas to a frame with no outside tools, other than an X-Acto knife to trim the excess canvas. While you have to pick from a limited variety of sizes, you can stick the pre-cut wood bars to the canvas and fix them in place in less than five minutes.[3]
-
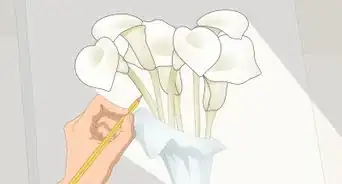
2Get enough canvas for the job. Get enough canvas to fit around the frame by at least six or eight inches on each side, depending on the width of the frame. It's essential that you have enough overlapping canvas to attach to the back side of the canvas, or the stretching won't work. Measure the dimensions of the frame you have, or of the eventual canvas that you want and purchase or cut a larger size of canvas, accordingly.
- Unprimed, sometimes referred to as “ungessoed” canvas is easier to stretch than primed or “gessoed” canvas.[4] For the best results, buy ungessoed canvas and prime it later.
Advertisement -
3Get the other necessary materials to complete the job. You'll need a few basic tools to complete a canvas stretching job properly. Try to get the following supplies:
- A spray bottle filled with plain water. It’s common to dampen the back of the stretched canvas. As it dries, it will shrink and thus tighten the canvas even more.
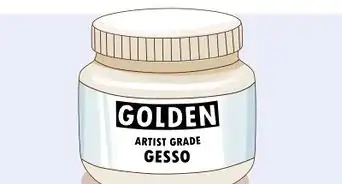
- Gesso. This primer is commonly used to treat the canvas after stretching. It's a white paint mixture, made of gypsum, chalk, and other ingredients, available at most art supply stores.
- Specialty pliers used for canvas stretching. Available at most art supply stores, canvas pliers have flat surfaces that can be used to easily stretch canvas without pulling holes in the material.
- Staple gun. Regular desk staplers are not sufficient for stretching canvas. You need a heavy-duty staple gun to plant staples into wood and carpentry staples capable of gripping into the frame.
-
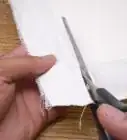
4Cut your canvas. The canvas should be cut several inches wider than the dimensions of the stretcher bars, taking into account the width of each side of the frame, as well. You'll need this extra canvas to have something to get a grip on to be able to pull and stretch it. After you've got all your supplies, frame and canvas, cut the canvas to shape using a very sharp utility knife, or an X-Acto.[5]
- Tearing the canvas will make a straighter line than cutting it will. Get the cut started along the appropriate line using your knife and consider tearing along the grain to make an accurate shape.


How to Stretch the Canvas
-
1Center your frame on the canvas. Lay the canvas out flat on your work surface and center the frame on top of it. Take a minute to smooth out and clean up the canvas as much as possible before you get started.
- Make sure that the grain of the canvas is lined up straight with the stretcher bars on the frame. If they don't, the bars will twist and two opposite corners will lift up.
-
2Stretch the longest sides of the canvas first. Start with the longest side of the canvas closest to you and fold it in. Insert three staples in the center of that side of the frame, along the bottom edge of the frame. In other words, you want to wrap the canvas all the way around the bar and start fixing it onto the bottom edge of the frame. The canvas around the corners should still be quite loose. You’ll tighten it up later.[6]
- Rotate the canvas and frame, or move around the table to the opposite side and do the same thing. Pull the canvas tight, fold it over the frame, and insert three more staples into the stretcher bar on the opposite side.
- You always want to secure the canvas from the middle to the corners. Never start inserting staples close to one of the corners, or the canvas will twist slightly on the frame, making it pooch out.
-
3Wet the canvas gently, if necessary. If you're trying to stretch an ungessoed canvas, it's common to use a spray bottle to gently dampen the canvas with some water, which will help to tighten the canvas as it dries. After you've fixed the long sides to the canvas, mist the canvas gently to promote shrinkage as you work.[7]
-
4Stretch the shorter sides. Go to one of the unstapled sides and give the canvas a good solid pull, fold it over, and insert two staples, attaching the canvas to the frame. Do the same thing to the other short side.
-
5Stretch the corners. Go back to the first side you started stretching and work from your center staples out to each corner. Pull a piece of loose canvas, stretch it down, and insert a staple. Go slowly, stretching a little bit from the opposite side of the bar at a time. Continue pulling and stapling pieces of the canvas moving around the canvas edges in the same order as before.[8]
- If you want, you can staple near the corners and then place a staple between the center and the corner instead. Continue until you have about four inches of unstapled space from the corners.
-
6Fold and staple the corners. Tuck one side of the corner under the other, pulling tight, so that one straight edge is just even with the corner. Pull the corners very firmly. This is the final tightening, making it the most important. Be firm and even.
- Sometimes, it's helpful to make a little slit along a diagonal in the canvas, to help stretch it tight and make it flush with the sides in the corner of the frame. You want the corners to look as clean as possible, so follow the shape of the canvas and cut it if necessary.
-
7Finish stapling the canvas. Go around the canvas and pound all your staples with a hammer to make sure everything is flush with the frame. You don’t want rough staples around the edges while you’re working. If you see a need for more staples, take a minute to fix a few more in.


How to Finish and Prime Your Canvas
-
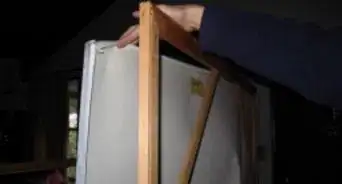
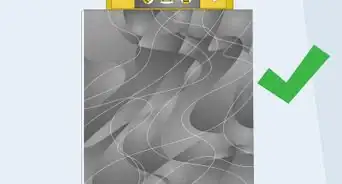
1Check the tightness of the canvas. Once you're finished, flip the whole canvas over and tap it with your finger. It should sound like a drum and feel quite taut. If there is any creasing or strange pulling, you'll be able to see it from here. If you mis-stapled or don't have the canvas particularly taut, pull the staples and fix it by repeating the steps in the previous section. The canvas will sag far worse once it is painted, if the canvas is loose.
-
2Use shims or wood wedges to continue promoting stretching. With some canvases, it's appropriate to insert shims into the corner joints to further stretch the canvas. This won't always be necessary, but if you want the canvas to be especially tight, or you think it could be tighter but don't want to take the time to remove all the staples and start over, this can be an excellent way of tightening it a bit more.[9]
- Wooden shims are very thin shards of wood that you can buy in packs at the hardware store for a few dollars. They usually come in a variety of sizes, which means you'll be able to customize the stretch and fill in the gap if necessary.
-
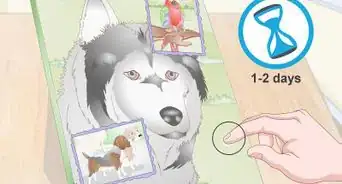
3Let the canvas rest. After stretching your canvas, it's important to let the canvas rest and tighten up on the frame before you attempt to prime it or paint on it. In a room-temperature area free of excess moisture and humidity, a canvas should tighten up and be firm in about a day or two.
-
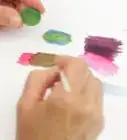
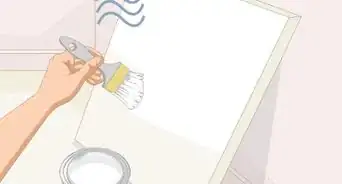
4Prime your canvas. After you've stretched your canvas, you're ready to prime it, using gesso or the primer of your choice. Sometimes "tightener" will be added to the canvas and allowed to dry before the primer, and sometimes not. Then, canvas needs to be primed by painting even, thin coats using the brush in one direction. Most canvases should be primed with three coats.[10]
- Apply one coat and let it dry thoroughly to the touch, then go back over the canvas with another coat. Use extremely fine-grained sandpaper to go over the paint before priming the canvas one more time.[11]
- Painting the primer on in the same direction allows the canvas to look fairly clean and simple, a great backdrop for your painting. Use sandpaper to flatten any texture or bumps of primer on the canvas.


Community Q&A
-
QuestionWhat is the best paper or cloth to use for a painting?
 Community AnswerIt depends on the paint you use. For acrylics or oils, a stretched canvas is the most popular. For watercolor, there are special papers made just for that.
 -
QuestionWhat kind of cloth should I use for a canvas?
 Community AnswerYou can search online for "cotton canvas," and get several weights, but 10-ounce is most common.
 -
QuestionCan canvases made for acrylic or oil paint can be used for watercolor?
 Community AnswerTo use watercolor on a canvas you will have to prime the canvas with an absorbent ground such as the one made by Golden.
Warnings
- Be careful not to staple your fingers.⧼thumbs_response⧽
Things You'll Need
- Good raw painter's canvas
- Stretcher bars assembled into a frame to stretch the canvas over
- Heavy duty stapler
- Box of staples
- Hammer


References
- ↑ Renée Plevy. Portrait Artist & Educator. Expert Interview. 7 May 2021.
- ↑ https://emptyeasel.com/2006/12/29/how-to-make-your-own-stretched-canvases-for-painting/
- ↑ http://www.breathingcolor.com/blog/4-options-for-stretching-canvas-prints/
- ↑ https://www.art-is-fun.com/what-is-gesso
- ↑ https://www.format.com/magazine/resources/art/how-to-stretch-painting-canvas
- ↑ https://www.liveabout.com/how-to-stretch-your-own-canvas-2578562
- ↑ https://www.justpaint.org/wp-content/uploads/2015/06/NumberThree.pdf
- ↑ https://www.mybluprint.com/article/how-to-stretch-your-own-canvas-and-why-you-should-definitely-dyi-it
- ↑ http://www.craftsy.com/blog/2013/08/how-to-stretch-your-own-canvas/
- ↑ https://www.mybluprint.com/article/get-ready-for-prime-time-heres-how-to-prep-your-canvas-for-painting
- ↑ Renée Plevy. Portrait Artist & Educator. Expert Interview. 7 May 2021.
- Videos provided by Emily Bland
About This Article

If you want to stretch a canvas using a stretcher bar, make sure there is 6 to 8 inches of extra canvas on each side of the frame. Then, fold the sides of the canvas around the frame one at a time and staple them to the frame. This will leave the corners loose, so you will have to fold the extra fabric at the corners a few extra times to staple them down. Then, insert shims or wood wedges to tighten the canvas more, and leave it to stretch for 1 to 2 days. To learn when to prime the canvas with gesso, read more!