This article was medically reviewed by Shaune Wallace, OD. Dr. Wallace is an Optometrist in Nevada with over 14 years of optometry experience. He received his OD from the Southern California College of Optometry in 2006 and is a member of the American Optometric Association.
This article has been viewed 223,446 times.
Putting in a soft contact lens can be tricky. The lens is very delicate, and the differences between a right-side out and inside out lens can be difficult to spot. To avoid the potential pain and discomfort of an incorrectly oriented lens, take the time to perform a few tests to ensure they are put in correctly.
Steps
Performing the “U” Test
-
1Place the contact lens on your finger. The rounded side should be downward, touching your finger. If it looks kind of like a bowl or a cup on your finger, you have it in the right orientation. If it looks like a dome, with the rounded side up, you have the contact lens flipped the wrong way.[1]
- If you can’t keep the lens even, try placing it on your palm instead.
-
2Hold the lens at eye level. Seeing the lens at the correct angle is paramount. Viewing from different angles can play tricks on your eyes, especially because you need the contact lens to see correctly. Look at it directly from the side.[2]Advertisement
-
3Look for the “U”. When the contact lens is correctly oriented, it should have a fairly rounded appearance. It should resemble a wide letter “U”. When it’s inside out, however, it will resemble a “V” more than a “U”.[3]
- Look for flaring at the edges. The lower part of the lens may be deceiving, but the edges themselves will look stretched towards the sides if the lens is inside out.
- If the lens seems wider at the top, and the lines aren’t straight, it’s likely inside out.


Performing “The Taco Test”
-
1Place the lens between your forefinger and thumb. Adjust your fingers so they are towards the inside portion of the contact lens, and are not covering or touching the edges. There needs to be enough room for the contact lens edges to move.[4]
-
2Gently squeeze the lens. Be sure not to smash the lens. The point is not to test the integrity of the lens, or the limits to which it will bend. You just want to see what shape it makes when you bend it.[5]
-
3Study the lens. If the edges point straight upward, like the eponymous taco, it is correctly aligned. If they squeeze or round outward, like the head of a vase, then the lens is inside out and should be reversed.[6] .
- If you squeeze very tightly, a correctly oriented contact lens will bow enough the edges will curve towards one another.


Checking the Lens Quickly
-
1Look for laser etching. Some lens manufacturers laser etch small numbers into their lenses that make this process even easier. Set the lens on your forefinger, rounded side down. Simply look for the numbers when viewing the lens from the side. If they are right-side up, the lens is oriented correctly.[7]
-
2Check for edge coloring. If you have a tinted lens, there will be a specific look to it if it’s inverted. Hold the lens on your fingertip and lower your hand. From there, look downward. If the edge is tinted in a blue or green color, which is dependent on the type of tint in the lens, then it’s in the right position. If the edges look like another color, they are inverted.[8]
-
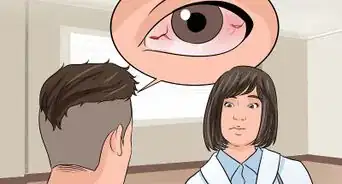
3Put the lens in. If none of the other tests make it clear, you might have to insert the contact lens as it is. Unless you’re brand new to contact lenses, there will be a definite change in feel when a contact lens is inserted inside out. It will feel irritable, itchy, and uncomfortable.[9]
- There may be a bit of confusion, however, because similar irritability can occur with a dirty lens that is inserted properly.


Warnings
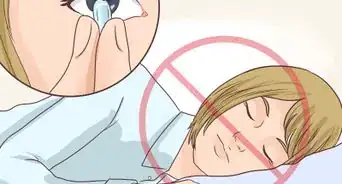
- Be sure not to dry out the contact while performing any tests, it may cause it to rip.⧼thumbs_response⧽
- Be very careful with the lens. If you drop it, it may no longer be sanitary enough to use.⧼thumbs_response⧽


References
- ↑ https://www.allaboutvision.com/contacts/faq/inside-out.htm
- ↑ https://www.allaboutvision.com/contacts/faq/inside-out.htm
- ↑ https://www.allaboutvision.com/contacts/contact-lens-tips.htm
- ↑ https://www.allaboutvision.com/contacts/faq/inside-out.htm
- ↑ https://www.allaboutvision.com/contacts/faq/inside-out.htm
- ↑ https://www.lensconsultants.com/inf06.htm
- ↑ https://www.allaboutvision.com/contacts/faq/inside-out.htm
- ↑ https://www.allaboutvision.com/contacts/contact-lens-tips.htm
- ↑ https://www.allaboutvision.com/contacts/contact-lens-tips.htm
About This Article

It can be hard to tell if your soft contact lens is inside out, but there are a couple of simple tricks you can use. Place the lens on your fingertip and examine it closely. If it’s the right way, it should have a full curve like a bowl. If it’s inside out, the sides will be straighter, like the letter “V.” You can also gently squeeze the edges together between your thumb and forefinger. If the sides stay straight, like a taco, the lens is the right way. However, if the sides curl outwards, it’s inside out. If the lens is already in your eye and it’s inside out, it will feel itchier and more uncomfortable than normal. For more tips from our Optometry co-author, including how to care for your contact lenses, read on!