This article was co-authored by Luba Lee, FNP-BC, MS and by wikiHow staff writer, Jessica Gibson. Luba Lee, FNP-BC is a Board-Certified Family Nurse Practitioner (FNP) and educator in Tennessee with over a decade of clinical experience. Luba has certifications in Pediatric Advanced Life Support (PALS), Emergency Medicine, Advanced Cardiac Life Support (ACLS), Team Building, and Critical Care Nursing. She received her Master of Science in Nursing (MSN) from the University of Tennessee in 2006.
There are 10 references cited in this article, which can be found at the bottom of the page.
This article has been viewed 8,613 times.
Applying an adhesive bandage might feel like the last step of first-aid, but you've got to check that the bandage is on properly before you're done. Remember to clean a cut or scrape before you stick an adhesive bandage on it and check circulation. The most common problem with adhesive or compression bandages is that they're on too tightly, which can cut off circulation and cause pain. Fortunately, it's easy to rewrap or reapply bandages to protect sprains, swollen limbs, or strained muscles.
Steps
Using Compression Bandages Correctly
-
1Get out a compression bandage that's slightly stretchy. Compression bandages are also called roller bandages since they're a long strip of fabric that comes tightly rolled up. They're usually a little stretchy so you can apply pressure as you unroll the bandage and wrap it around a limb.[1]
- Most compression bandages are 2 to 4 inches (5.1 to 10.2 cm) wide. Choose narrow bandages to wrap around hands or feet while you use wider bandages for knees or upper legs.
-
2Wrap a compression bandage on sprains, swollen limbs, or varicose veins. If you've twisted your ankle or pulled a muscle in your wrist, for instance, a compression bandage can prevent it from swelling. To wrap your ankle, place your foot flat on the floor and wind the bandage around your foot so each layer overlaps slightly. Work your way up to the ankle until you reach the end of the bandage.[2]
- If you're wrapping a sprained wrist, hold your hand out straight and wrap an end of the bandage across your hand below the fingers. Then, wrap the bandage across your hand near the base of the thumb. Keep wrapping across the wrist while you apply slight pressure.
- Compression bandages work best for venous ulcers, lymphoedema, and gross varices.
Tip: To keep the wrap in place, attach the 2 flat hooks that came with the bandage. Secure the ends of the hook to the end of the bandage and attach it to the wrap.
Advertisement -
3Use a triangular bandage like a sling to support an injured limb. If you have an injury that's already bandaged, wrapping a sling around it can offer some stability. It's also an extra layer of protection if you have a simple gauze dressing over a wound. In addition to the sling, you can fold the diagonally-cut piece around a dressing and tie off the ends with a knot.[3]
- If the sling is wrapped around an arm injury, check that the bandage isn't pulling tightly around the person's neck.
- If you're trying to care for your own injury, ask a friend to help you make the bandage into a sling.
-
4Check if you can slide a fingertip under the bandage. The bandage should be snug, but not too tight. To tell if the bandage is applying even pressure, try to slide 1 of your fingers under the edge of the bandage. If you can't easily slip your fingertip under it, the wrap is probably too tight.[4]
- Repeat this for the opposite side of the bandage to compare how much pressure you feel. If 1 side feels tighter or looser than the other, unwrap the bandage and wrap it again.
-
5Push on a fingertip to see if an arm bandage is cutting off circulation. If you've wrapped a bandage on the wrist, hand, arm, or finger, it's important to check that it's not too tight and cutting off circulation to the fingers. Once you finish wrapping, press on a fingernail and pay attention to the color. If the bandage is fine, the fingernail will stay the same color or turn a little pale before the color comes back in a few seconds.[5]
-
6Use a brace or crutches along with the bandage if you need to protect an injury. Compression bandages can prevent swelling and remind you not to use an injured part of your body, but they don't give much protection from further injury. If you need to keep weight off of a wound, wear a brace over the bandage or use crutches in addition to the compression bandage.[6]
- Using the compression bandage with a brace or crutch could speed your healing time.
-
7Loosen compression bandages or take them off before you go to bed. Since you won't be putting pressure on the wound while you sleep, loosen or remove the bandage so you get some circulation. Then, re-wrap the injury when you wake up to give it some support and to prevent fluid from building up.[7]
Tip: If your leg is injured, you may want to prop a pillow underneath it while you sleep, which also keeps swelling down.
-
8Monitor the skin for tingling and other signs of poor circulation. If a bandage is too tight, it can cut off circulation so you'll need to unwrap the bandage and rewrap it if you think it's too tight. Look at the skin on both sides of the bandage and rewrap it if the skin:[8]
- Turns blue or purple
- Feels cool to the touch
- Feels tingly or numb
- Becomes more painful


Applying Adhesive Bandages Correctly
-
1Rinse minor a cut or scrape with cool water to clean it. Wash your hands with soapy water before bandaging the injury. Hold the scrape or cut under cool running water to get rid of dirt or debris. You could also soak a gauze pad in cold water and gently pat it over the wound to clean it. Then, pat the area dry with a clean soft tissue or towel.[9]
- If you don't have access to water, dab the wound with an alcohol-free wipe.
- Try not to use fluffy cotton balls to clean or dry the injury since the tiny fibers can stick to the area.
-
2Choose a bandage that covers the wound or injury. This is especially important if you're putting a bandage on an open wound. Pick a bandage that will cover the entire wound so you're not sticking adhesive directly onto a painful area. Most adhesive bandages come in thin strips or wide rectangles, so choose one that fits the size of your injury.[10]
- Having a well-stocked first-aid kit means that it will be easier to find the right bandage for your situation. Go through your first-aid kit every few months and stock up on bandages that you are low on.
Tip: Use hourglass-shaped bandages if you're wrapping a fingertip injury. If you don't have one of these, take a narrow strip bandage and cut a lengthwise strip down each end of the strip. Then, press the pad over the wound and wrap the ends of the strip around your finger so they crisscross.
-
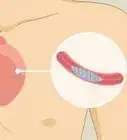
3Place a strip or fingertip bandage on small scrapes or cuts. If you have a cut or scrape that needs to be covered, unpeel an adhesive strip or fingertip bandage from its covering. Position the gauze part of the bandage directly over the cut or scrape and press the sticky sides down around the injury.[11]
- If the injury is bleeding, press on it gently with clean gauze to stop the bleeding before you put the bandage on.
- Simple bandages stop germs from getting into the wound. They can also protect the injured area from getting hurt even more.
-
4Check for blue skin, tightness, and other signs of poor circulation. It's possible to wrap an adhesive bandage too tightly around a finger or toe. If it's too tight, the bandage will turn your skin blue or purple or the skin around the bandage might feel numb, tingly, or painful.[12]
- Remove the bandage and try to reapply it so it's looser. If the bandage isn't sticky anymore, use a new one.


Warnings


References
- ↑ https://www.nhs.uk/common-health-questions/accidents-first-aid-and-treatments/how-do-i-apply-a-bandage/#:~:text=as%20soon%20as%20the%20bandage,so%20you%20should%20loosen%20it.
- ↑ https://myhealth.alberta.ca/Health/aftercareinformation/pages/conditions.aspx?hwid=abr6087
- ↑ https://www.nhs.uk/common-health-questions/accidents-first-aid-and-treatments/how-do-i-apply-a-bandage/
- ↑ https://ahc.aurorahealthcare.org/fywb/baycare/x21086bc.pdf
- ↑ https://www.uhn.ca/PatientsFamilies/Health_Information/Health_Topics/Documents/Self-bandage_hands_arms_to_reduce_lymphedema.pdf
- ↑ https://familydoctor.org/condition/ankle-sprains-healing-preventing-injury/
- ↑ https://myhealth.alberta.ca/Health/aftercareinformation/pages/conditions.aspx?hwid=abr6087
- ↑ https://myhealth.alberta.ca/Health/aftercareinformation/pages/conditions.aspx?hwid=abr6087
- ↑ https://www.nhs.uk/common-health-questions/accidents-first-aid-and-treatments/how-do-i-clean-a-wound/
- ↑ https://www.stjohn.org.nz/first-aid/first-aid-library/immediate-first-aid1/dressings-and-bandages/
- ↑ https://health.clevelandclinic.org/cover-wound-air/
- ↑ https://myhealth.alberta.ca/Health/aftercareinformation/pages/conditions.aspx?hwid=abr6087
- ↑ https://www.saintlukeskc.org/health-library/first-aid-bandaging
- ↑ https://www.uhn.ca/PatientsFamilies/Health_Information/Health_Topics/Documents/Self-bandage_hands_arms_to_reduce_lymphedema.pdf


Medical Disclaimer
The content of this article is not intended to be a substitute for professional medical advice, examination, diagnosis, or treatment. You should always contact your doctor or other qualified healthcare professional before starting, changing, or stopping any kind of health treatment.
Read More...