This article was co-authored by wikiHow Staff. Our trained team of editors and researchers validate articles for accuracy and comprehensiveness. wikiHow's Content Management Team carefully monitors the work from our editorial staff to ensure that each article is backed by trusted research and meets our high quality standards.
This article has been viewed 64,671 times.
Learn more...
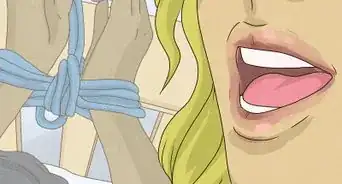
Even the most elegant tie wearer had someone to help out the first time. Learn a knot or two, and you can help your son prepare for his first job interview, save your friend from the "snake pit" style, or simply bolster your image.
If you're tying your own tie, see this article instead for instructions based on looking in a mirror.
Steps
Simple Four-in-Hand Knot
-
1Position the tie around the other person's shoulders. From your perspective facing the other person, the wide end of the tie should hang on your left, and the narrow end on your right. Adjust the tie until the tip of the wide end is roughly 12 inches (30 cm) below the narrow end.[1]
-
2Cross the wide end over the narrow. The wide end should now be on your right (over the wearer's left side).Advertisement
-
3Bring the wide end back under. Cross the wide end under the narrow end and back over to your left.
-
4Cross over one more time. Bring the wide end back over the narrow end as before.
-
5Pull up through the neck loop. Fold the wide tip under itself and pull it up through the loop at the wearer's collar.
-
6Bring it down through the front loop. The wearer should now have a horizontal loop at the front of his tie. Insert the wide end through this loop and pull through.
-
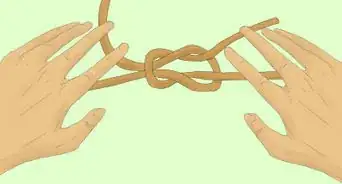
7Create the dimple. A dimple is fairly easy to create with the four-in-hand knot, and improves the appearance of the tie. Here's how to make one:[2]
- Pinch the sides of the tie just below the front knot. The sides should curl upward and a dimple should appear in the center.
- Pull the wide end to tighten the tie.
- Give the knot a final pinch to help the dimple stay in place.


Versatile Pratt Knot
-
1Start with the seam side upward. Drape the tie around the other person's collar, so the underside of the tie faces you. Let the wide end fall on the left side (from your perspective), and the narrow end on your right. The wide end should reach about 1–2 inches (2.5–5 cm) below the wearer's belt buckle, or about 12 inches (30 cm) below the tip of the narrow end.[3]
-
2Cross the wide end beneath the narrow end. Bring the wide end of the tie over to your right side (the left side of the wearer's body).
-
3Bring the wide end up and through the neck loop. Raise the wide end up to the loop at the wearer's collar. Insert the tip from above and pull through completely. Keep the wide end on the same side, without crossing the narrow end.
-
4Cross the wide end over the narrow end. The wide end should now be back in front of your left hand, with the seamless front side facing you.
-
5Insert the wide end into your neck loop from below. Fold the tip under itself and pull through the neck loop.
-
6Pull through the front loop. Loosen the horizontal loop at the front of the tie with your finger. Bring the wide end through this loop and pull through. The wide end should end roughly at the top of the wearer's belt buckle, and completely cover the narrow end underneath.
-
7Tighten the tie. Pull down on the wide end and slide the knot upward to complete the look.


Formal Half-Windsor Knot
-
1Position the tie. Face the other person and drape the tie around his or her neck, so the front side of the fabric faces you. Keep the wide end on your left (the wearer's right), and about 12 inches (30 cm) below the tip of the narrow end on your right.[4]
- The wearer may need a spread or wide spread collar to accommodate this knot, especially if you use a tie with thick fabric.
-
2Loop the wide end over and under the narrow end. Cross the wide end over the narrow end, then cross back under. The wide end should now be back on your left, with the seam side face up.
-
3Pull the wide end through the neck loop from above. Pull down through the loop at a diagonal, crossing underneath the narrow end.
-
4Fold the wide end across the narrow. The wide end should now be back on your left again.
-
5Insert into the neck loop from below. Bring the wide end up through the center of the neck loop.
-
6Finish in the front loop. Loosen the horizontal front knot and insert the wide end through it. Pull down to tighten and slide the front knot up near your collar.


Highbrow Windsor Knot
-
1Position the wide end low on your left side. Stand in front of the person who will wear the tie. Drape the tie over the wearer's neck so the wide end is on your left (the wearer's right). Adjust the tie so the wide end is 14 inches (36 cm) lower than the narrow end.[5]
- This very formal knot is also one of the largest in common use. Make sure the wearer pairs it with a spread or wide spread collar, and that the tie is long enough to accommodate the greater number of folds.
-
2Bring the wide end over the narrow end. Cross the wide end over the wearer's chest so it is on your right.
-
3Loop the wide end through the neck loop from below. Fold the wide end up through the neck loop from below. Loop it around and pull down over the front of the neck loop. Keep it on your right as you do this.
-
4Fold the wide end under the narrow. Cross the wide end back to your left.
-
5Loop around the neck loop from above. Bring the wide tip up to the front of the neck loop, and insert from above. Pull through so the wide end is back on your left, with the seam side facing you.
-
6Cross the ends one last time. Fold the wide end over the narrow end, so the front side is once again visible.
-
7Insert through the neck loop from below. Bring the wide end back up to the neck loop. Insert from below and pull through.
-
8Fasten the ends with the front loop. Tuck the wide end back down into the front loop near the top of the tie. Pinch the lower corners of the front knot and slide upward as you gently pull on the wide end.


References
About This Article

Tying a tie on someone else can be a little confusing if you’re used to tying your own, but after you do it once, you'll get the hang of it. To do a simple four-in-hand knot, start by hanging the tie around their neck with the wide end on your left and the narrow end roughly 12 inches higher on the right. Then, cross the wide end over the narrow end and cross the wide end back underneath to your left side. Cross the wide end back over the narrow end one more time and fold it up through the loop at the person’s collar. Once you’ve pulled it through the loop, tuck it through the smaller loop you made when you crossed the tie around itself, and pull it tight. To create the dimple, pinch the sides of the tie just below the front knot, pull the wide end to tighten the tie, and pinch the knot again to help the dimple stay in place. For more tips, including how to tie a half-windsor knot on someone else, read on!