This article was co-authored by wikiHow Staff. Our trained team of editors and researchers validate articles for accuracy and comprehensiveness. wikiHow's Content Management Team carefully monitors the work from our editorial staff to ensure that each article is backed by trusted research and meets our high quality standards.
wikiHow marks an article as reader-approved once it receives enough positive feedback. In this case, several readers have written to tell us that this article was helpful to them, earning it our reader-approved status.
This article has been viewed 315,655 times.
Learn more...
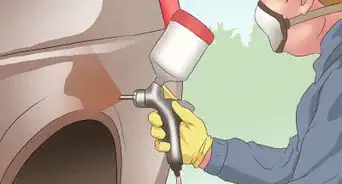
Most people have experienced slush and ice buildup on their windshield wiper blades. Normally this is a quick easy fix by reaching out the window, grabbing the wiper and knocking the ice off against the windshield. However, doing this can cause a wiper retaining nut to come loose and make the wipers unusable.
Steps
Part One: Tightening the Retaining Nut
-
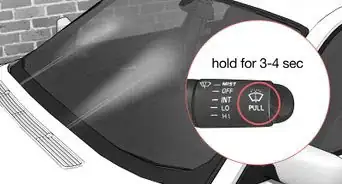
1Turn the windshield wiper switch off. You should allow the blades to drop into the rest position.[1] Turn the vehicle ignition switch off and remove the key.
-
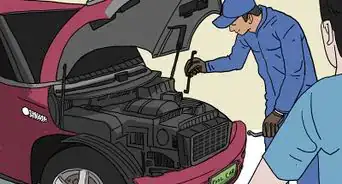
2Follow the wiper arm away from the wiper blade to its base. This may require that the hood be opened.
- Place a rubber mat, cardboard or some other piece of material in the area around the base of the wiper arm and position it to protect the glass and paint finish in case a tool slips.
Advertisement -
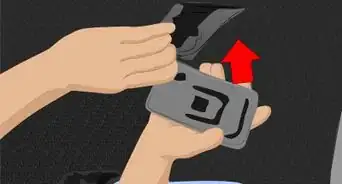
3Pry up the plastic dust cap covering the nut. Verify that the arm position is still correct and use a small flat screwdriver to pry the plastic cap covering the nut at the base of the arm away from the recessed nut well. The plastic cap may have a small slot to assist in inserting the screwdriver. With this dust cap removed, you will have the access you need to remove the nut.
-
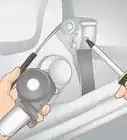
4Select a socket sized to fit the hex nut. Now that the dust cap is removed and you can analyze the hex nut that holds the wiper arm onto the drive post you should choose a socket that fits it. Place the socket on the ratchet or, if needed, on an extension that is attached to the ratchet.
- Be certain that the socket is an exact fit as some are metric and some are SAE. There should be no extra room or wiggle when you place the socket over the nut.
-
5Set the ratchet to allow it to tighten the nut. Ratchets are designed both tighten and loosen nuts and bolts. You want to be sure you are set to spin in a clockwise direction. This will tighten the nut.
-
6Tighten the nut. Place the socket (and short extension if needed) onto the ratchet handle slide it over the nut. Gently attempt to tighten the nut. If it turns easily, continue to tighten until it gets snug and then go about 1/8 of a turn more to secure the nut. If the nut is already very tight, stop this process.
- If the nut just spins in place and does not tighten, either the nut or the drive post may be stripped. If the nut is stripped it will need to be replaced. If the drive post is stripped it will need to be replaced, and this may mean replacing the windshield wiper motor.
- If the nut was already very tight, you will need to loosen the retaining nut and remove the wiper arm for inspection. If the base of the wiper arm is stripped or damaged this can cause the same behavior as a loose nut, but cannot be repaired. It will be necessary to purchase a new wiper arm and install it.[2]
-
7Test the wipers. Turn the ignition key on, turn the wipers on and test the travel of the arm for proper operation. If the arm slips, you will need to replace it.


Part Two: Replacing the Arm
-
1Mark where the windshield wiper blade rests. If your wiper problem was not the result a loose nut, your wiper arm might be stripped out. In this case you need to replace it. The new arm needs to rest exactly where the original rested to insure proper travel. Bar soap, wax, or another easy to remove mark will work fine to mark this spot.
-
2Remove the nut that fastens the windshield wiper arm to the drive post.
- Place the socket and ratchet fully over the hex nut and hold in place with one hand while Stabilizing the wiper arm by firmly gripping it with the other hand. This will prevent the linkage from exceeding the designed range of motion when twisting the ratchet.
- Twist the ratchet to spin the nut counter clockwise one half to one full turn.
- Once the hex nut is loosened, release your grip of the wiper arm and remove the socket and ratchet from the hex nut. Spin the hex nut completely off by hand and set aside for reuse.
-
3Remove the entire wiper arm from the drive post. Lift the wiper blade up from the windshield with one hand and hold the point of attachment with the other. Gently "rock" the wiper blade back and forth while lifting with both hands and remove from the drive post.
-
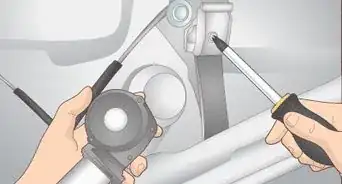
4Clean the drive shaft splines with a wire brush and some WD-40. This will remove trapped metal and dirt from the shaft splines. Be sure to wipe the shaft completely dry after cleaning.
-
5Examine the new arm. Ensure that it has matching splines that will mate with the shaft.
-
6Install the new arm. Line up the splines so that they mate with the shaft.[3] Make sure that your wiper arm is in the correct resting position on the windshield (it should land on the same mark you made with the original wiper).
-
7Gently tap the arm down onto the shaft. It is ideal to use a tool that will not scratch your new wiper arm. Rubber mallets work well for this.
-
8Clean the threads for the retaining nut. This will help prevent the nut from cross-threading, stripping or being damaged when you tighten it.
-
9Install the retaining nut by hand. Ensure that the nut turns freely and is not cross-threaded. If it turns easily, continue to tighten until it gets snug and then us the ratchet to go about 1/8 of a turn more to secure the nut.
-
10Test the travel of the arm for proper operation. Spray water or windshield wiper fluid onto your windshield. Next turn the ignition key on and then turn on the wipers.
- If the wiper arms clear each other, move smoothly and do not travel into the molding at the edge of the windshield, turn off the wiper switch and ignition key.
-
11Tap the plastic cap back down. Use a small rubber mallet if necessary, and be sure to align any grooves or tool prying slots to their original positions.


Our Most Loved Articles & Quizzes


Community Q&A
-
QuestionWhat should I do if the nut on the shaft turns but just spins in place, and the shaft does not move?
 Community AnswerHave an assistant watch the axle nut on the affected side, while you attempt to move in two-wheel-drive. Watch for the axle nut to turn when clutch is released. Another possibility is that somehow the splines in the pinion yoke are gone, so that the pinion nut retains the yoke while allowing it to rotate without transferring power to the wheels.
 -
QuestionOn my 2014 Town and Country, the rear wiper is turning down so as to wipe the hatch door and not the window. How do I adjust this?
 ASEmastertechCommunity AnswerTry removing the wiper arm and indexing it on the motor so that it wipes the window - i.e. reposition the arm of the wiper blade. Remove cap, remove nut, lift up and wiggle arm to remove, reposition on the splines of the motor.
 -
QuestionIf both wipers stop working or work only sluggishly, does this mean that the problem is likely the wiper motor instead of the wiper nuts?Community AnswerYes, and you should look for information on how to replace or rewind them.
Warnings
- Do not leave the car unattended when the arm is in its upright position as it may swing back and hit the windshield, thus, causing the windshield to possibly shatter.⧼thumbs_response⧽


References
About This Article

Before you tighten your windshield wiper retaining nut, be sure your windshield wipers are in their resting position and turned off, and the car engine is off, too. Then, use a small, flat screwdriver to pry off the plastic cap covering the nut at the base of the windshield wiper’s arm. Next, find a socket that’s an exact fit for your wiper’s hex nut, put on your ratchet handle, and slide the socket over the nut. Tighten the hex nut by turning your ratchet clockwise until it gets snug, then go about 1/8 of an inch more to secure the nut. To learn how to replace the windshield wiper arm if tightening the retaining nut doesn’t work, read on!