This article was co-authored by Art Fricke. Art Fricke is a home renovation and repair specialist and the owner of Art Tile & Renovation based in Austin, Texas. With over 10 years of experience, he specializes in bathroom and kitchen renovations. Art focuses on a single contractor approach to customized renovation work, and performs projects such as installing custom tile showers, fixing tiled shower leaks, replacing cracked tiles, and installing floor and wall tile.
This article has been viewed 37,638 times.
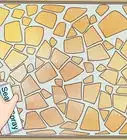
Covering a wall is a great way to transform the look of a room. Wallpaper, fabric are excellent media for redecorating. Although ceramic tile is often used for flooring and countertops, it can serve as a patterned surface for a wall. Italy, China and the United States are known for creating porcelain tile designs used in home decoration. You will want to take extra time when applying the tile, to ensure it is straight and well spaced. Porcelain tile is also known for being fragile, so you will need to work carefully. Find out how to tile a wall with porcelain tile.
Steps
Wall Preparation
-
1Prepare the area around your walls. Place drop cloths on the floor to catch dust and tile pieces.
-
2Wear protective clothing. You should use safety goggles, long shirts, long pants and gloves. Broken tile can be sharp and dangerous.Advertisement
-
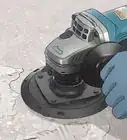
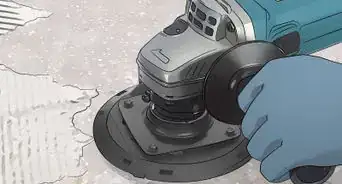
3Remove the old tile, if necessary. It is inadvisable to try to tile over old tile, because your surface will not be even.
- Use a chisel and a hammer to crack existing tiles. Once cracked, remove the tile in pieces, if it does not fall off automatically.
- Chisel off remaining pieces. Beware not to gouge the wall too deeply, or you may create an uneven surface.
- If the resulting wall is very uneven, you may want to re-plaster it. It is best to hire a professional to plaster the walls. If you are installing wall tile in a bathroom or other wet area, use cement fiberboard on the surface before you adhere tile.
-
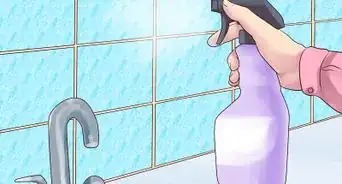
4Sand the wall with medium-grit sandpaper to create an even surface. If you are not removing previous tile, you will still want to scuff up glossy surfaces with a fine-grit sandpaper to help the adhesive stick.
-
5Buy your tiles. Porcelain tiles are available through the Internet, home improvement stores and decorators. Buy extra tile for your project, since tiles will break in the process.
- Take your tile to the home improvement store to try out glue. Different ceramic tiles require different types of glue. You do not want your glue to discolor the tile.
-
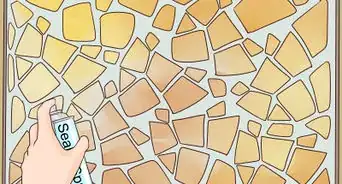
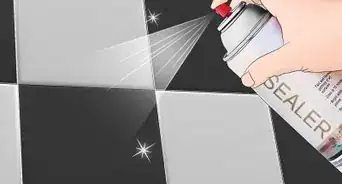
6Apply a wall sealant. This mild adhesive product will keep the glue moist while you complete your project. It is available at home improvement stores.


Measuring Tiles
-
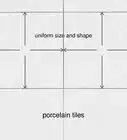
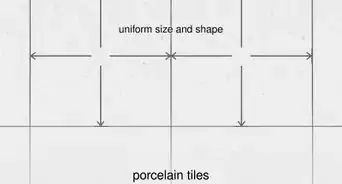
1Measure the size of the tiles you want to use and any tile spacers or grout. Decide how many tiles you will need to use to complete your pattern.
-
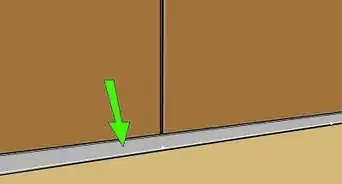
2Ensure level tiles with the use of a batten, or wooden straight edge. Do not measure the tile according to the ceiling or floor, since these surfaces are not always level. Place a batten horizontally across the wall, and use a level to make it straight.
-
3Pin the batten on the wall. Mark where the tiles will go with a pencil, including spacers or grout. The batten will help you to keep the tile straight and evenly spaced, so do not avoid this time-consuming step.
-
4Use a vertical batten for your first tiles as well. Pin a level vertical batten in place. This will ensure your first tiles are at a 90 degree angle.
-
5Apply a layer of glue to the area above the batten with a notched trowel. You can use a vertical straight edge to help align the tile uniformly. In small areas, you may need to apply the glue with a brush, but make sure it has a notched surface.
-
6Place a tile spacer between the tiles as you set them into the glue to allow space for grout.[1]
-
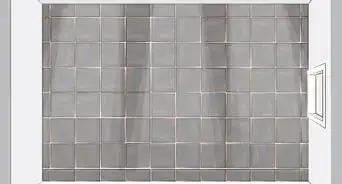
7Press the tile into the wall with a wooden board. Allow the tiles to dry according to adhesive directions in small areas, so that you can concentrate on making the tiles straight.
-
8Wipe away any excess glue with a wall scraper. Then, wipe away the tops of the tiles with a wet rag.
-
9Cut porcelain tiles to go near the edges of your walls. You will need to use a wet cutter with a blade that goes in water. Measure each tile before cutting for a good fit.
-
10Allow the tiles to dry for at least 24 to 36 hours. The glue directions should specify the necessary time.


Applying Grout
-
1Spread grout over the surface of the tile with a grout float.[2] Choose a tile that is water and mold resistant.
-
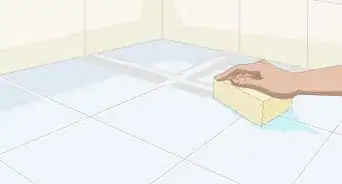
2Clean the surface of the tile with a wet sponge. Run the wet sponge over the surface of the tile. Allow the grout to dry completely.
-
3Polish the surface of your tiles with a dry cotton rag. This should remove any remaining grout residue.


Things You'll Need
- Level
- Hammer
- Chisel
- Porcelain tile
- Safety goggles
- Protective work clothing
- Sandpaper
- Sealant
- Tile glue
- Battens
- Paint brushes
- Pencil
- Notched trowel
- Wall scraper
- Wet rag
- Wet tile cutter
- Grout
- Grout float
- Wet sponge
- Cotton cloth


References
- ↑ Art Fricke. Home Renovation & Repair Specialist. Expert Interview. 1 July 2020.
- ↑ Art Fricke. Home Renovation & Repair Specialist. Expert Interview. 1 July 2020.
- http://www.guardian.co.uk/lifeandstyle/2008/mar/01/diy.homes22
- http://www.youtube.com/watch?v=pq9GDsbOVM4
About This Article