This article was co-authored by wikiHow Staff. Our trained team of editors and researchers validate articles for accuracy and comprehensiveness. wikiHow's Content Management Team carefully monitors the work from our editorial staff to ensure that each article is backed by trusted research and meets our high quality standards.
This article has been viewed 23,197 times.
Learn more...
While you can buy a wide variety of planters at your local garden center or home improvement store, creating a planter from other objects can add flair and visual interest to your yard. If you're a fan of rustic landscape design, a log can make an ideal planter. The project requires being able to handle a chainsaw, which can be tricky if you're new to the DIY scene. However, you only have to use the saw for making straight cuts and you can use an ax to actually hollow out the log.
Steps
Organizing Your Project
-
1Decide how large you want the planter to be. You can make a planter out of any size log that you like. However, keep in mind that larger logs can weigh a great deal, which makes them difficult to move around your yard or deck. In general, try to find a log with a diameter of approximately 12- to 14-inches (30- to 35-cm)[1]
- A log that’s approximately 45-inches (114-cm) long is usually a good size for a planter. You can go smaller or larger, though, depending on how much space you have in your yard and how many flowers you’d like to plant.
- When it comes to the type of log to use, a harder wood will usually last longer. However, hard woods are more difficult to cut. Maple is a good option.
-
2Choose how large you want the opening to be. You can make the opening in your log planter as small or as large as you’d like. You can make it almost as long and as wide as the log itself, so nearly the entire top of the log is available for planting. You can also opt for a smaller opening so more of the log is visible.
- It’s best to use a tape measure when you’re trying to decide how large to make the planter opening. That will help you understand how much space that you have to work with.
Advertisement -
3Consider removing the bark. Part of the charm of a log planter is its rustic appearance. However, you may want to strip the bark off of the log to expose the bare wood underneath. You can use a debarking tool, such as a draw knife, to manually remove the bark or a debarker that attaches to the end of a chainsaw and uses a rotating blade to remove the bark much more quickly.
- If there are any twigs, moss, and other debris on the exterior of the log, you may wish to remove those as well.
-
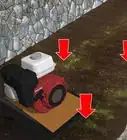
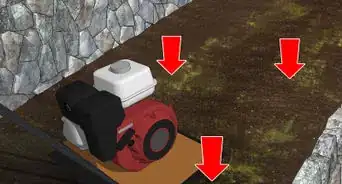
4Secure the log with wedges. Because the log is round, it can easily roll around when you attempt to cut it. To keep it in place, set a large wooden wedge on either side of the length of the log. Make sure the wedges have a flat edge so they won’t move when you begin to cut.[2]
- When you’re choosing a location to set the log up for cutting, it’s best to select a spot that’s close to where you plan to put the planter. That way, you won’t have to move it too far when you’re finished cutting it.
-
5Draw the cutting lines with chalk. Once the log is secure, use a piece of chalk to trace the interior cutting lines for the opening on the top of the log. It helps to use a tape measure or ruler as you’re tracing, so you know the lines are as straight as possible.[3]
-
6Put on your safety gear. Using a chainsaw and other cutting tools can be dangerous. To protect yourself, shield your eyes with a pair of safety goggles or glasses before you begin cutting. It’s also a good idea to wear a pair of canvas or leather work gloves to protect your skin.[4]
- You may also want to wear a dust mask over your nose and mouth to protect yourself from the sawdust and chips that fly around when you’re cutting the log.


Cutting the Log
-
1Score the short sides of the planter opening. When your safety gear is place, lift the chainsaw and begin cutting the short sides of the marked planter opening lines. You don’t need to cut the full depth of the opening -- just make a superficial score line.[5]
- For best results, use a chainsaw with a low kickback blade.
-
2Make superficial cuts to mark the longitudinal cuts. Once you’ve scored the short sides of the opening, use the chainsaw to make a superficial cuts along the longitudinal sides of the opening. You don’t need to go deep with the cuts; you just want to create shallow score lines as you did with the short sides of the opening.[6]
-
3Hold the chainsaw perpendicular to the log and cut deeper. To finish cutting the longitudinal sides of the opening, adjust the chainsaw so you’re holding it almost perpendicular to the log. Plunge the tip into the wood and cut until you reach your desired depth. Aim for at least 5- to 6-inches (13- to 15-cm).[7]
- When you’re using the chainsaw to make a plunge cut, you are more likely to experience kickback, which can cause you to lose control of the tool and run the risk of injuring yourself. Be sure to read the safety instructions for your chainsaw so you know how to use it safely.
-
4Cut the short sides of the opening deeper. Once you’ve cut the longitudinal sides deep enough, plunge cut the short sides of the opening until they’re the same depth as the long sides. Make sure that you join the short side cuts with the long side cuts so the opening is cut to the desired depth all the way around.[8]


Hollowing Out the Log
-
1Create several lengthwise cuts to the center of the opening cut out. After you’ve cut out the entire outline of the planter’s opening, use the chainsaw to make several lengthwise cuts in the center of the opening. It’s best to create 3 to 4 cuts that are parallel to one another.[9]
- The lengthwise center cuts should all be the same depth.
-
2Saw diagonally along the center of the opening cut out. Once you’ve made the lengthwise center cuts in the opening, make several diagonal cuts to the center portion of the opening that you’re going to hollow out. They should crisscross the lengthwise cuts that you made previously.[10]
- The diagonal cuts should be just as deep as the lengthwise cuts to the center of the cutout.
-
3Use a hatchet to remove the wood from the opening cut out. When the planter’s opening has been completely scored, you’ll be left with chunks of wood in the center. Cut this wood out with a hatchet or ax until you’ve created a complete opening for the planter.[11]
-
4Create drainage for the planter with the chainsaw. To prevent the planter from becoming waterlogged, it helps to create drainage slits in the bottom. Use the chainsaw to cut all the way through the bottom of the planter opening in three to four spots so the water can drain out.[12]
- Be sure to elevate the log on a sawhorse before you cut the drainage slits. You may damage the chain on your chainsaw if you allow the blade to hit the ground.


Setting Up the Planter
-
1Set the planter in its spot. Once you’ve finished cutting the log, it’s time to set the planter in the spot where you want to keep it. It’s important to move it before you fill it with soil and plants because it may be too heavy to move afterward.[13]
- If you like, you can elevate the log planter on two or more flat pieces of wood. You should secure the “legs” to the planter with screws, though, so it doesn’t roll off.
-
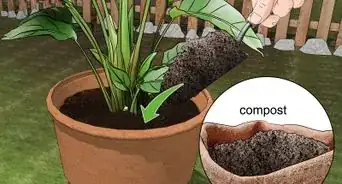
2Fill the planter with soil. When you’re happy with the placement of the planter, you must add soil to the interior. Garden soil, potting soil, and even soilless mixes, which usually consist of peat moss or peat substitutes, compost, and perlite, are all suitable.[14]
- If your soil mix doesn’t contain slow-release fertilizer, you may want to mix some granules of it in yourself when you plant your flowers.
-
3Add your plants and flowers. After you’ve filled the planter with soil, you can add your plants and flowers. It’s best to start placing the plants in the center of the opening and work your way out on either side.[15]
- Make sure that the plants have an appropriate amount of soil around them. The soil level should be 1- to 2-inches (2.5 to 5-cm) below the lip of the planter.
- Water the plants thoroughly with a watering can or spray nozzle after you plant them.


Warnings
- Working with a chainsaw can be very dangerous. If you’ve never used one before, practice making small cuts on a scrap piece of wood before you start to work on the planter. That will allow you to become more comfortable handling the tool.⧼thumbs_response⧽
- Always wear safety gear when working with a chainsaw. Even if you’re experienced in working with one, you can easily become injured by flying debris.⧼thumbs_response⧽
Things You’ll Need
- A log in your chosen size
- A tape measure
- Chalk
- Wooden wedges
- Safety goggles or glasses
- Work gloves
- A chainsaw
- A hatchet or ax
- Soil
- Plants of your choice


-Oven-Step-15.webp)


References
- ↑ http://www.stihl.com/instructions-for-making-a-flower-trough.aspx
- ↑ http://www.stihl.com/instructions-for-making-a-flower-trough.aspx
- ↑ http://www.stihl.com/instructions-for-making-a-flower-trough.aspx
- ↑ http://www.stihl.com/instructions-for-making-a-flower-trough.aspx
- ↑ http://www.stihl.com/instructions-for-making-a-flower-trough.aspx
- ↑ http://www.stihl.com/instructions-for-making-a-flower-trough.aspx
- ↑ http://www.stihl.com/instructions-for-making-a-flower-trough.aspx
- ↑ http://www.stihl.com/instructions-for-making-a-flower-trough.aspx
- ↑ http://www.stihl.com/instructions-for-making-a-flower-trough.aspx
- ↑ http://www.stihl.com/instructions-for-making-a-flower-trough.aspx
- ↑ http://www.stihl.com/instructions-for-making-a-flower-trough.aspx
- ↑ http://www.stihl.com/instructions-for-making-a-flower-trough.aspx
- ↑ http://wonderfuldiy.com/wonderful-diy-log-planter/
- ↑ https://www.thisoldhouse.com/how-to/how-to-plant-pots
- ↑ https://www.thisoldhouse.com/how-to/how-to-plant-pots
About This Article