This article was co-authored by wikiHow staff writer, Jack Lloyd. Jack Lloyd is a Technology Writer and Editor for wikiHow. He has over two years of experience writing and editing technology-related articles. He is technology enthusiast and an English teacher.
The wikiHow Tech Team also followed the article's instructions and verified that they work.
This article has been viewed 192,352 times.
Learn more...
This wikiHow teaches you how to remove the "iPhone is Disabled" lock, which occurs after entering incorrectly the passcode several times, from your iPhone. While your iPhone will usually remove the lock itself after anywhere from a minute to 60 minutes, numerous incorrect passcode attempts can result in your iPhone being disabled indefinitely. You can remove this lock by erasing and restoring your iPhone, which can be done from both iTunes and iCloud, or by using Recovery Mode in iTunes to erase your iPhone.
Steps
Using iTunes
-
1Attach your iPhone to your computer. Plug the charging end of your iPhone's charger cable into your iPhone, then plug the USB end of the cable into your computer.
- If you use a Mac, you may need to buy a USB 3.0 to Thunderbolt adapter in order to connect the cable.
-
2Open iTunes. Its app icon resembles a multicolored musical note on a white background.
- If iTunes asks for a passcode or indicates that it's unable to interface with your iPhone, skip to the Recovery Mode method.
Advertisement -
3Click your iPhone's icon. It's the iPhone-shaped icon that's in the upper-left side of the iTunes window.
-
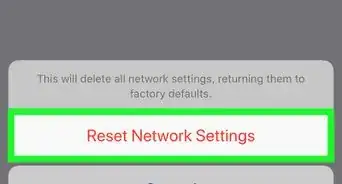
4Click Restore iPhone…. This is in the upper-right side of the page.
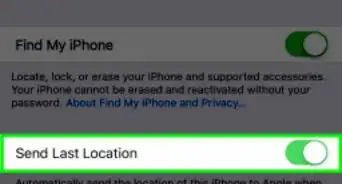
- If your iPhone's Find My iPhone feature is turned on, you'll be prompted to turn it off before proceeding. Since you can't disable Find My iPhone while your iPhone is disabled, try using iCloud to erase your iPhone instead.
-
5Click Restore when prompted. Doing so will prompt your iPhone to begin restoring to factory settings.
- You may need to enter a password before proceeding.
-
6Wait for the restore to finish. This should only take a few minutes, though it may take longer if your iPhone needs to be updated. Once the restore completes, your iPhone's "Disabled" protection should be unlocked, and your passcode will be gone.[1]
-
7Restore a backup if needed. If you have a backup of your iPhone stored in iTunes or iCloud, you can restore your iPhone's settings, photos, apps, and so on.
- If your iPhone has an activation lock on it, you'll need to enter your Apple ID email address and password in order to restore a backup in iTunes.
- If you don't have a backup available, you'll need to set up your iPhone as a new iPhone.


Using iCloud
-
1Make sure that you have Find My iPhone enabled. If you turned off Find My iPhone at any point and didn't turn it back on, you won't be able to use this method. Try using iTunes or using Recovery Mode instead.[2]
-
2Open your iCloud page. Go to https://www.icloud.com/ in your browser, then log in by entering your Apple ID email address and password if prompted. This will bring up your iCloud dashboard.
-
3Click Find iPhone. It's a green radar icon at the bottom of the dashboard. Doing so causes iCloud to begin trying to find your iPhone.
- You may have to re-enter your Apple ID password here before continuing.
-
4Click All Devices. This is a green tab at the top of the window. A drop-down menu will appear.
-
5Select your iPhone. Click your iPhone's name in the drop-down menu. You should see the iPhone's page open on the right side of the window.
- If you can't see your iPhone's name here, Find My iPhone isn't enabled on your iPhone.
-
6Click Erase iPhone. It's in the bottom-right corner of the iPhone's page.
-
7Click Erase when prompted. Doing so will bring up a password field.
-
8Enter your Apple ID password. In the password field, type in the Apple ID password for the iPhone that you're trying to erase.
-
9Click Next. It's in the upper-right corner of the iPhone's page that's in the top-right side of the window.
-
10Click Done. This green button is in the upper-right side of the iPhone's page. Doing so prompts your iPhone to begin erasing.
-
11Wait for your iPhone to finish erasing. The erasing process will usually only take a few minutes. Once you see various languages' versions of "Hello" flashing across your iPhone's screen, you may proceed.
-
12Restore a backup if needed. If you have a backup of your iPhone stored in iTunes or iCloud, you can restore your iPhone's settings, photos, apps, and so on.
- If your iPhone has an activation lock on it, you'll need to enter your Apple ID email address and password in order to restore a backup in iTunes.
- If you don't have a backup available, you'll need to set up your iPhone as a new iPhone.


Using Recovery Mode
-
1Understand when to use Recovery Mode. Recovery Mode allows you to use iTunes to reset your iPhone on a computer on which you've never used your iPhone. If you can't use iTunes to restore your iPhone and your iCloud account doesn't have Find My iPhone enabled, you'll need to use Recovery Mode.
-
2Close iTunes if it's open. This is important for enabling Recovery Mode, as leaving iTunes open and then placing your iPhone in Recovery Mode will result in an error.
-
3Attach your iPhone to your computer. Plug the charging end of your iPhone's charger cable into your iPhone, then plug the USB end of the cable into your computer.
- If you use a Mac, you may need to buy a USB 3.0 to Thunderbolt adapter in order to connect the cable.
- If iTunes opens, close it before proceeding.
-
4Place your iPhone in Recovery Mode. For an iPhone 8 or higher, you'll press quickly the Volume Up button, press quickly the Volume Down button, and then press and hold the Power button until you see the "Connect to iTunes" message—which resembles a power cable and the iTunes logo—appear on your iPhone's screen.[3]
- For an iPhone 7, press and hold both the Volume Down button and the Power button until you see the "Connect to iTunes" message.
- For an iPhone 6S or lower, press and hold both the Power button and the Home button until you see the "Connect to iTunes" message.
-
5Open iTunes. Its app icon resembles a multicolored musical note on a white background. iTunes should open to the Recovery Mode page.
-
6Click Restore iPhone…. This is at the top of the window.
-
7Click Restore when prompted. Your iPhone will begin restoring to factory settings.
- You may have to enter your Apple ID password here.
-
8Wait for the iPhone to finish erasing. This will usually only take a few minutes, though it may take longer if your iPhone needs to be updated.
-
9Restore a backup if needed. If you have a backup available on a different computer or in iCloud, you can restore your iPhone's information via the backup.
- If your iPhone has an activation lock on it, you'll need to enter your Apple ID email address and password in order to restore a backup in iTunes.
- If you don't have a backup available, you'll need to set up your iPhone as a new iPhone.


Community Q&A
-
QuestionHow do I unlock my iPhone without erasing it?
 Community AnswerYou cannot unlock your iPhone without erasing it.
 -
QuestionWhy is it not letting me sync my iPhone?
 Al PoleyCommunity AnswerMake sure that your iTunes account on your PC is authorizing your phone. It may be that you can only have 5 at a time.
 -
QuestionWhat do I do if it is asking for a password, shows all the device parts, and the "hello" is not showing?
 Community AnswerUsing Recovery Mode means there's no need for a password. If you don't have a password, you can use the third method in the article. You can also use Eelphone iPhone Unlock.
Warnings
- If your iPhone is disabled and you’ve never backed up your iPhone to iTunes or iCloud, all personal data will be lost after you restore it.⧼thumbs_response⧽


References
About This Article
1. Connect the iPhone to the computer.
2. Open iTunes.
3. Click the iPhone icon.
4. Click Restore iPhone...
5. Click Restore.
6. Follow the on-screen instructions to set up your iPhone.